At Project Studios, we like to differentiate between the American, or Western Raku process, and traditional Japanese Raku 楽焼き. It is important to understand that they really are very different techniques with their own goals. The following essay is a quick explanation of the Western Raku process as we perform it at Project Studios.
In the Western Raku process, we expand upon the original Japanese technique of extracting red-hot pottery ware from the kiln. We then introduce a secondary reduction component, subjecting the ceramic object to combustible material. This secondary reduction produces elaborate glaze effects and blackens the clay body.
Much of what is described below comes from knowledge we have gained from our semi-annual group Raku events. We always fire during the city-wide studio tours in Hoboken, New Jersey, where the Project Studios Clay Studio is located. We are by no means masters of the western Raku process, and learn something new every time we fire.
Clay
Like all ceramic art, Raku begins with making something in clay. At our studio we use commercial Raku clay such as Standard Clay Company S239 or S295 or any other stoneware clay with adequate grog content. The commercially available Raku formulae are an easy way to get a fully white body due to their use of silica sand instead of grog.
Generally, we want to see at least 15% grog in a stoneware body to achieve survivability in Raku. An aggregate like sand or grog in a body promotes porosity, which is vital when the expectation is that a ceramic object is to withstand not only extraction from a hot kiln, but even immediate immersion in cold water. We prefer not to use alternative additives such as sawdust, simply because we don’t want those materials to accidentally end up in our reclaimed clay.
For Raku, we shy away from low-fire talc bodies, and lately haven’t used them at all, because we fire pretty aggressively, and these clays just can’t take the thermal shock. We also don’t use this type of clay in our shop in general.
Kilns
Project Studios fires in three customized Raku kilns, each optimized for particular shapes of ware. Our main kiln is a modified Paragon electric kiln (using a propane gas burner) with a studio-made removable upper ring. The removable ring makes reaching deep into the hot kiln much easier. It also gives us the option to fire the kiln in a shorter configuration with the ring removed. For larger pieces, we have an old Thermo-lite model 24 with a 30 inch inside diameter. Both of these kilns have studio-made Insboard fiber lids with stainless steel wraps for support. We removed the electric elements and drilled burner and exhaust ports.
Our third kiln is a totally studio-made unit based on the old Peach Valley Pottery design, using an expanded steel shell lined with refractory blanket that lifts vertically off of a hard brick firebox. We have also fired for Raku using some of our smaller electric kilns, which give a true oxidizing atmosphere. The chaos of the Western Raku process is such that dedicated kilns are always better.
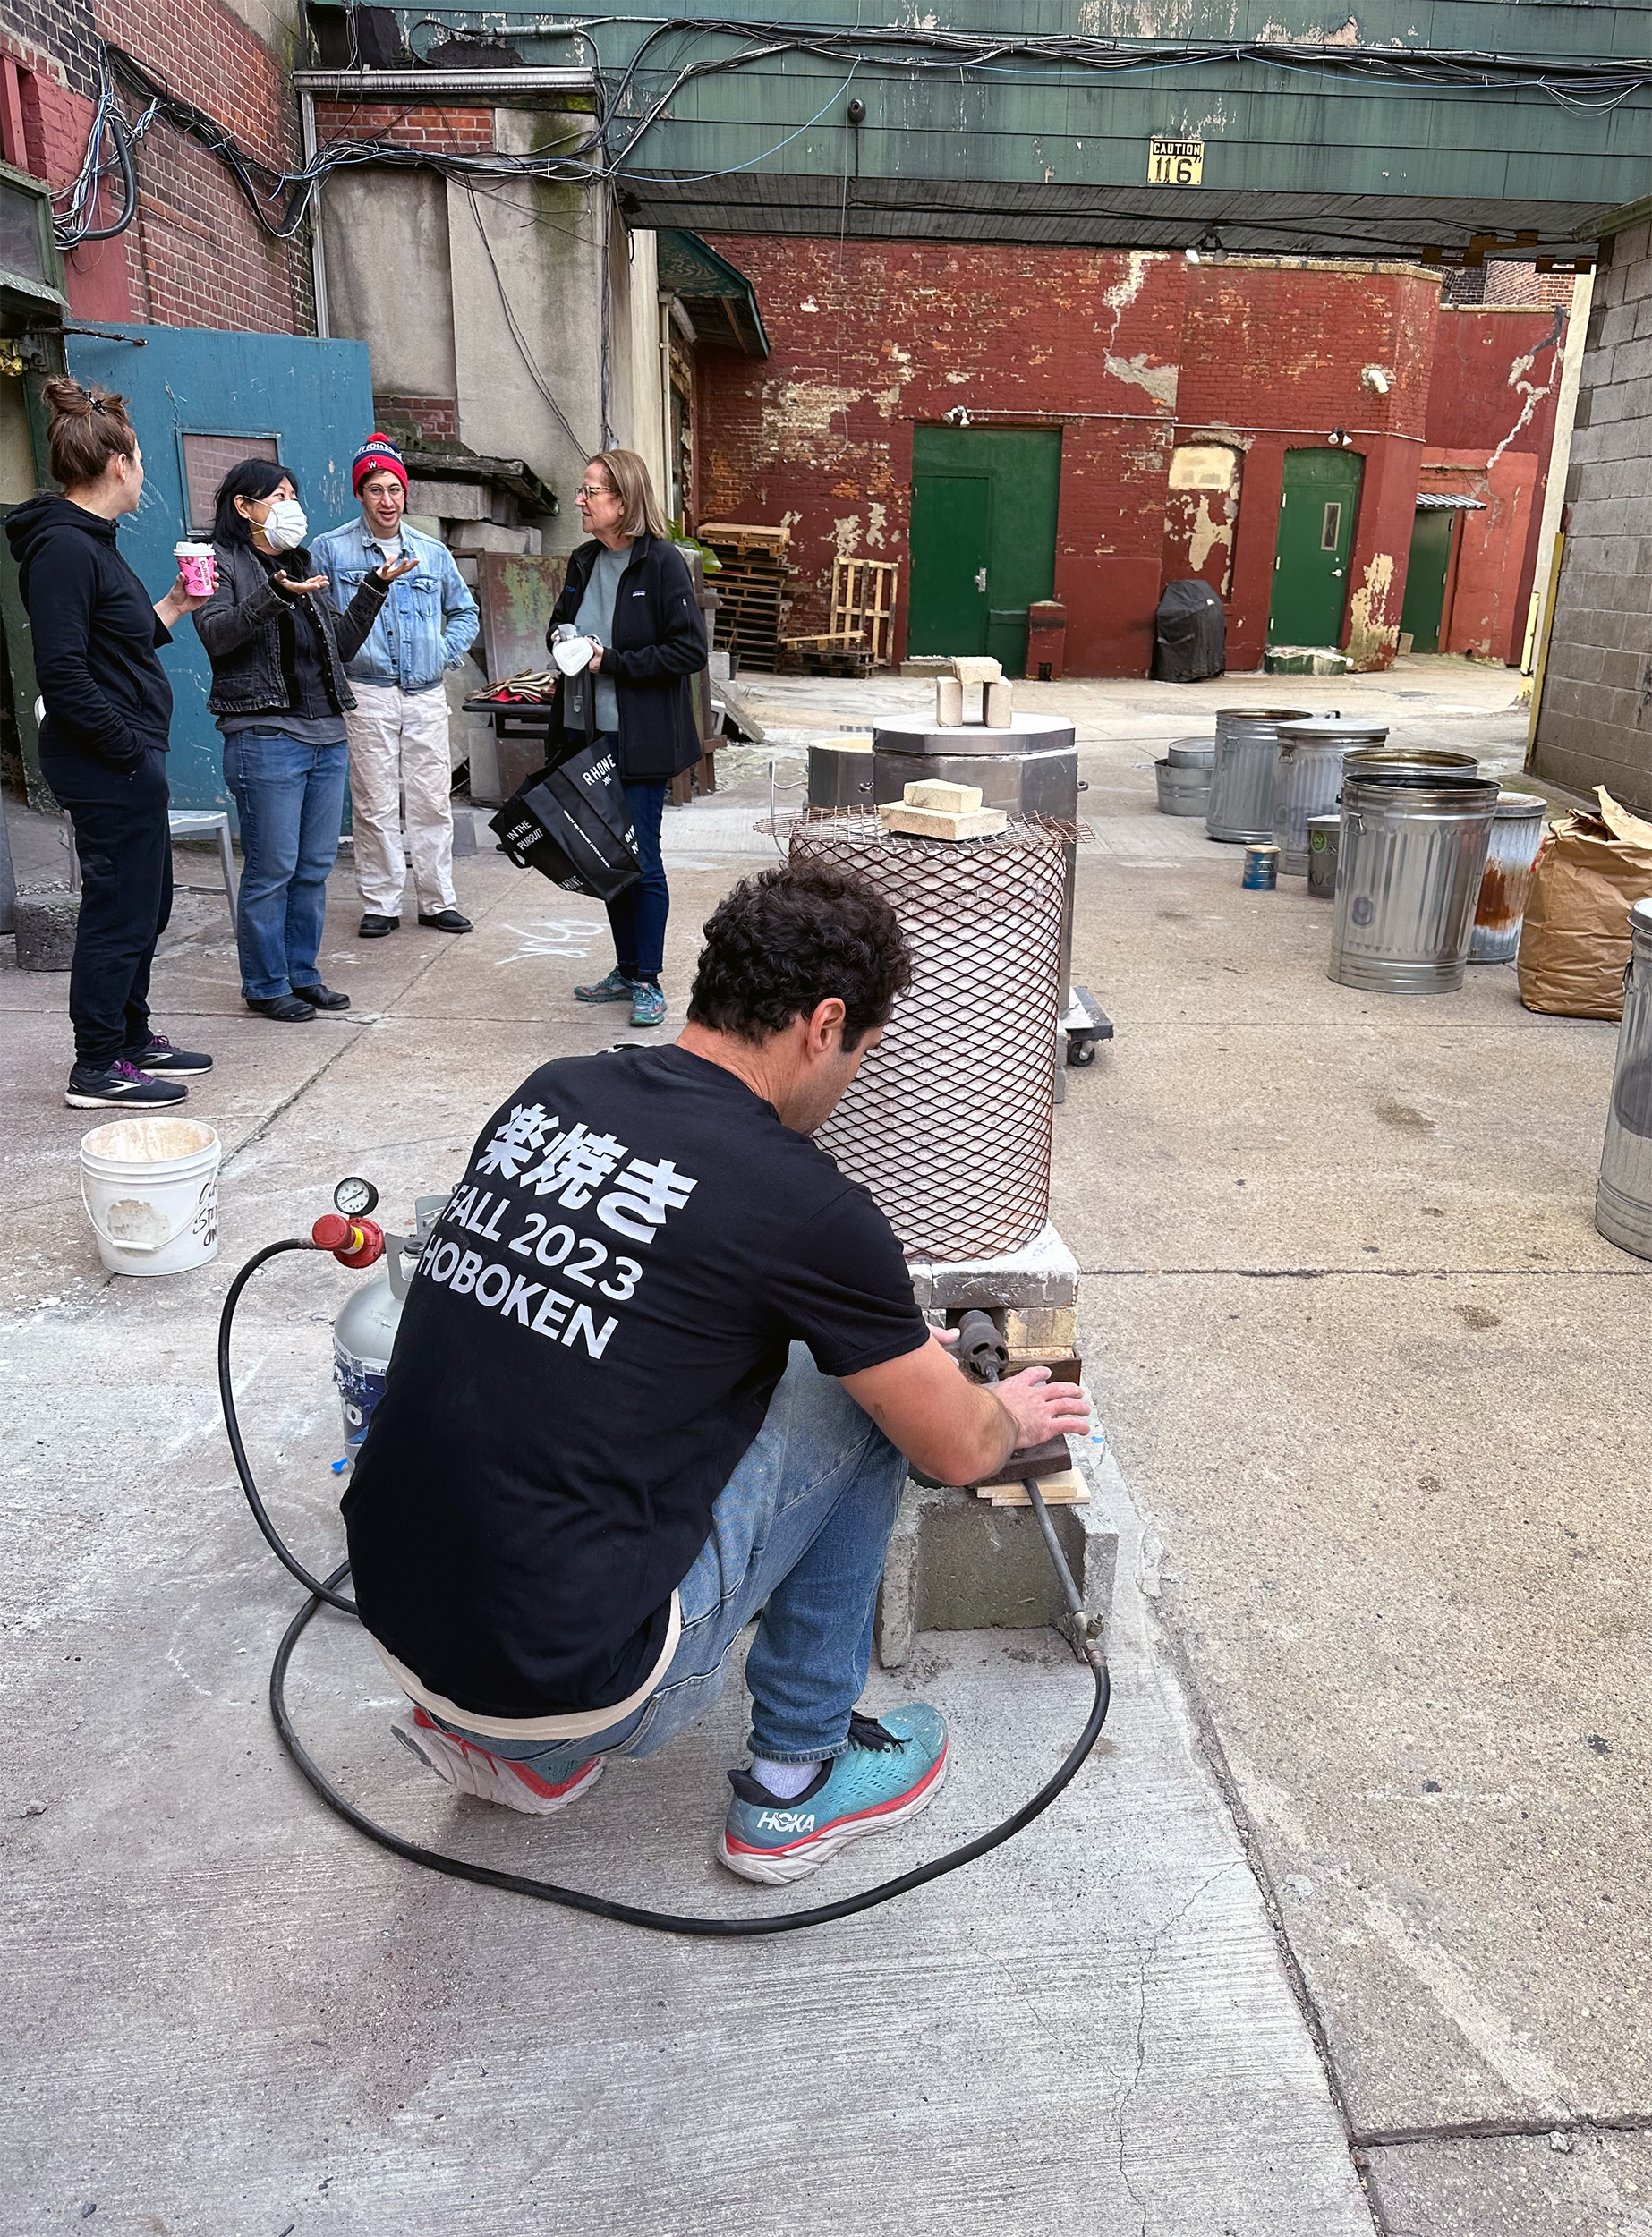
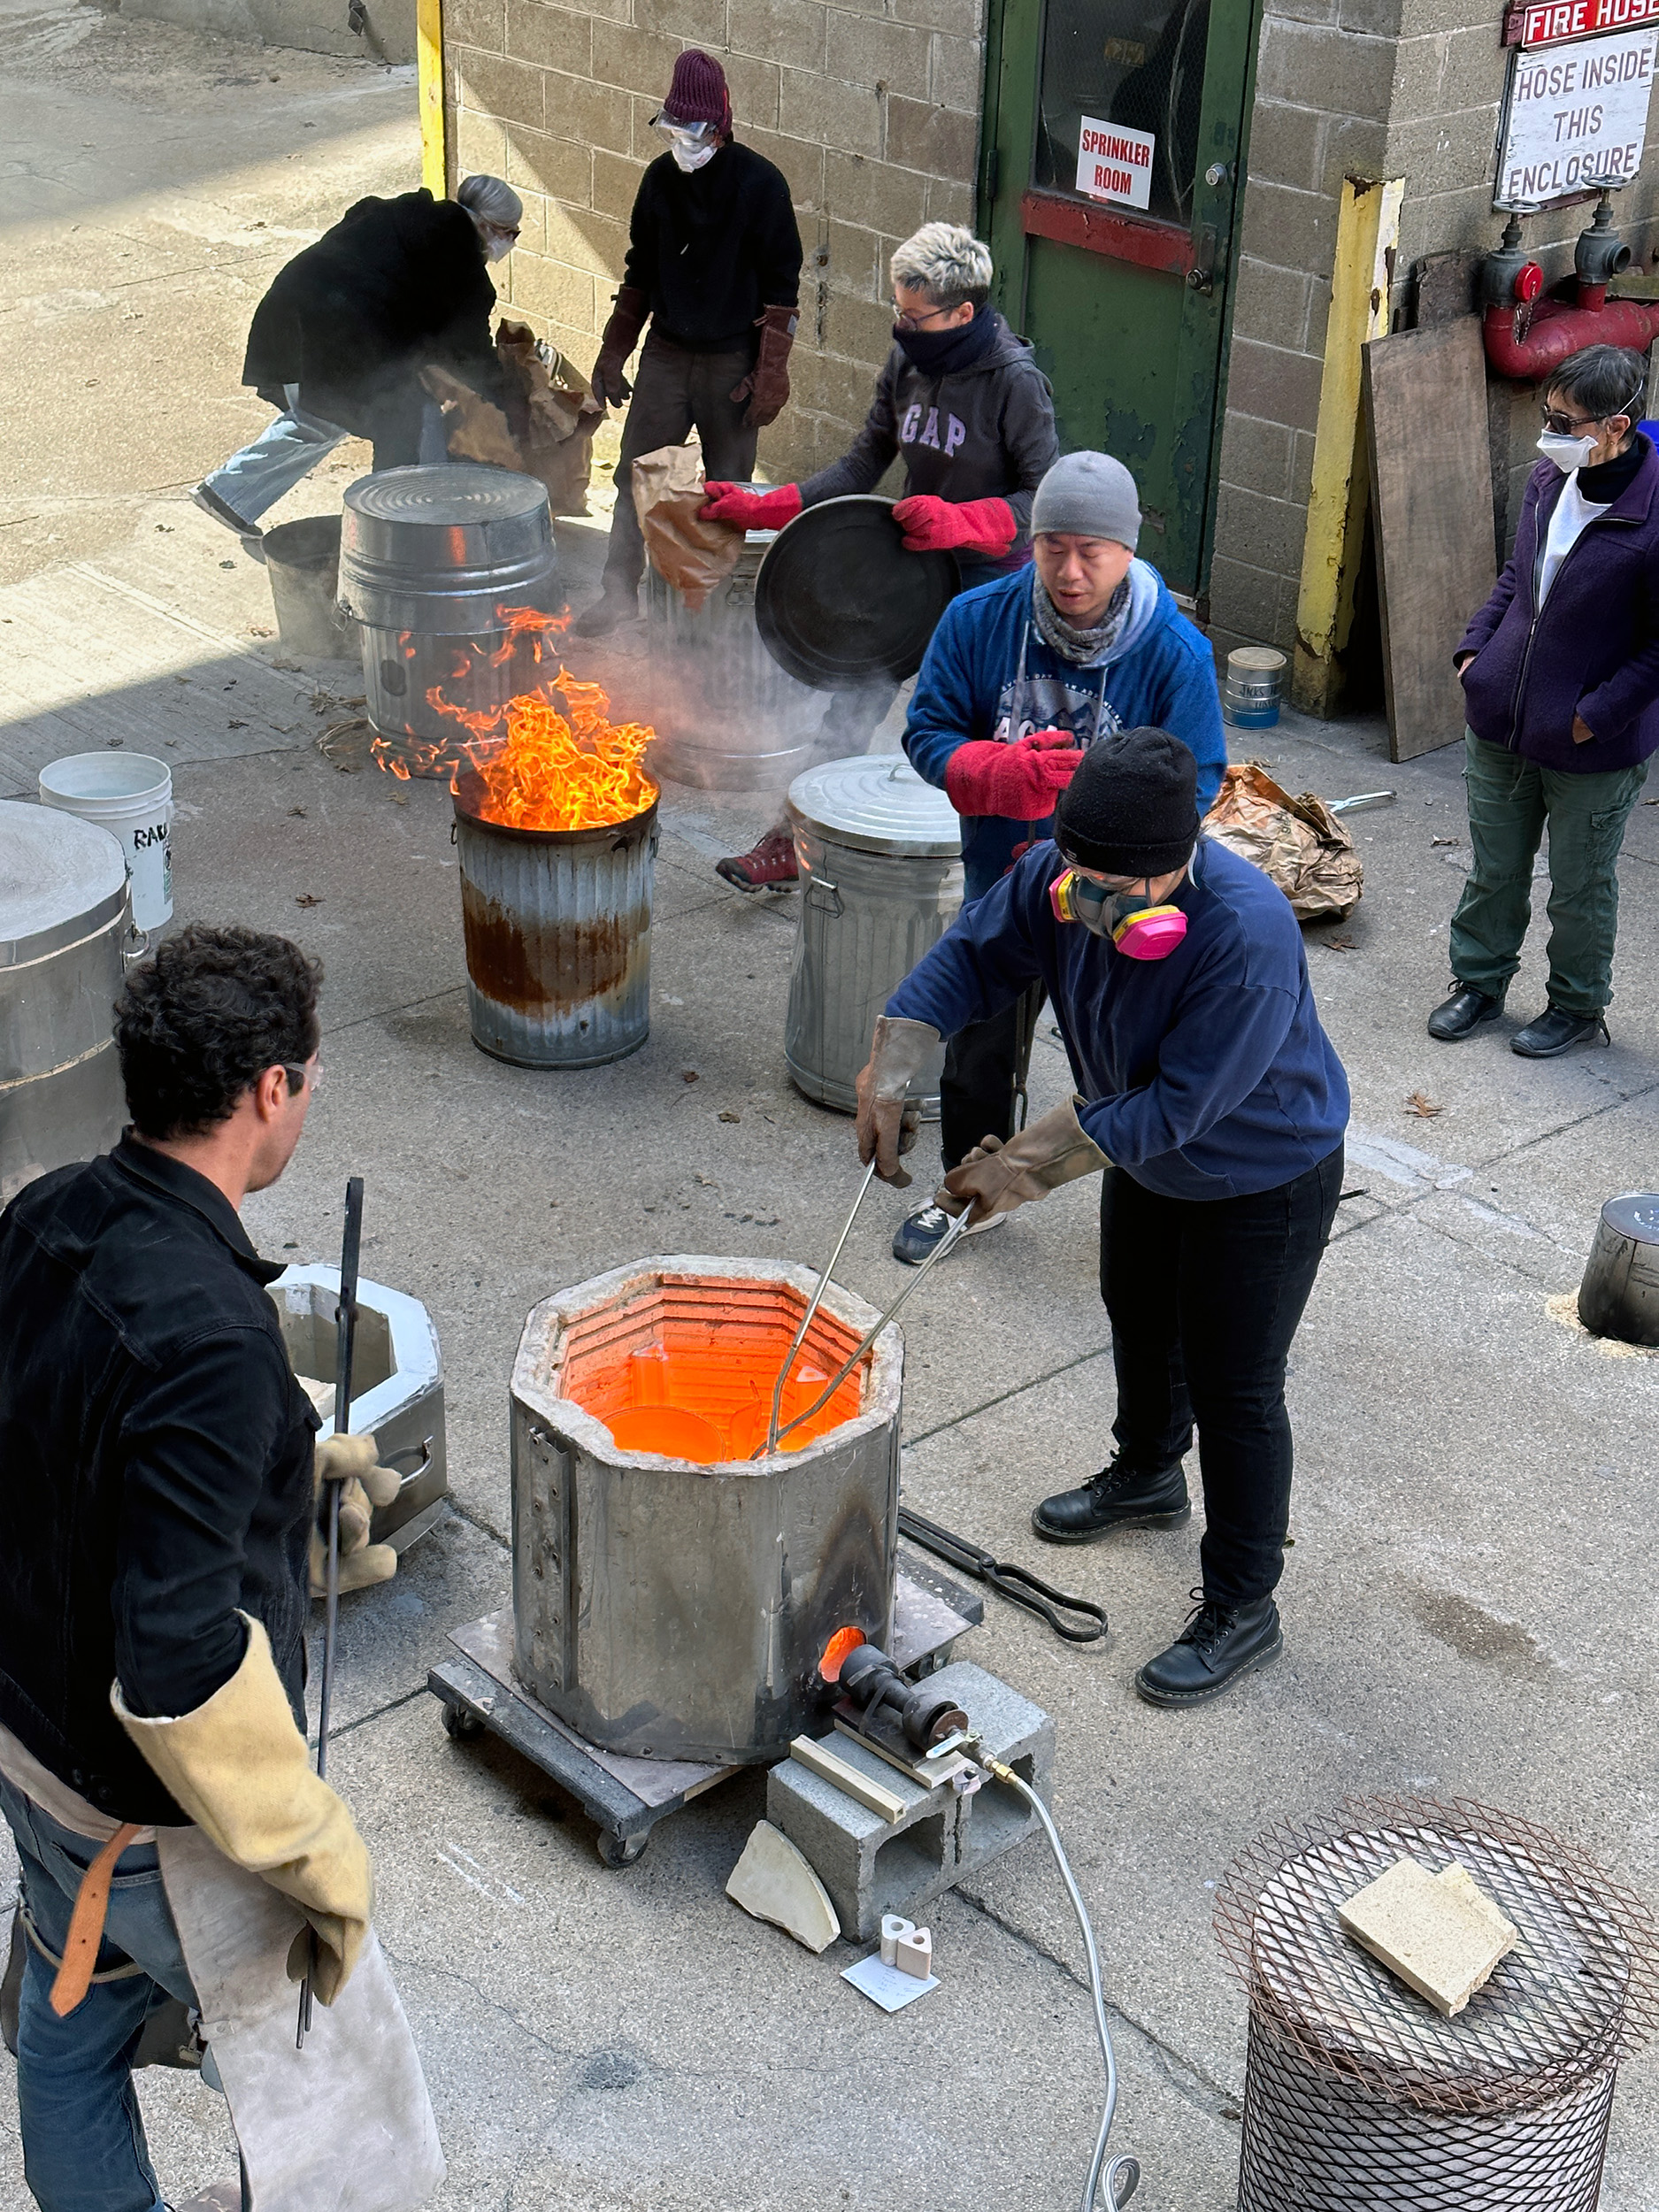
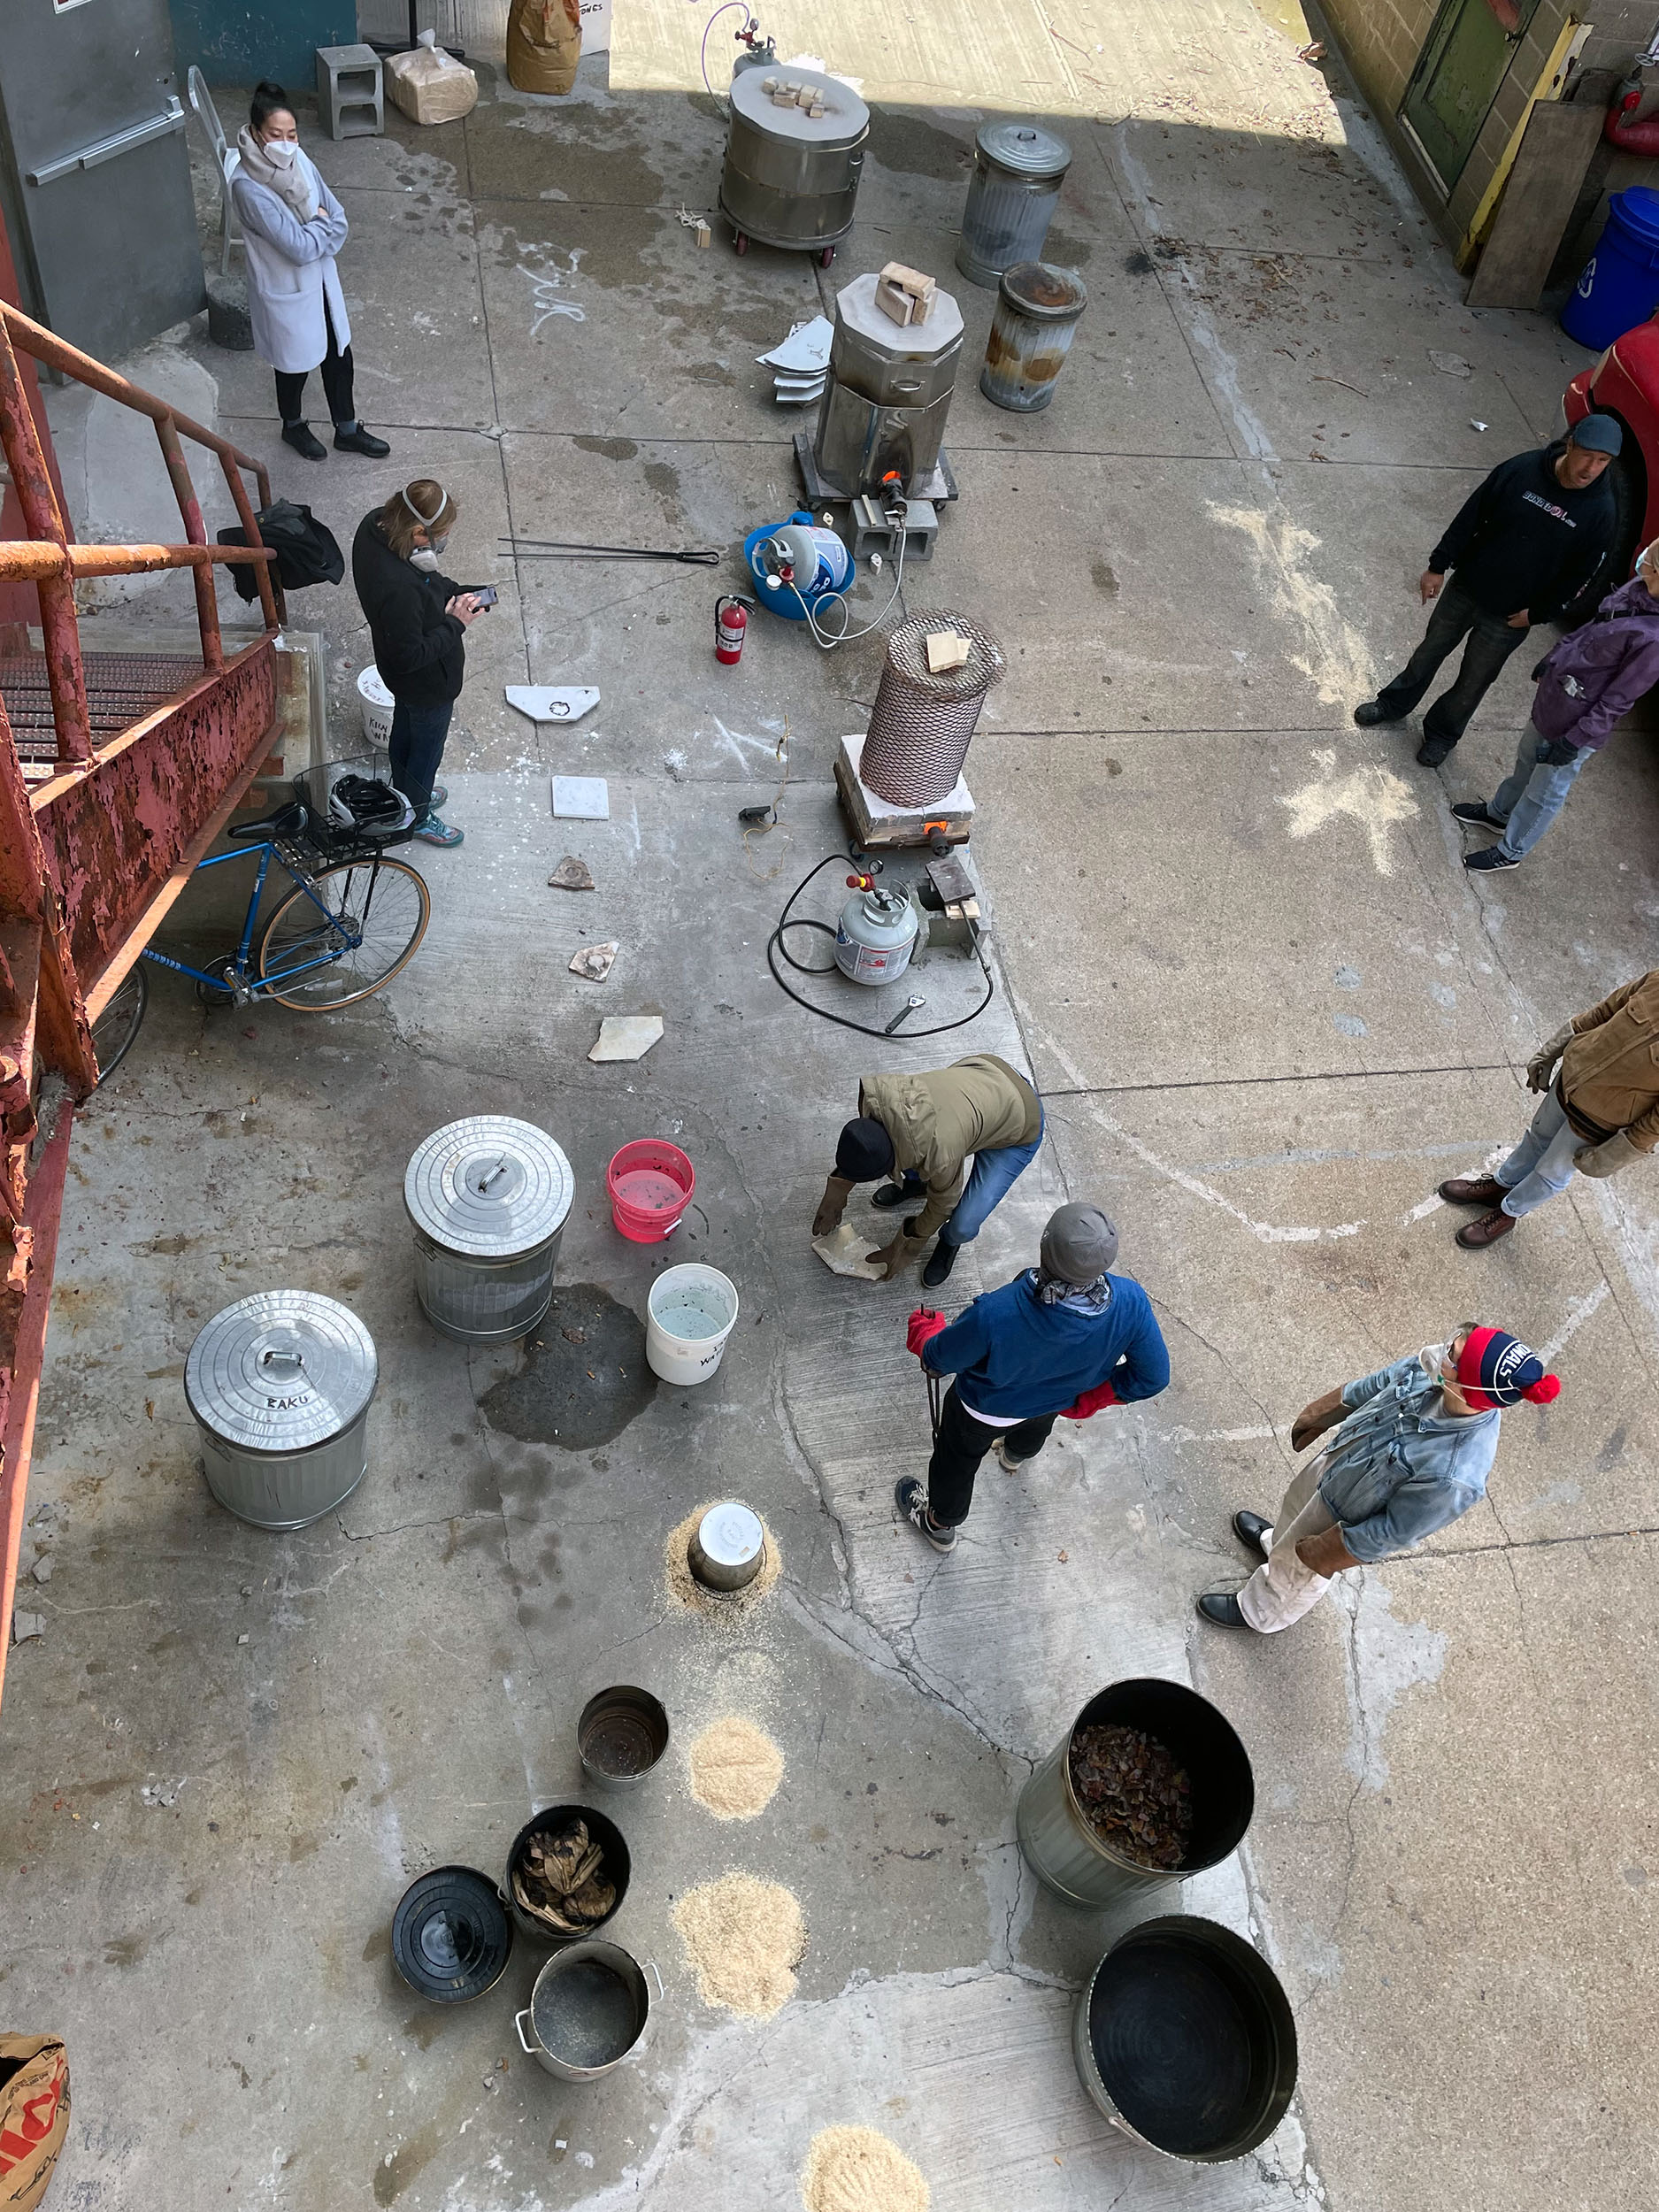
We stack our Raku kilns with kiln furniture but still try to keep that to a minimum. It is best to stack with only a few fixtures because we have to remove every shelf and post with tongs while hot. Because our studio is located in a large former factory building in an urban area, we can’t really install a permanent kiln outdoors, so all of our kilns are portable. All three of our kilns are opened manually.
We use a few different types of burners, and have tuned them to run optimally by experimenting with different sizes of gas orifice. The goal is to achieve a neutral flame and not to introduce surplus fuel into the kiln, which will darken white ware.
Tools
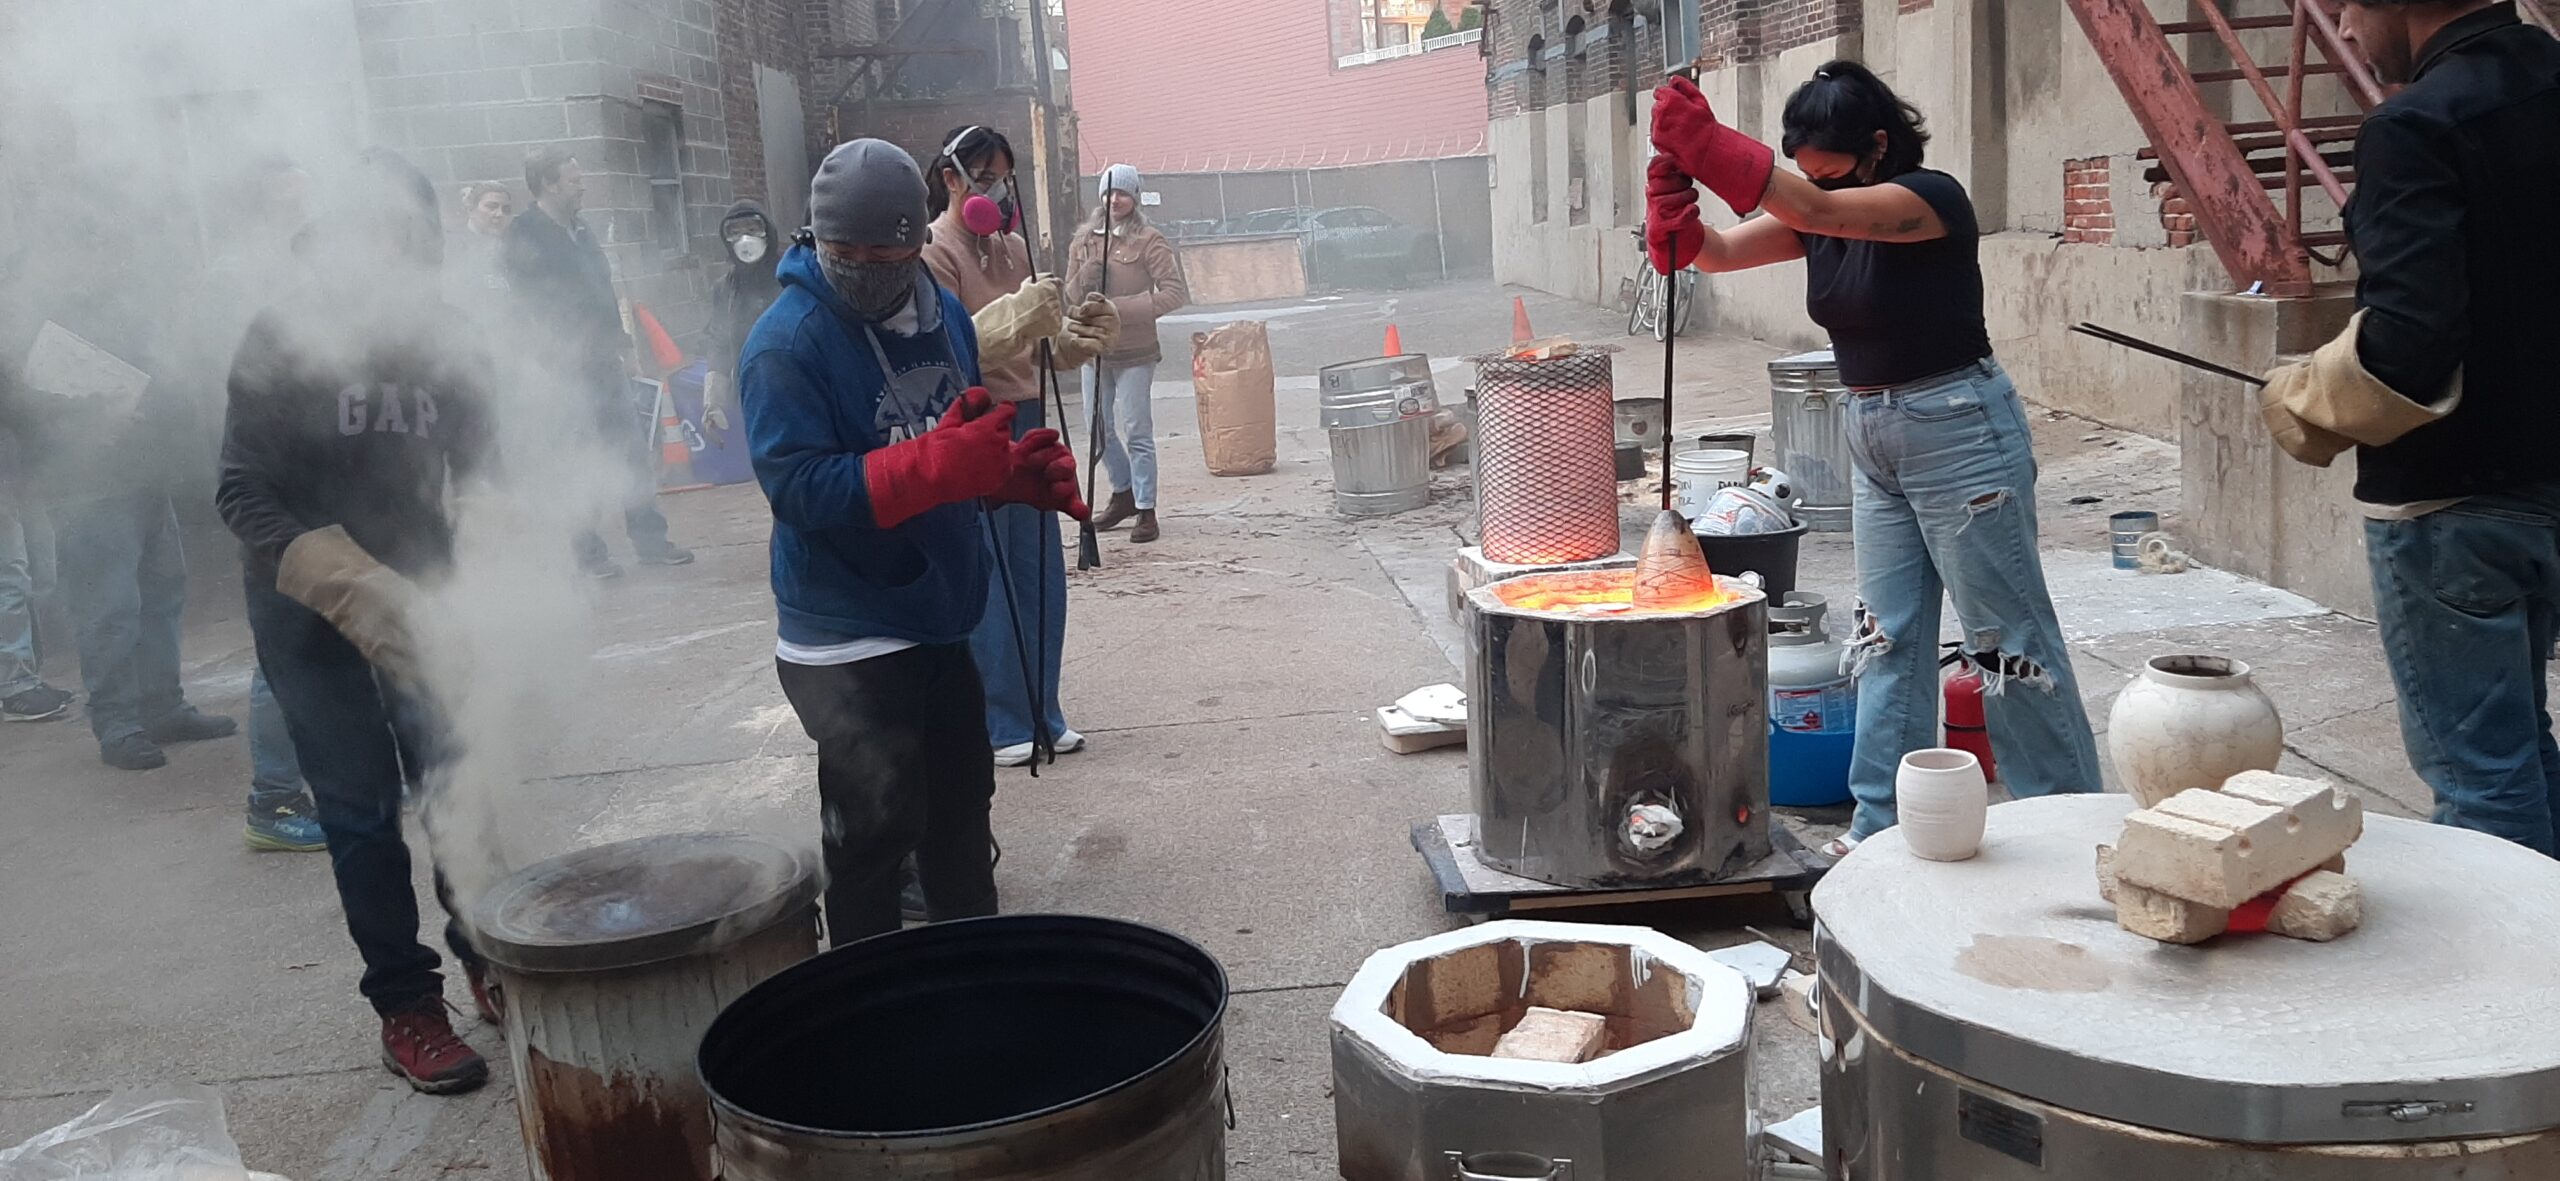
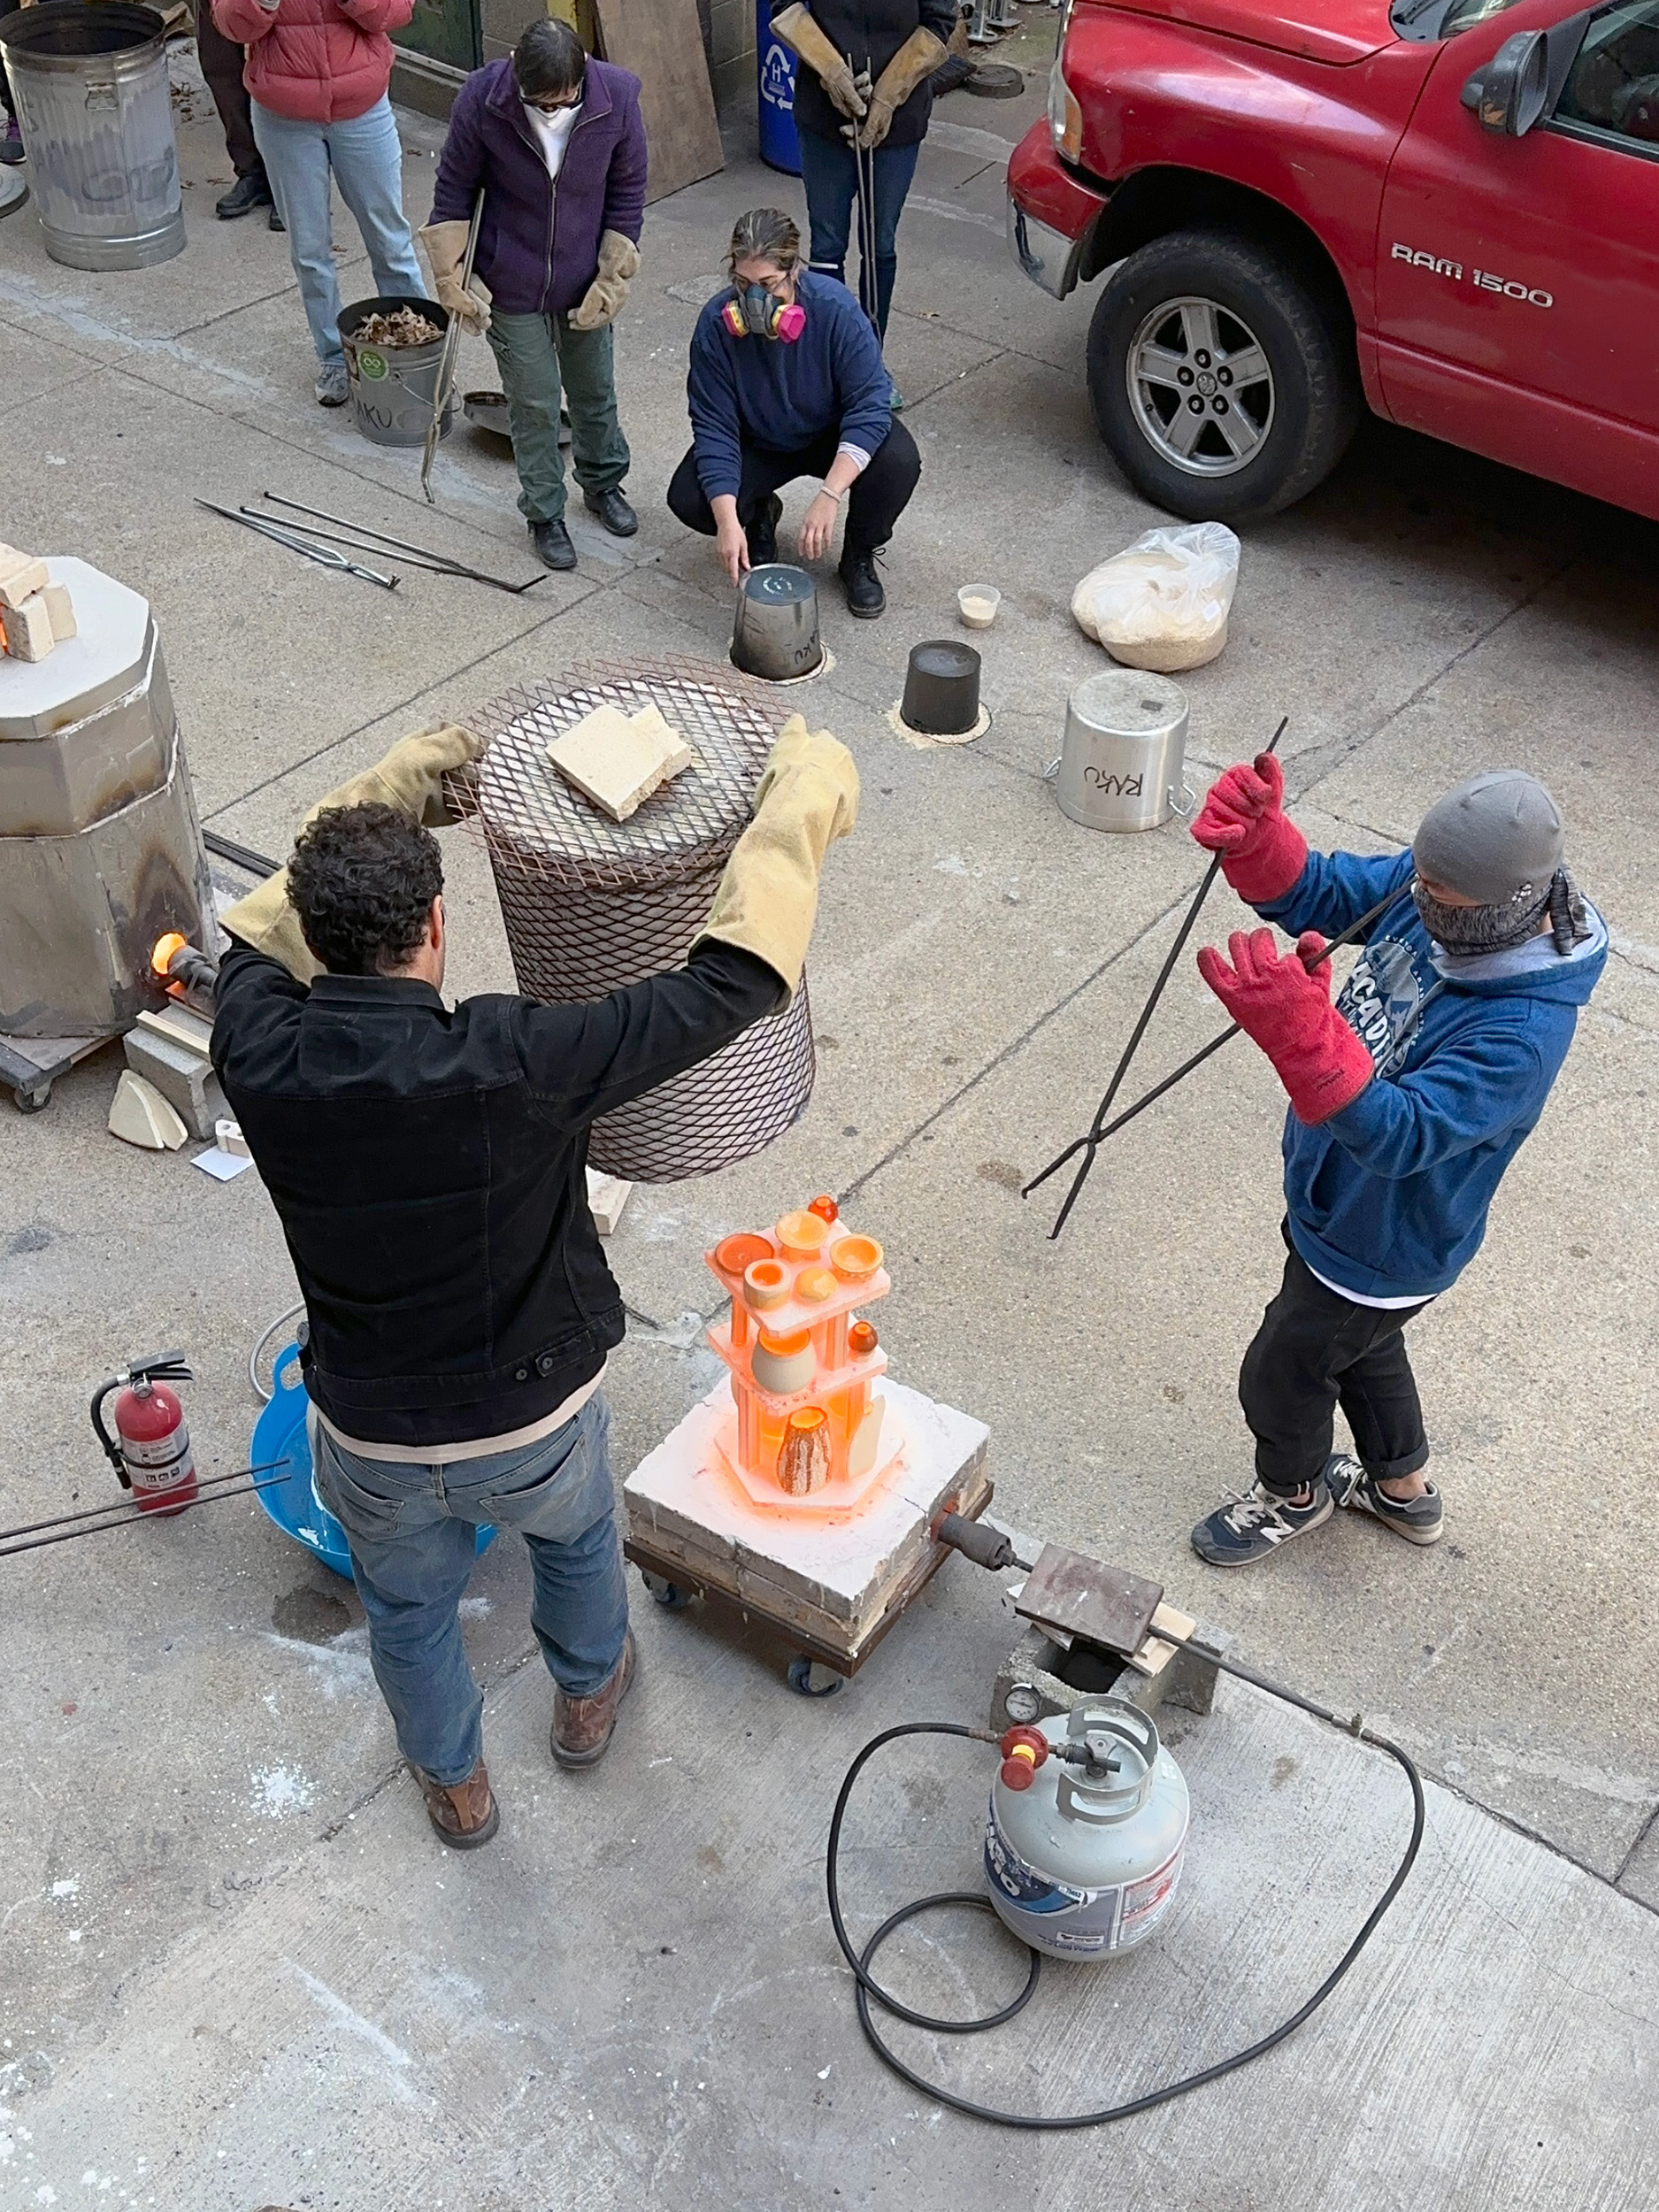
We have a variety of tongs that we use to remove work from the kiln. Many of them are vintage hand-made blacksmith rivet tongs of various sizes. We also use some of the commercially available Raku tongs, but they are far less robust. Ideally, tongs should grasp like a thumb and index finger, so that contact with the hot ware is limited. The touch of the tongs should leave a mark that is deliberate, showing clear intent. In the Japanese tradition, this is an important detail, and we promote it in our Western Raku process as well. We love our tongs so much that we made a shirt about them.
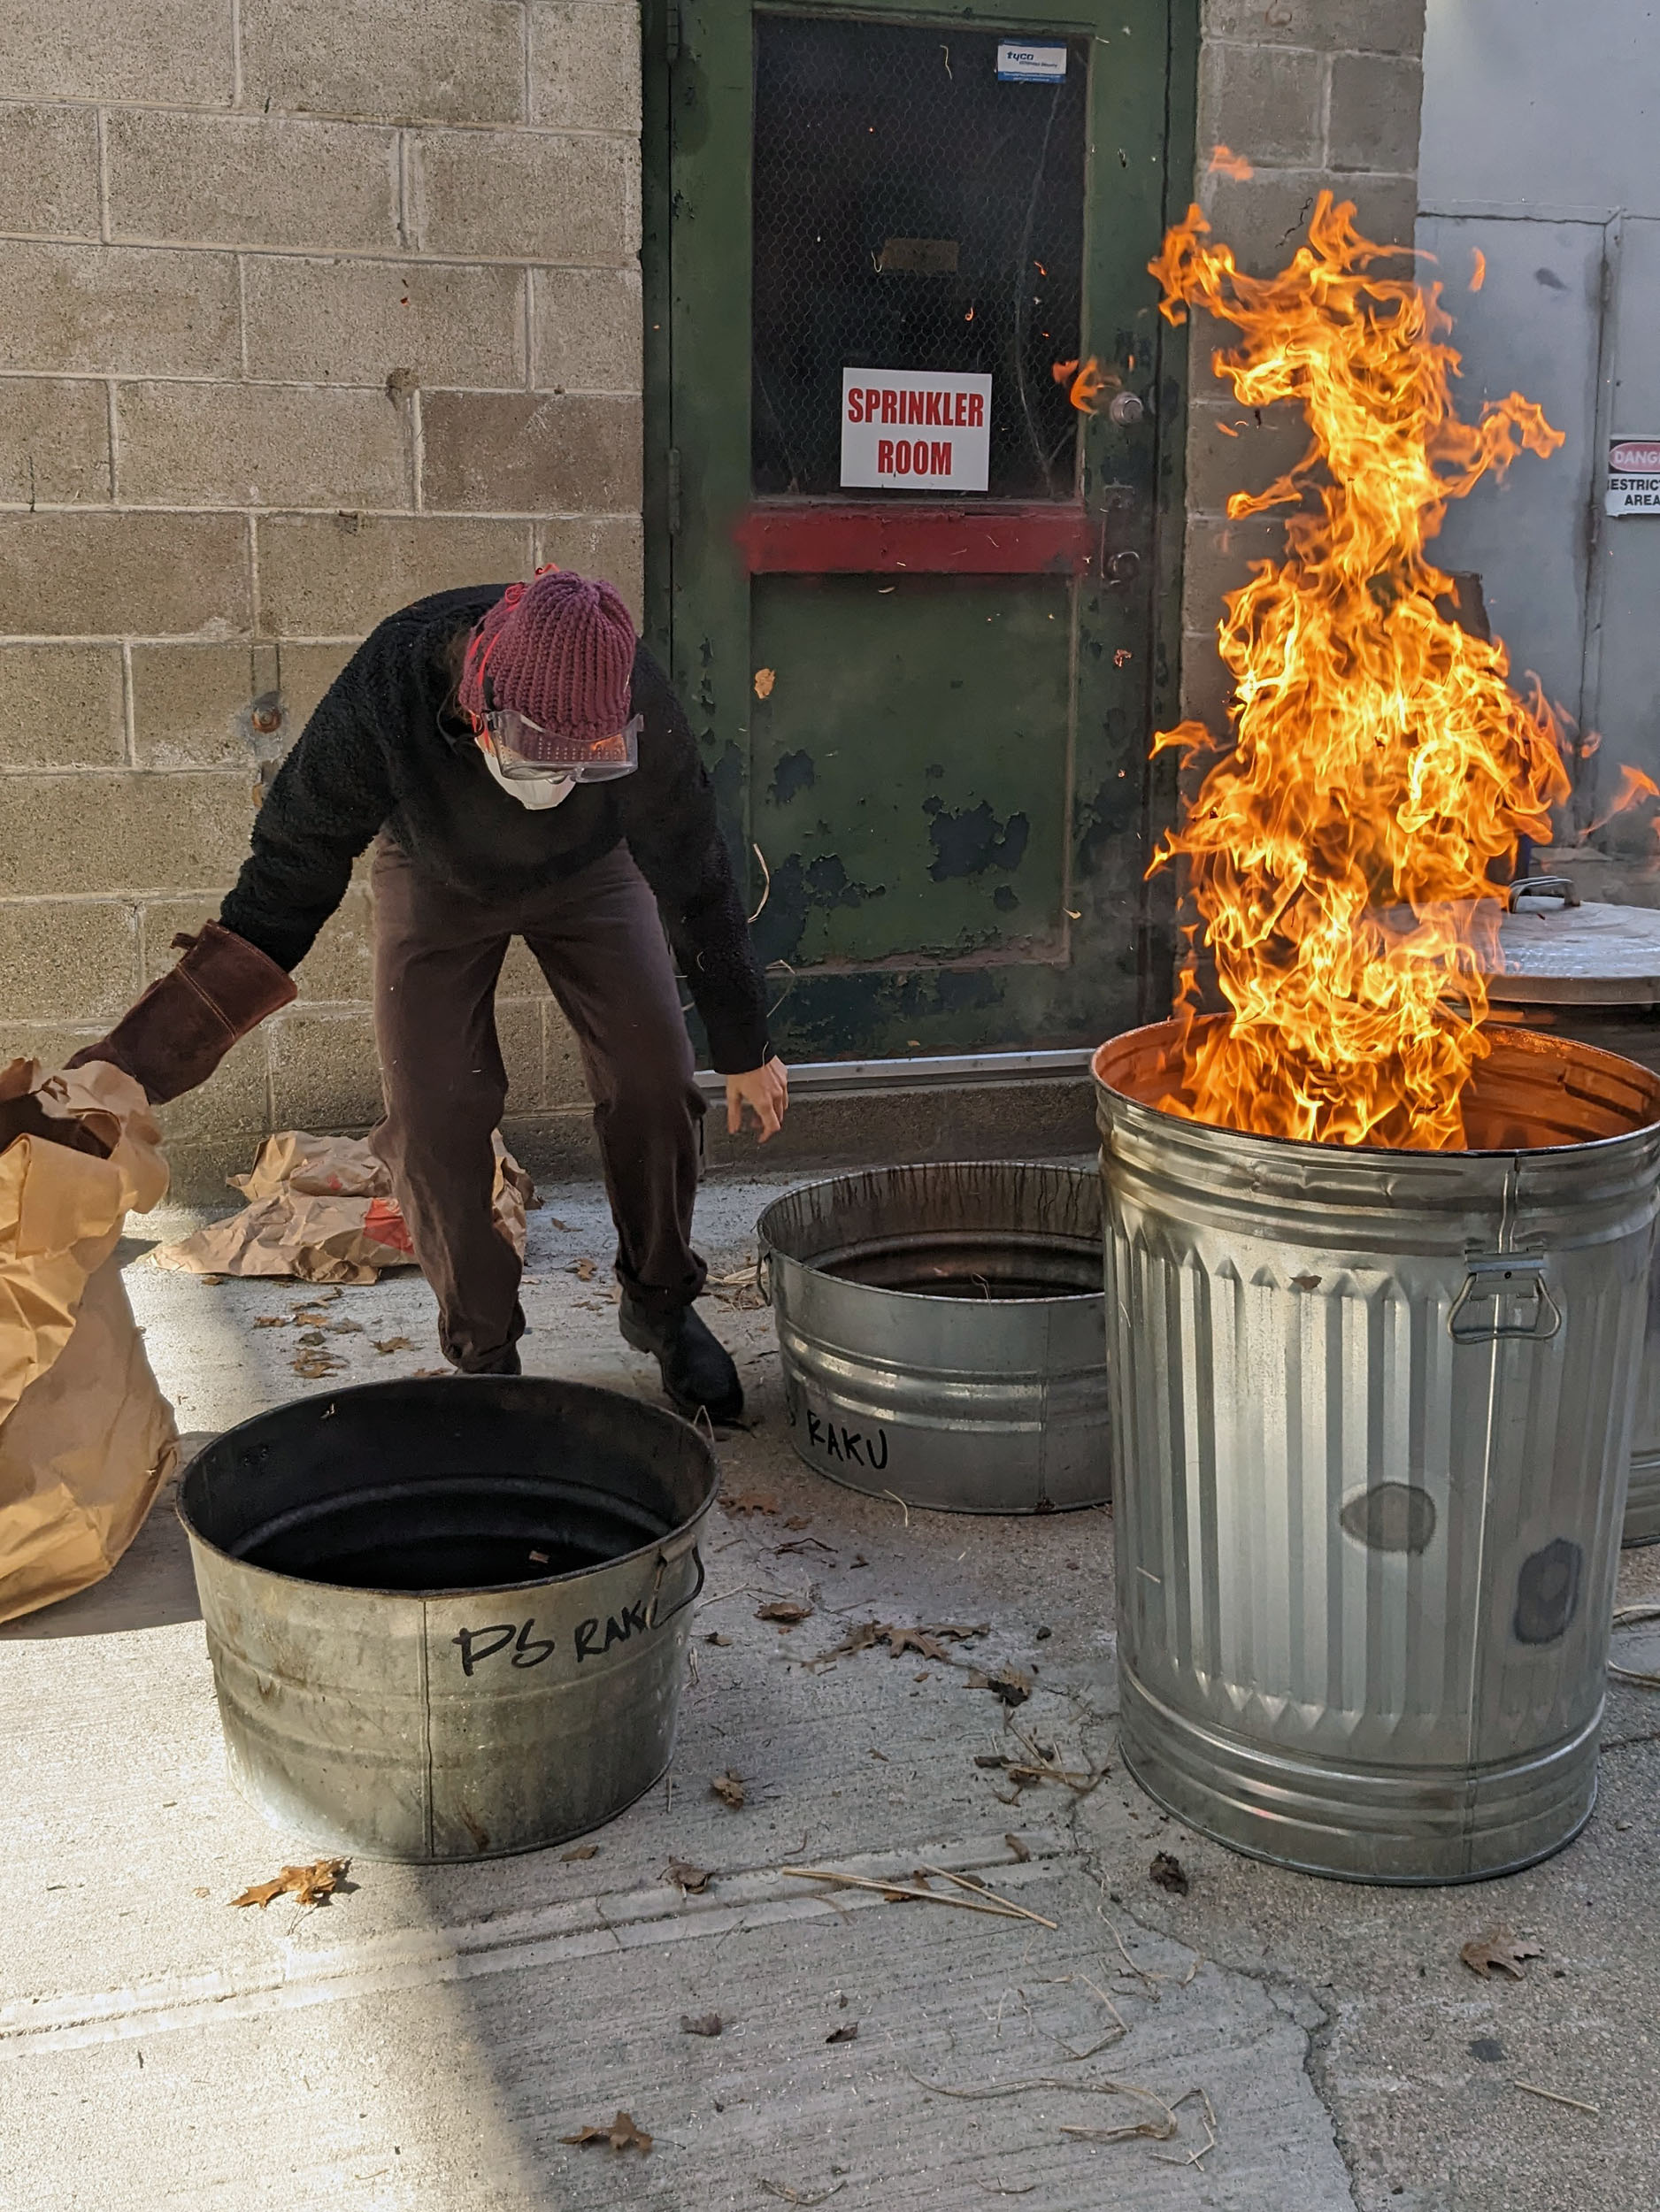
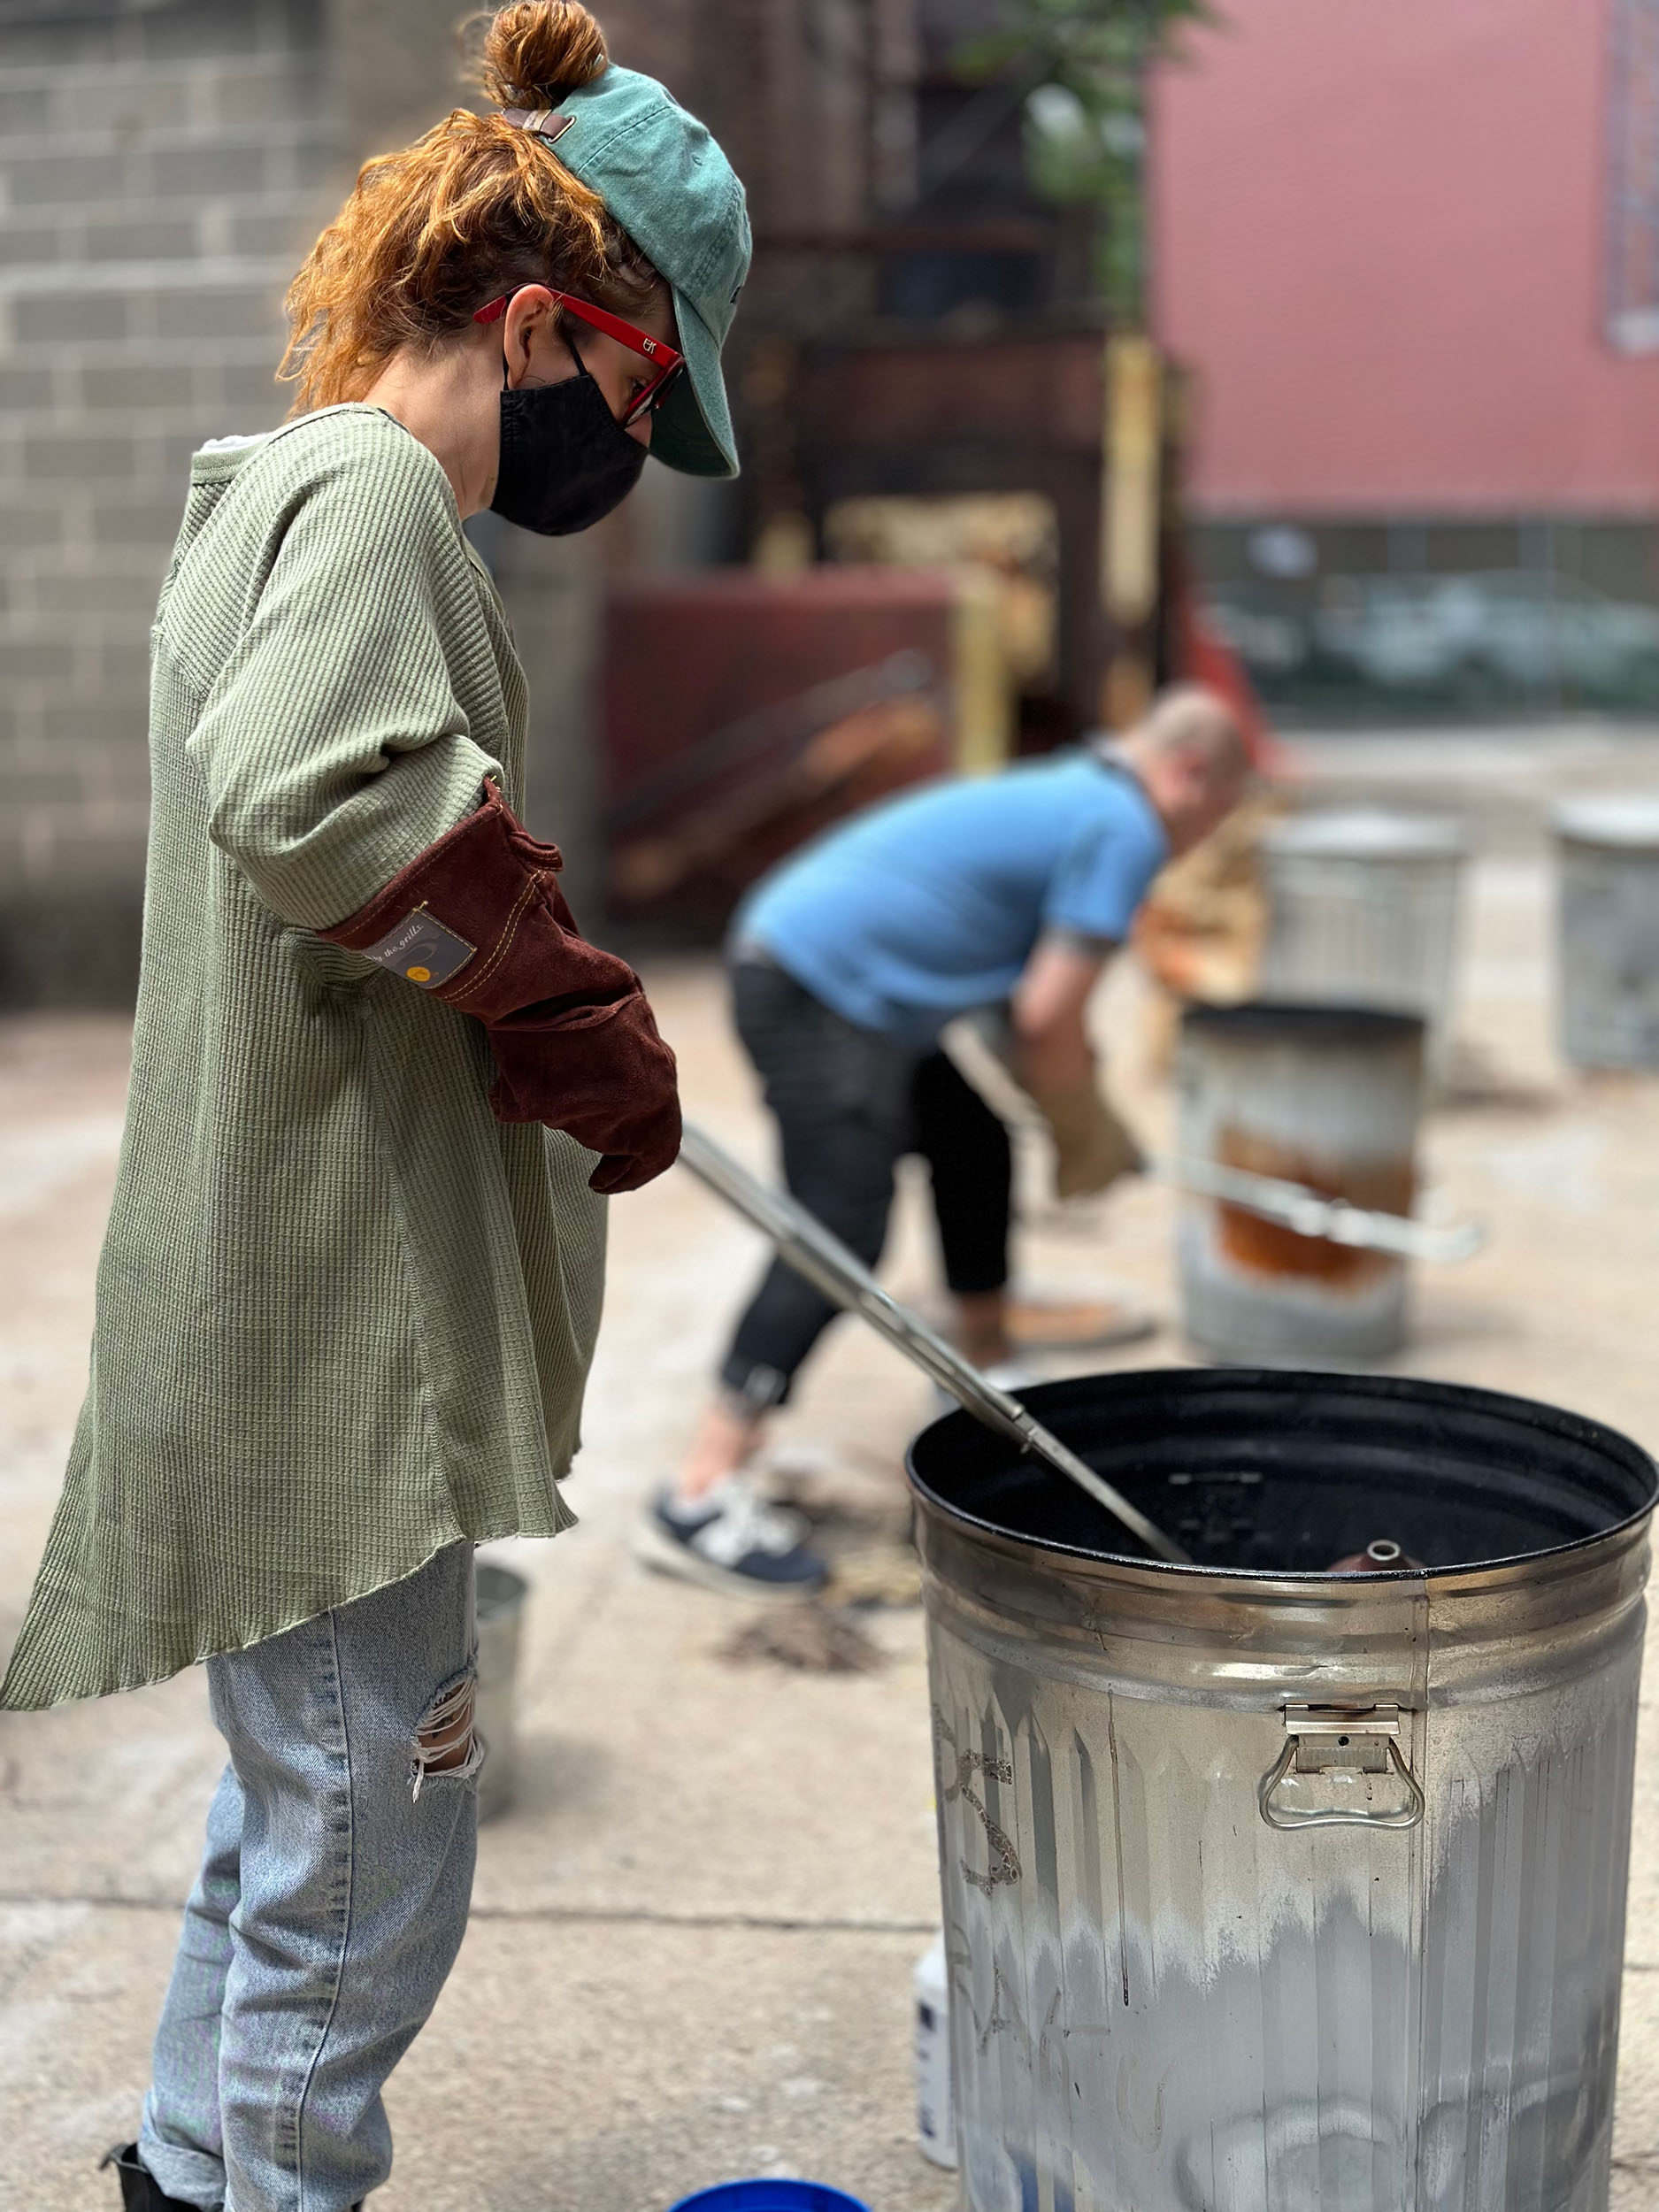
Other required equipment to perform the Western Raku process includes: rugged clothing, eye protection and other PPE, a source of water, metal containers, combustible material, and gloves. Leather welding gloves provide adequate general protection, but handling work directly from the kiln by hand requires the use of full-sleeve Kevlar gloves.
The studio stocks a variety of glazes, including numerous studio-made glazes that we have invented or formulated from other sources. Because we have a physical book library at the studio, often our glaze recipes come from books rather than the internet. We also use commercially available Raku glazes and various commercial low-fire glazes. As this is a quick explanation of the Western Raku process, we won’t go into details of glaze formulation.
Raku Ware
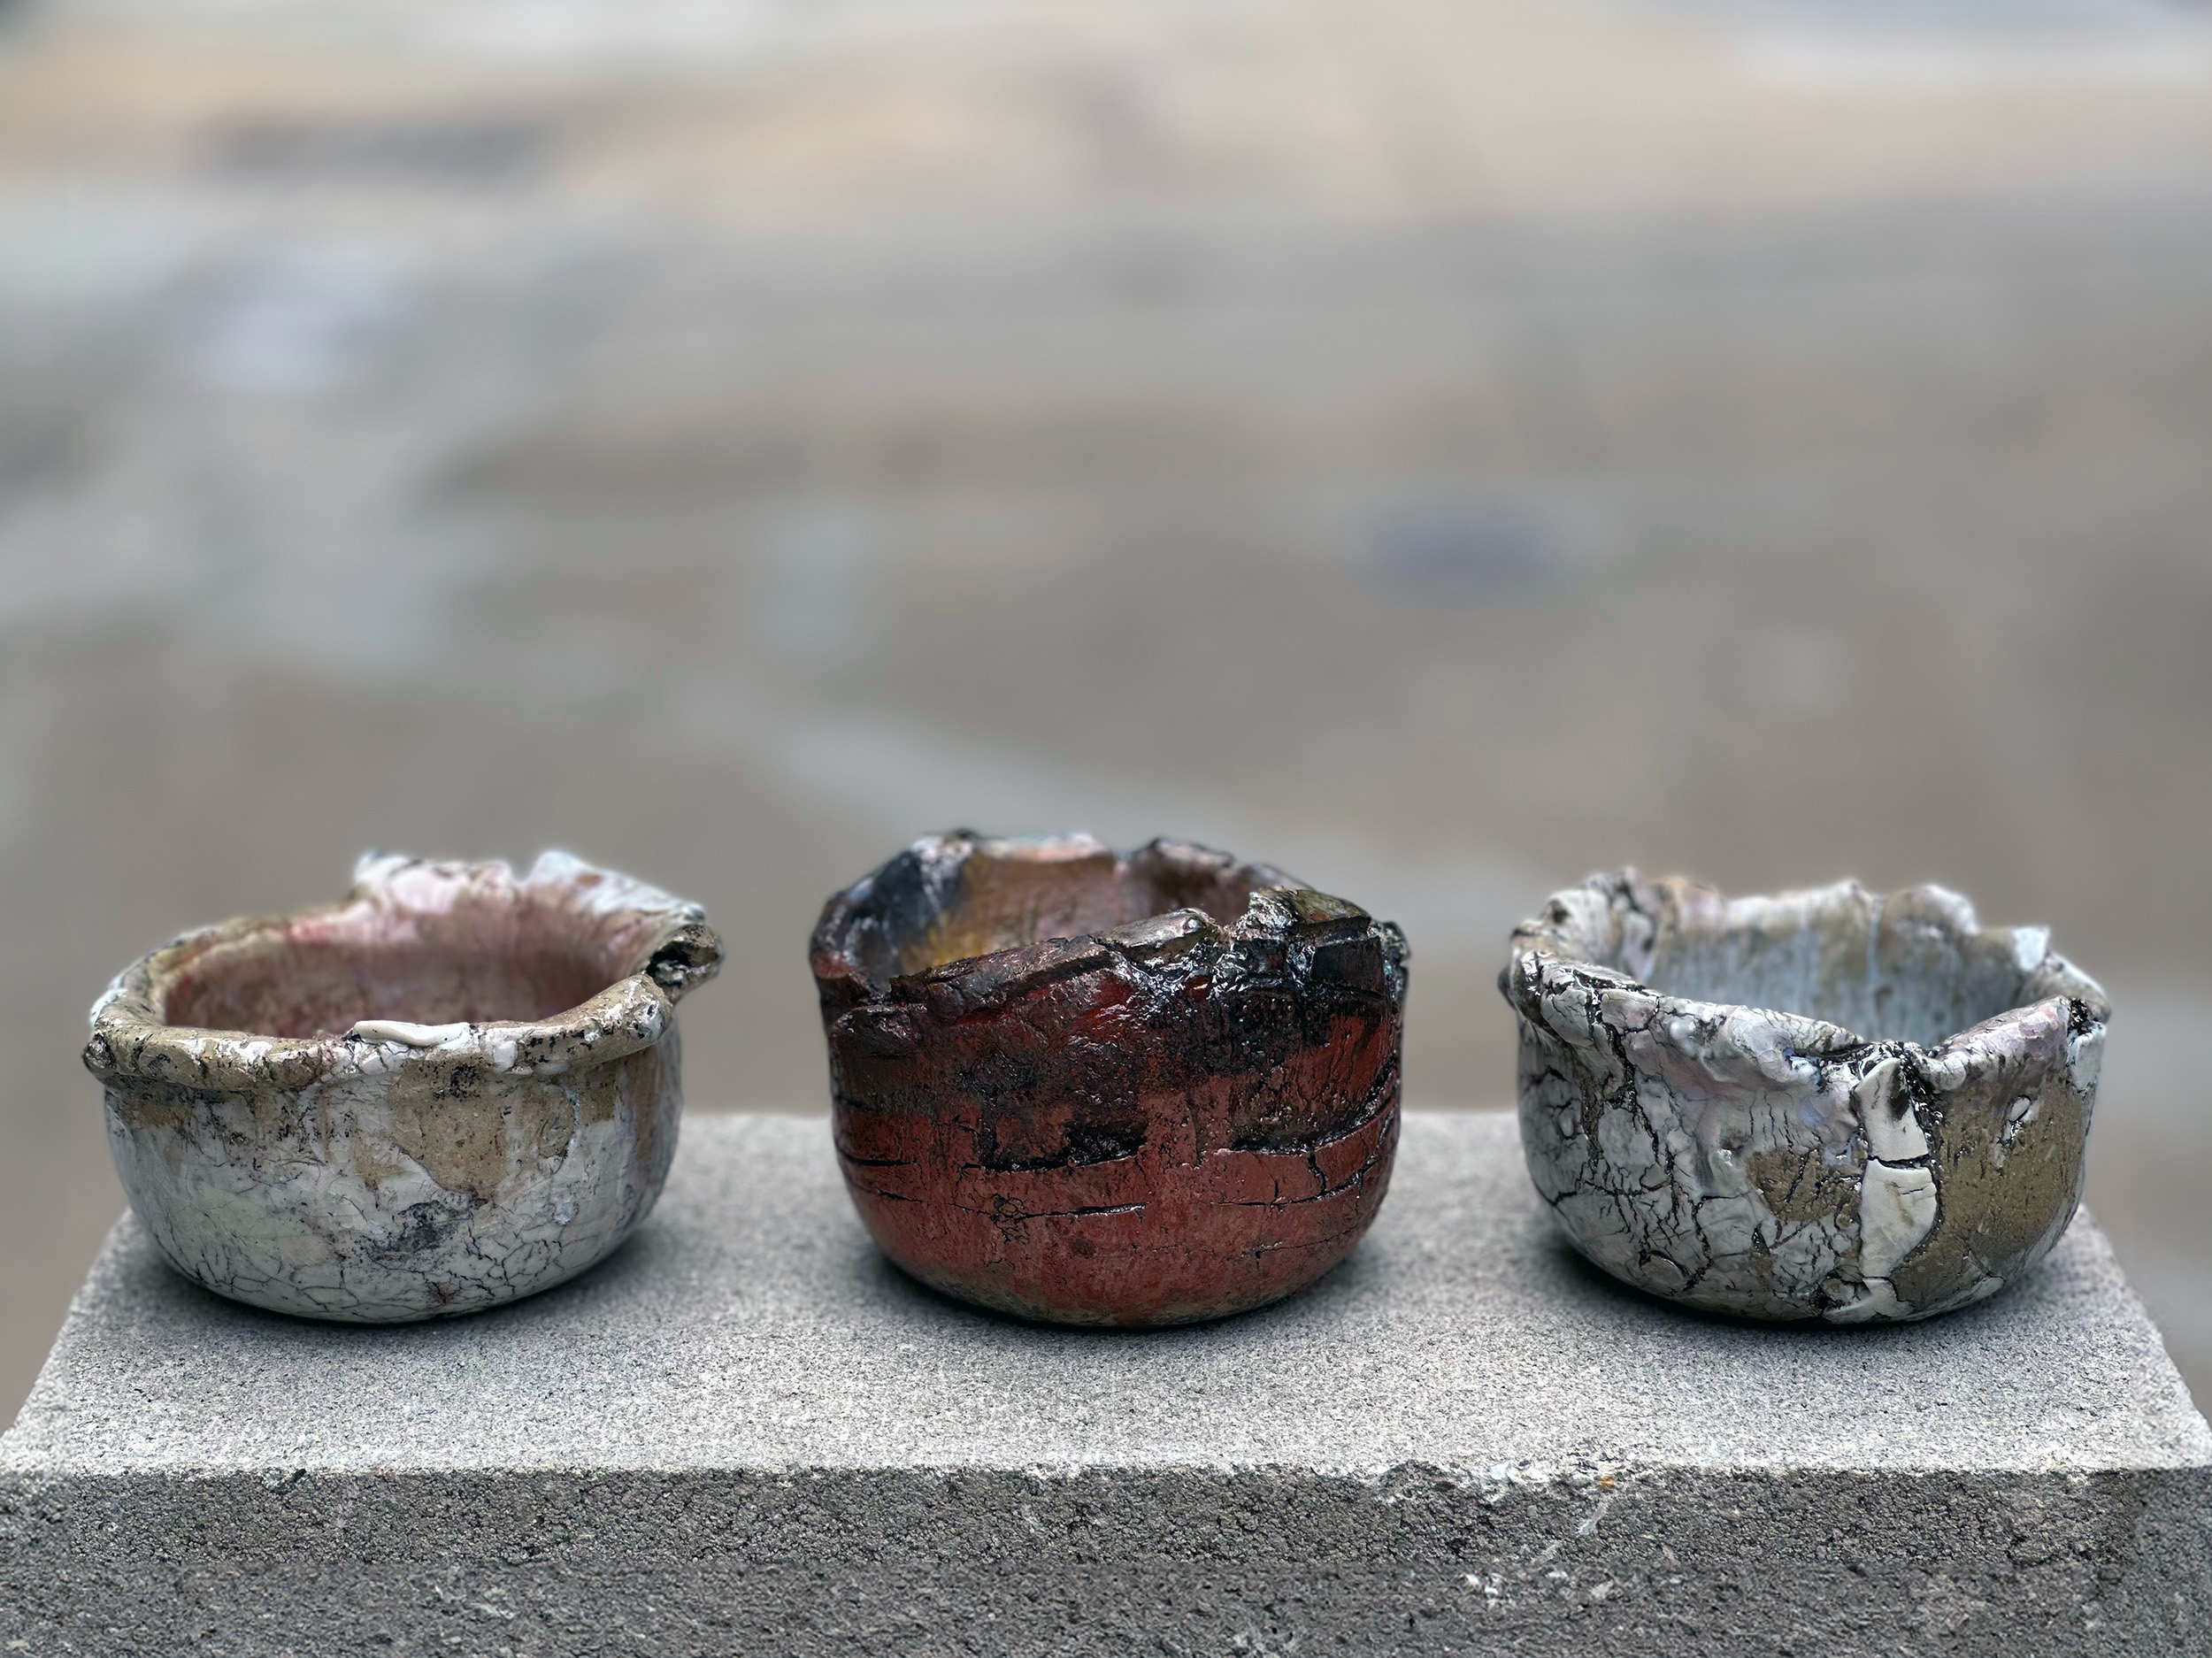
Wheel-thrown or pinched vessels are physically tough due to having no seams or joints. These simple forms are ideal for surviving the rapid heating and cooling in Raku. This is evidenced in the pinched and carved chawan tea bowl, which is the staple of traditional Japanese Raku. Slab work and other broad flat forms can be challenging, but generally can be counted on to survive. They must be made well, supported in the kiln, and can’t have any pre-existing cracks.
Hand-built sculptures or vessels with handles and other appendages are prone to breaking unless the joints are exceptionally well blended. For group Raku events, we tend to ask our artists to minimize these sorts of details. Interestingly, we have fired massively thick slab work with no issues, but a wheel-thrown vessel with a bottom that is too thick will inevitably crack. Material consistency may be the most important factor in surviving the rapid heating and crash cooling of the Raku process. This may, perhaps, be more important than the clay formula itself.
A lightweight and consistently thrown or pinched vessel, even in porcelain, is more likely to survive than something with wildly different thicknesses, even if the latter is made with Raku clay. The basic logic here is that thick media will take significantly longer to cool. Because clay becomes rigid as it loses heat, these differences produce enough tension to shatter an object to pieces.
Bisque
We bisque fire all Raku pieces at Project Studios in our electric kilns before glazing. Project Studios does not fire raw clay during our Raku adventures, although it is possible to do so. We consider all bisque to be the same, and just feed our Raku work into the normal kiln room flow. There are certainly reasons to bisque at a specific higher or lower temperature. In a shared studio with more than 70 members, it is easier for us to fire to our normal bisque temperature of ∆05.
Glazing
In our studio, everybody handles their own glazing, using just about every procedure available: brushing, dipping, air-brushing, or spraying with one of our larger spray guns.
The potter can mask areas of the ware by using tape or wax, creating unglazed areas that will blacken in reduction. In American style Raku, artisans can decorate ware with a variety of elements, including oxide washes, commercial and custom glazes, or leave it unglazed and burnished for potential carbon effects.

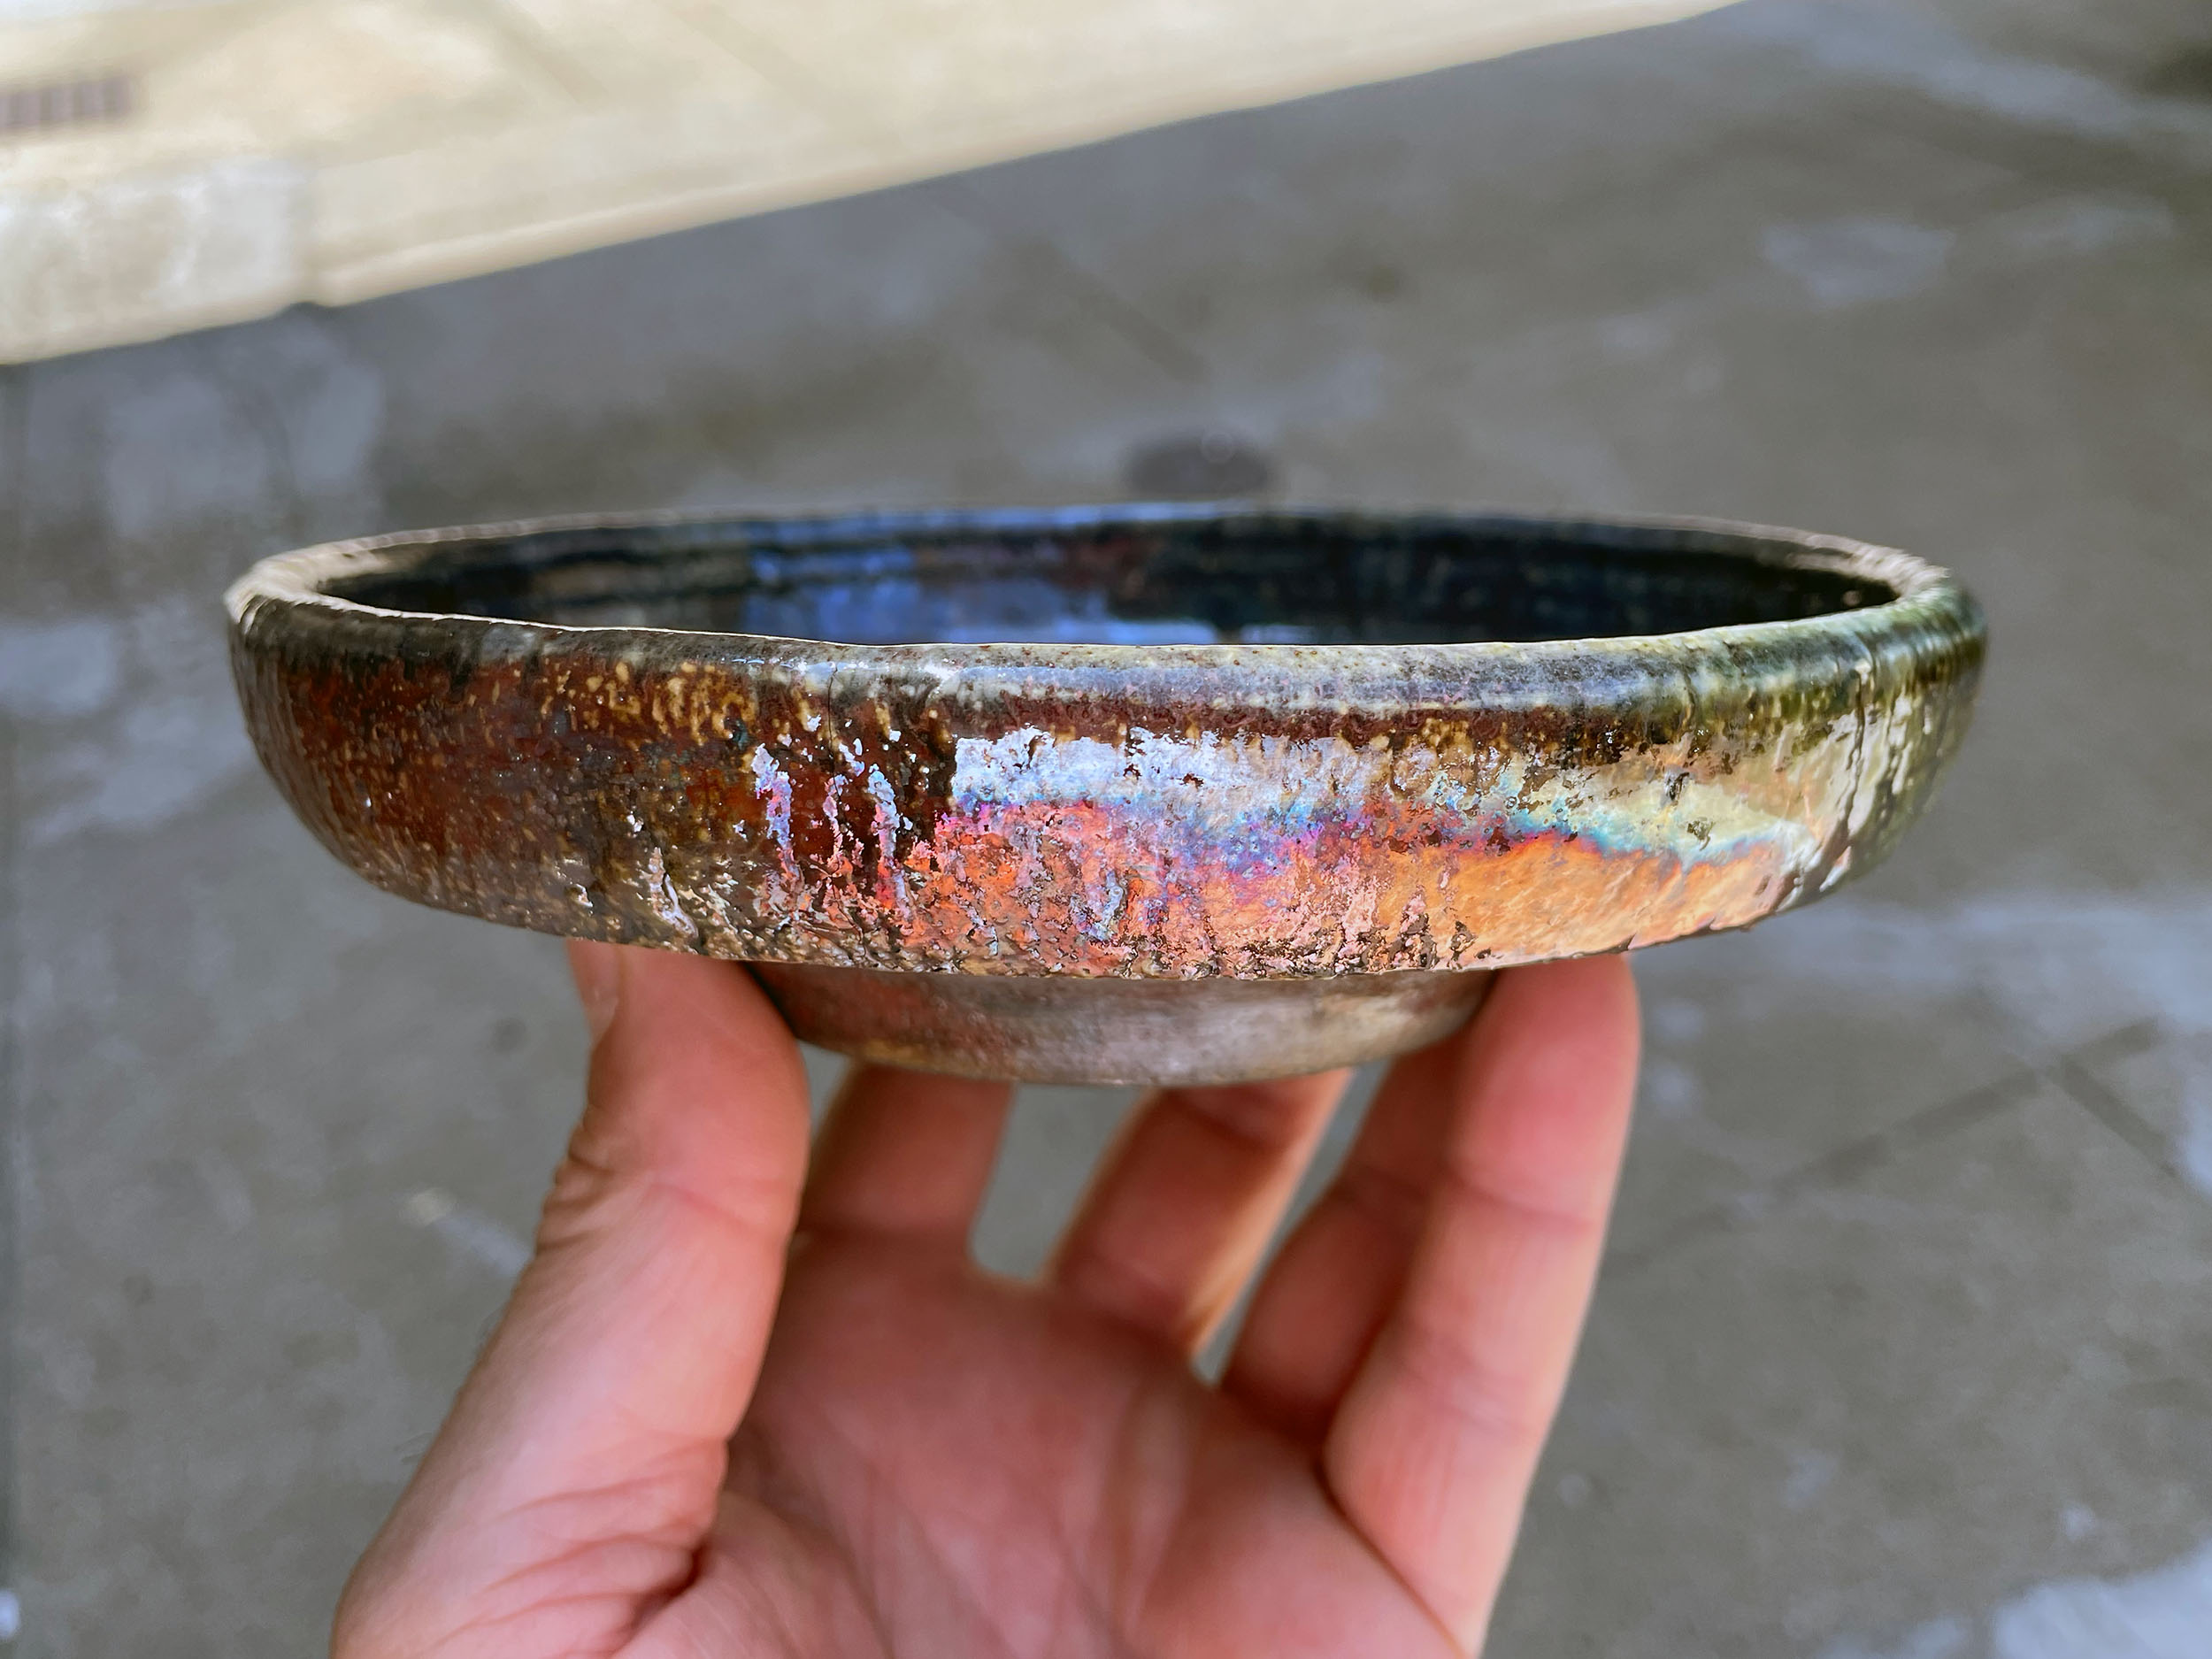
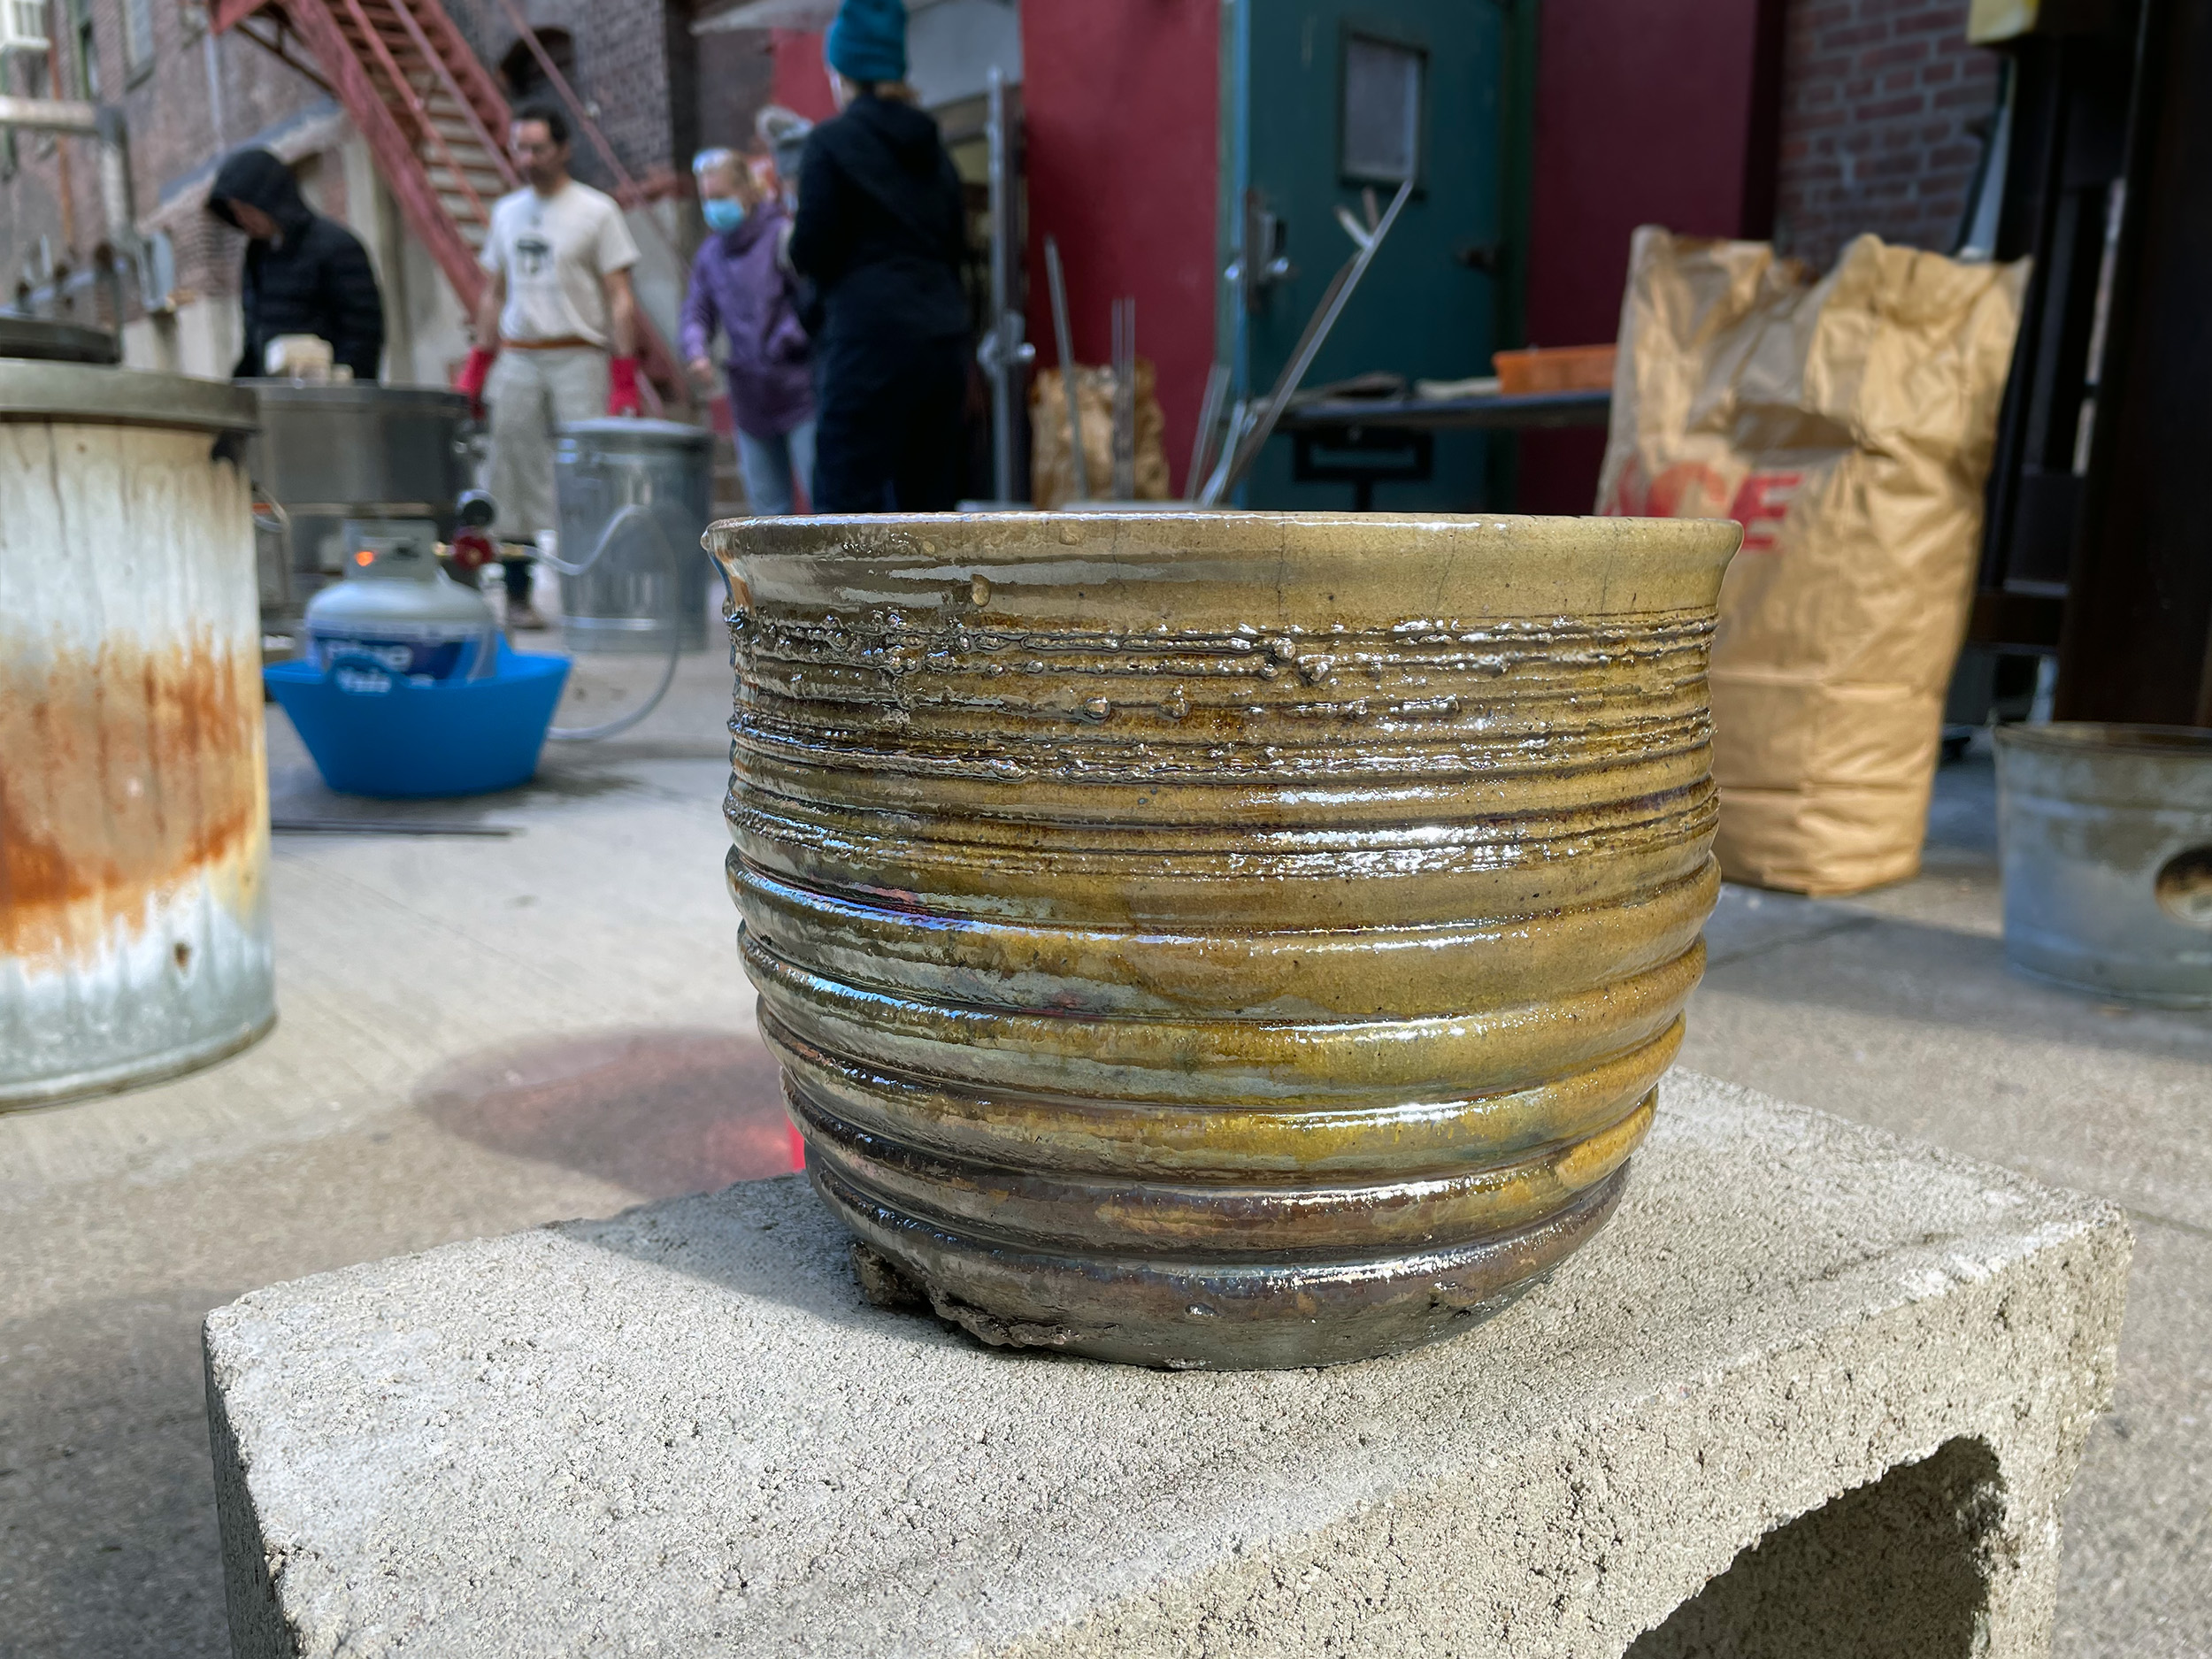
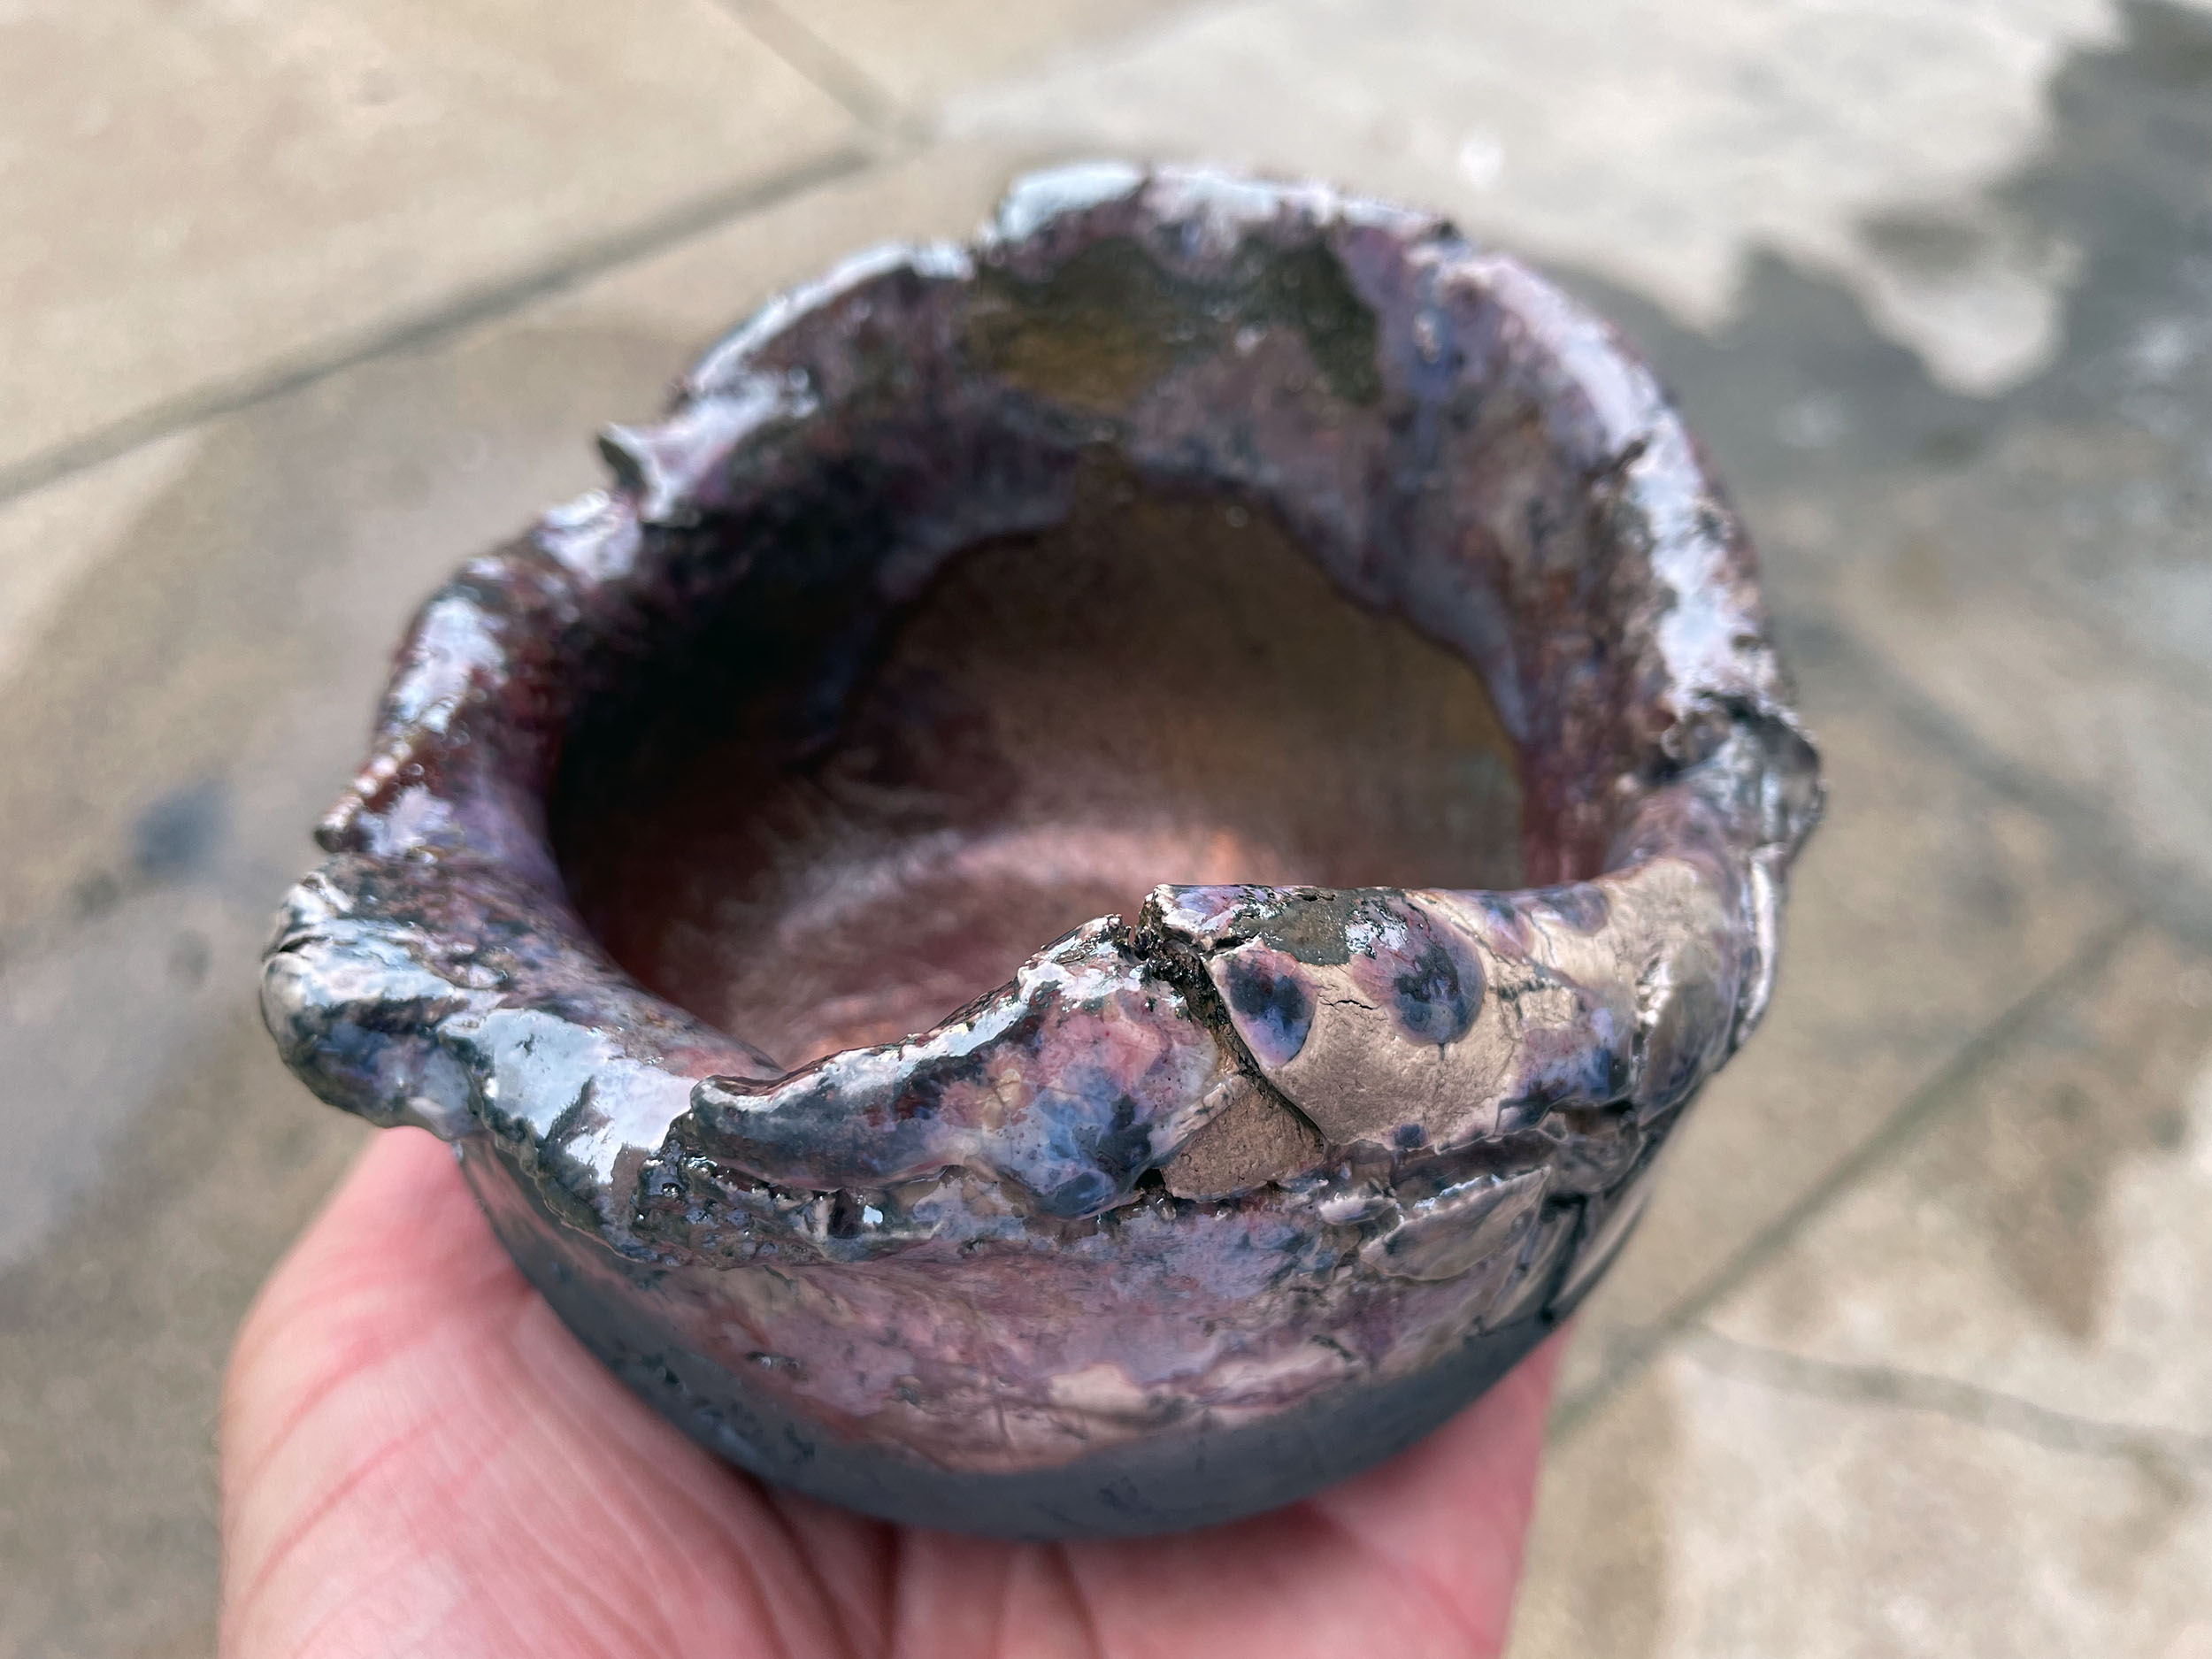
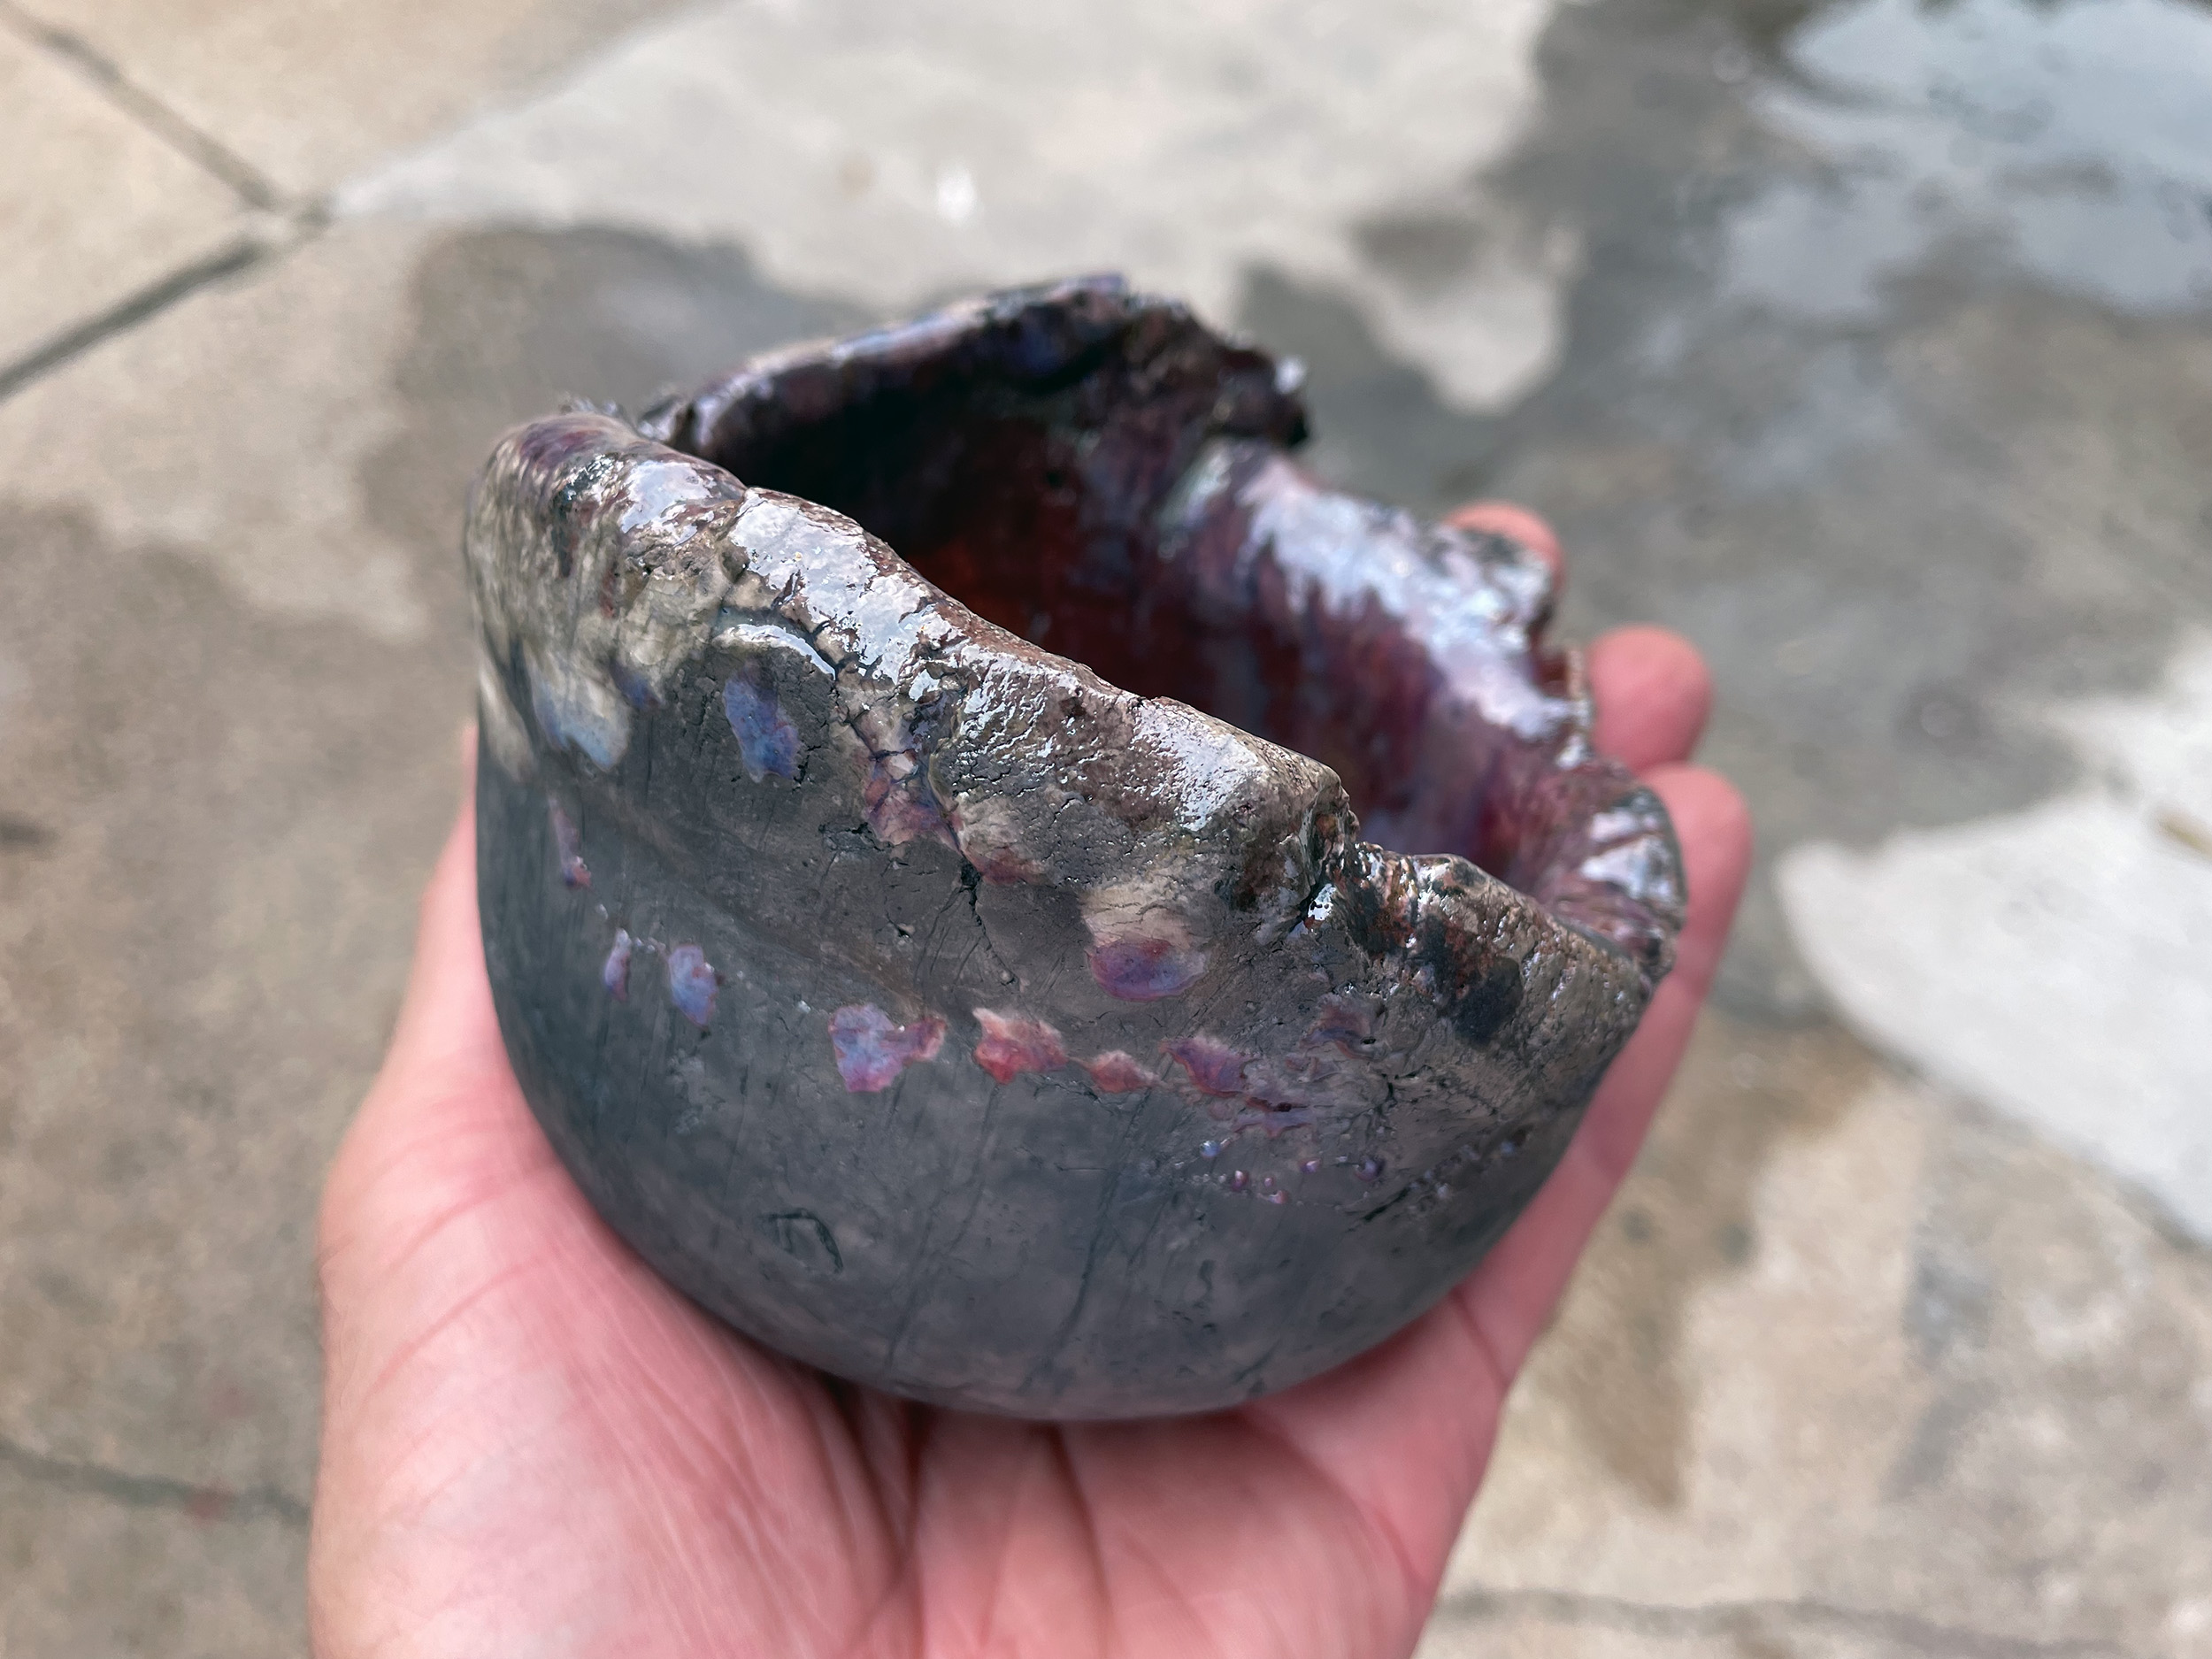
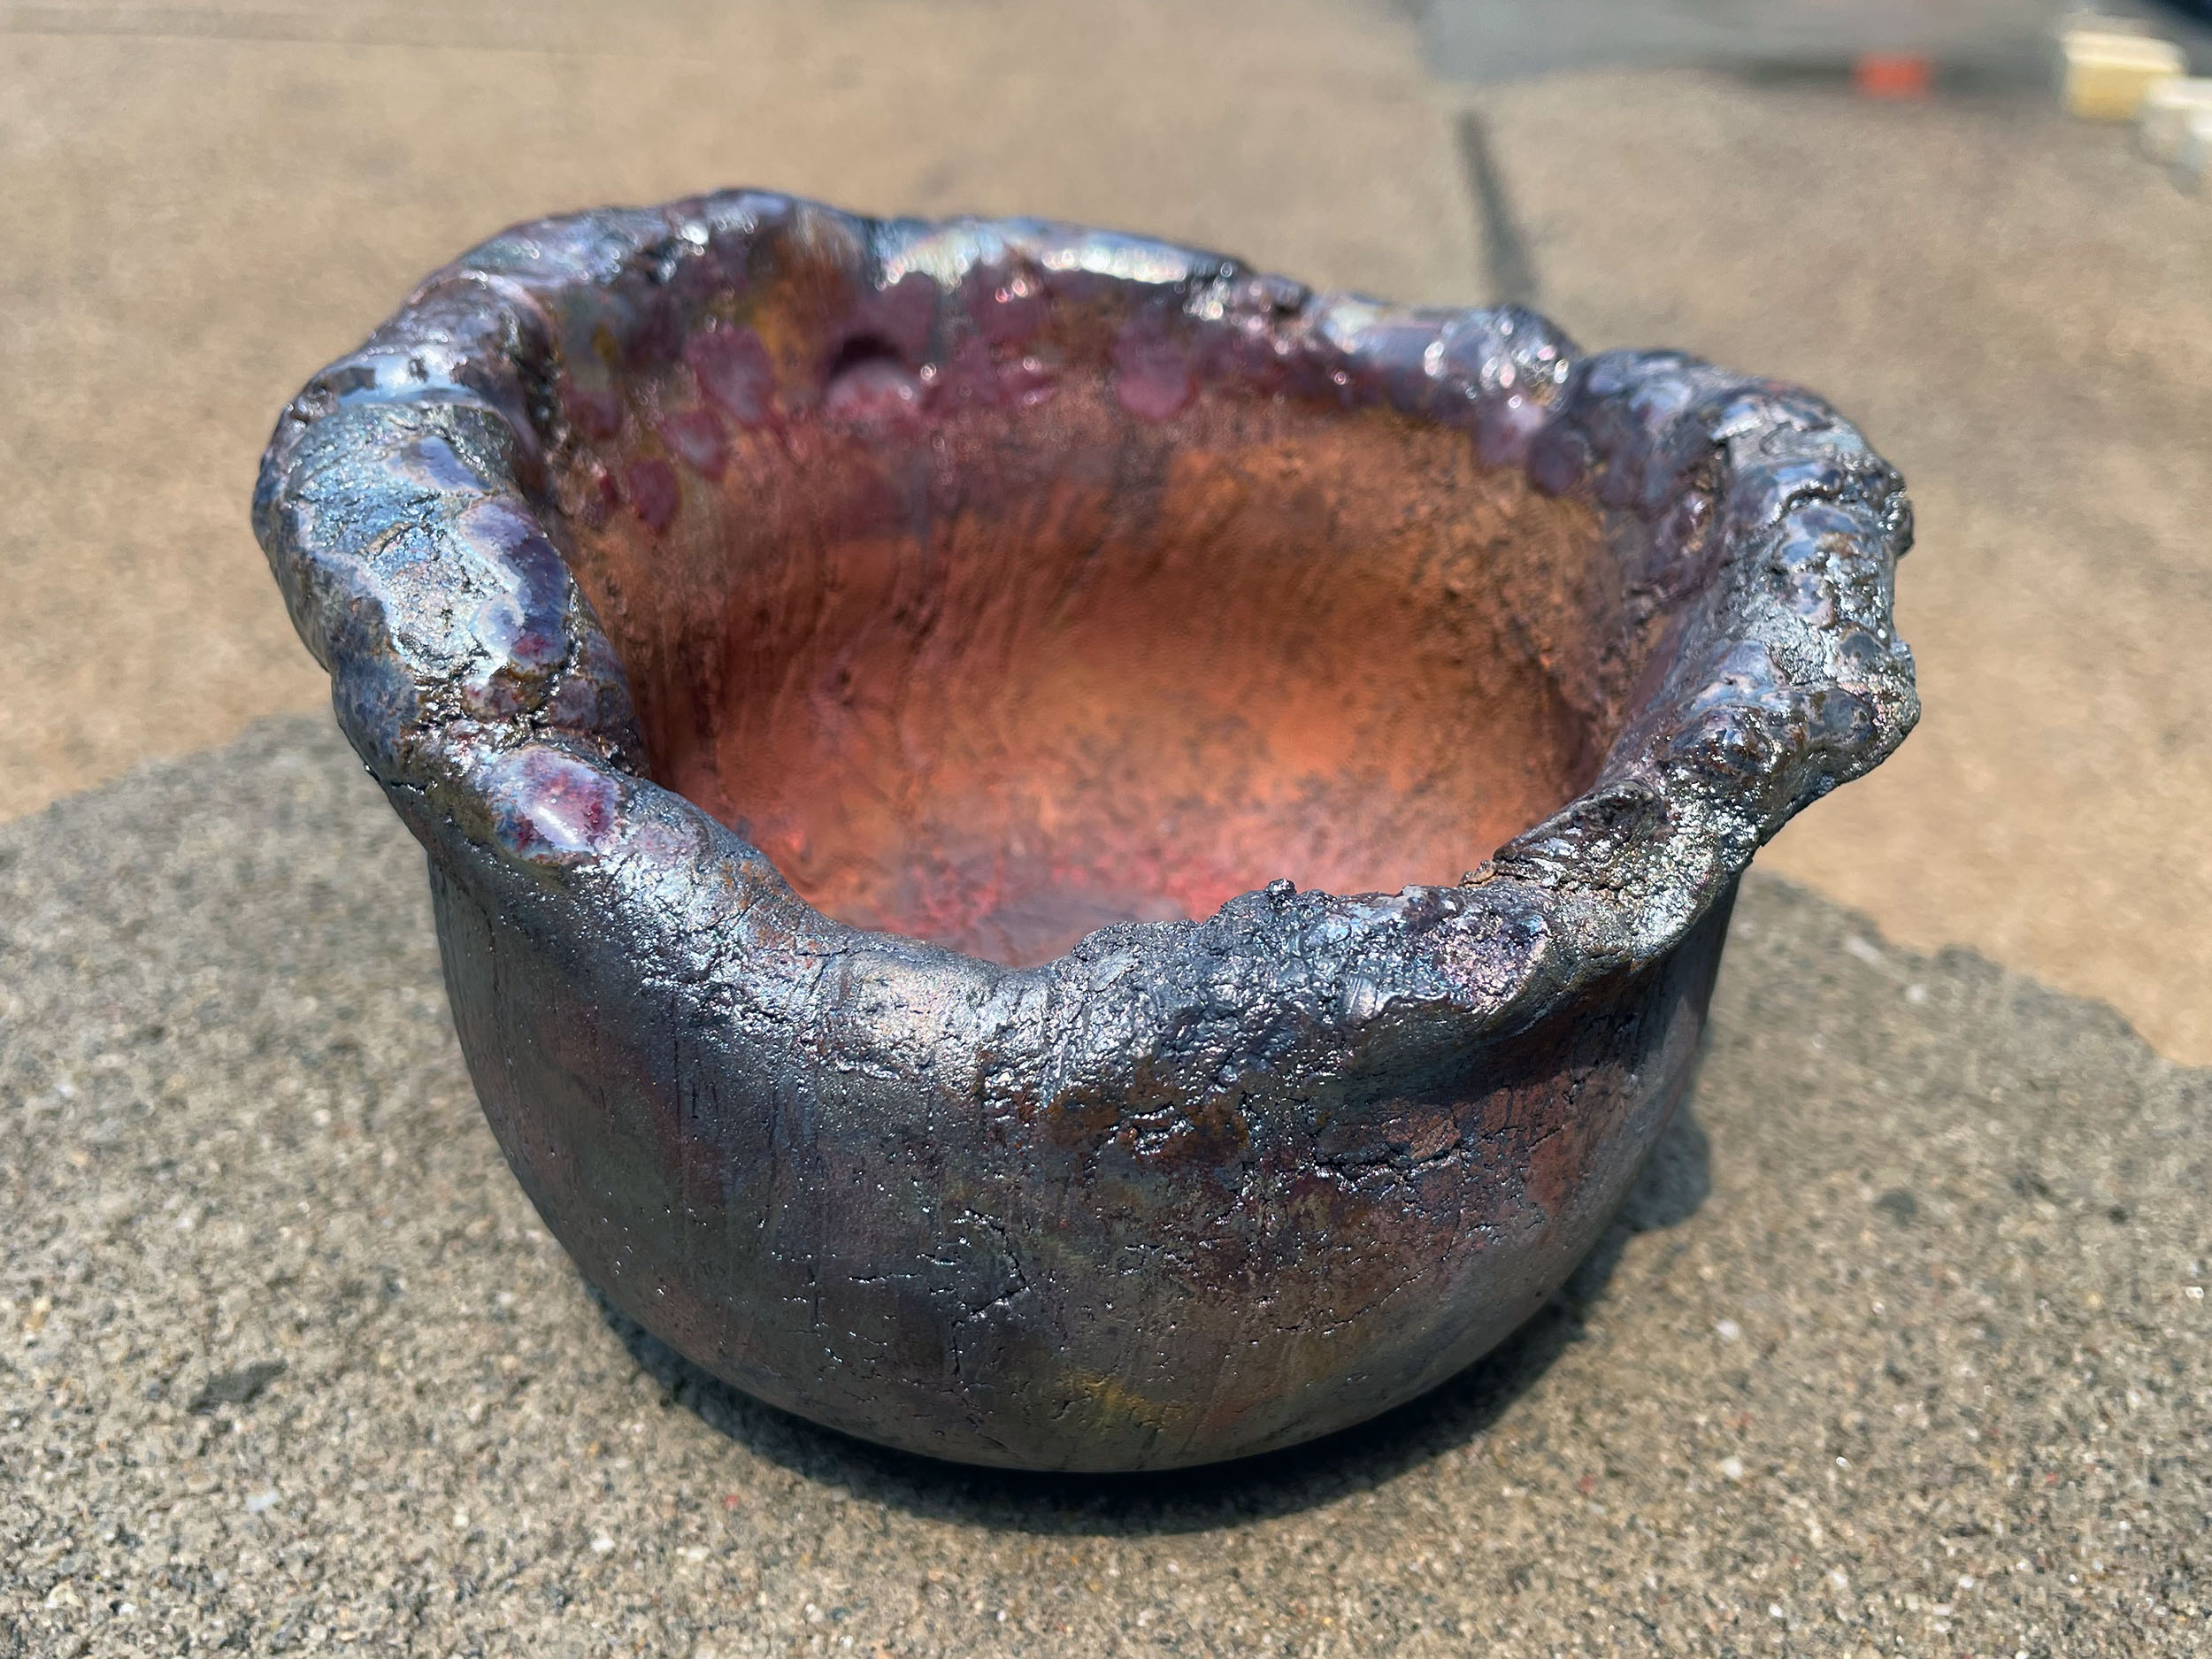
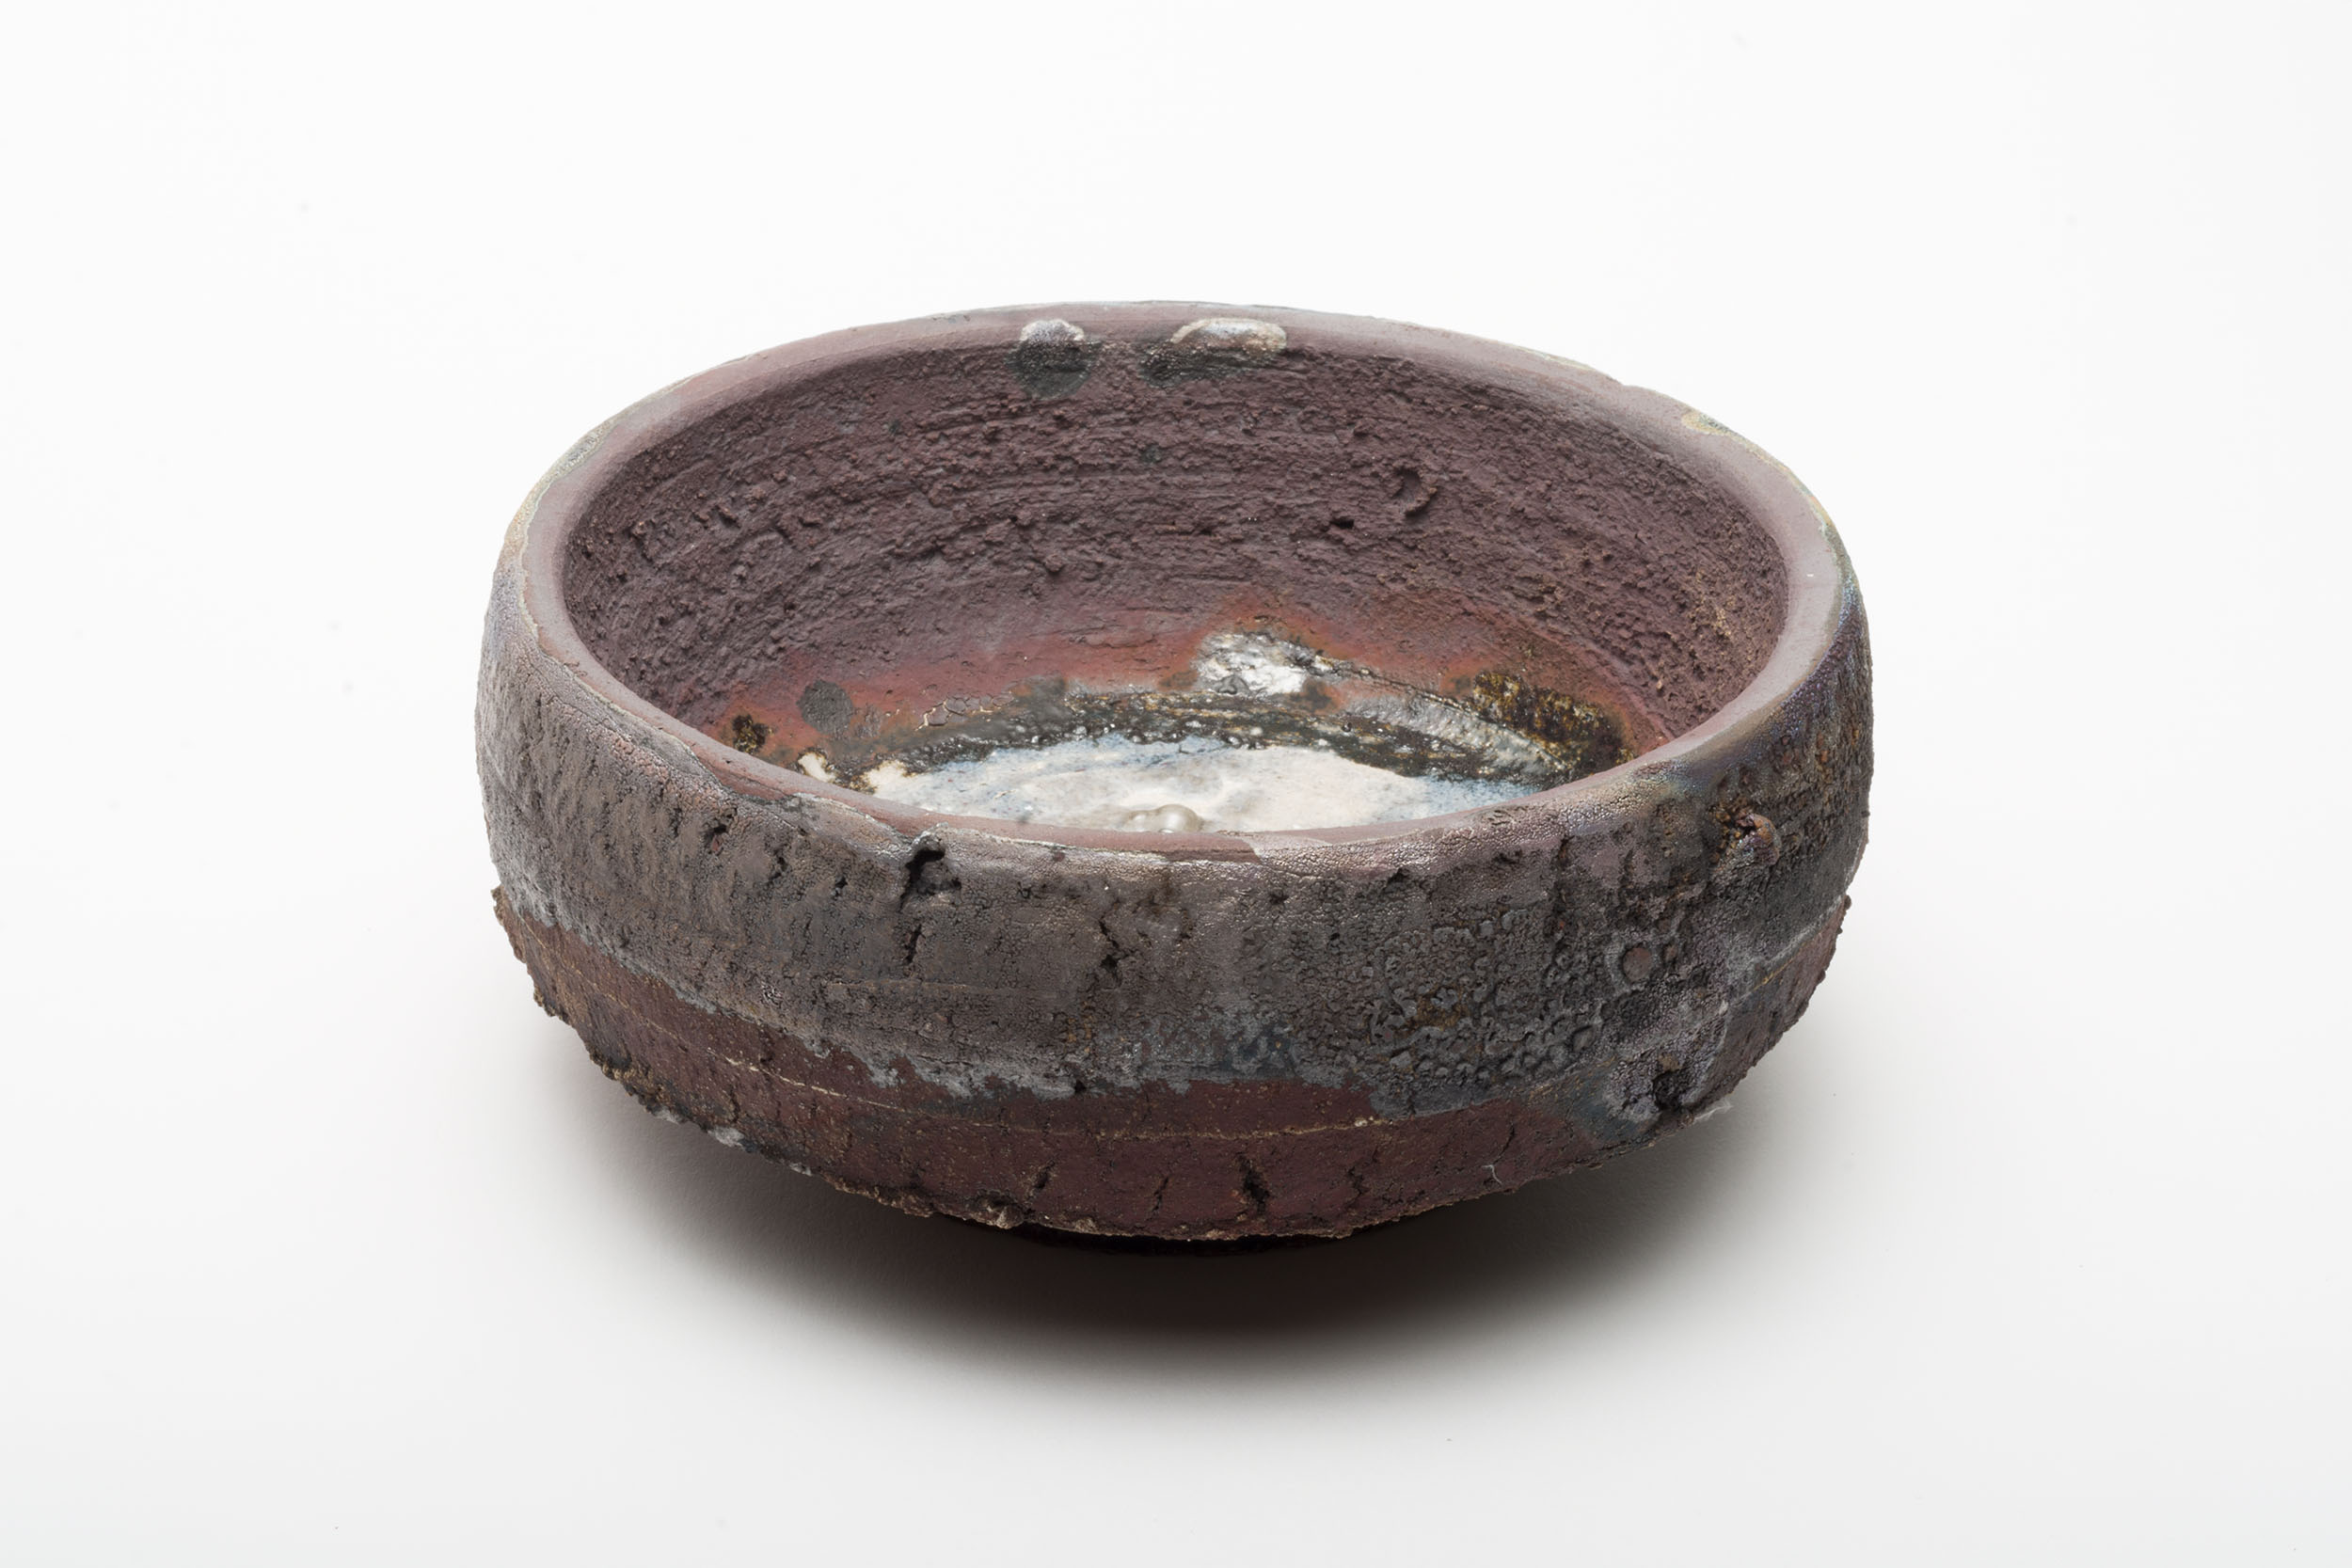
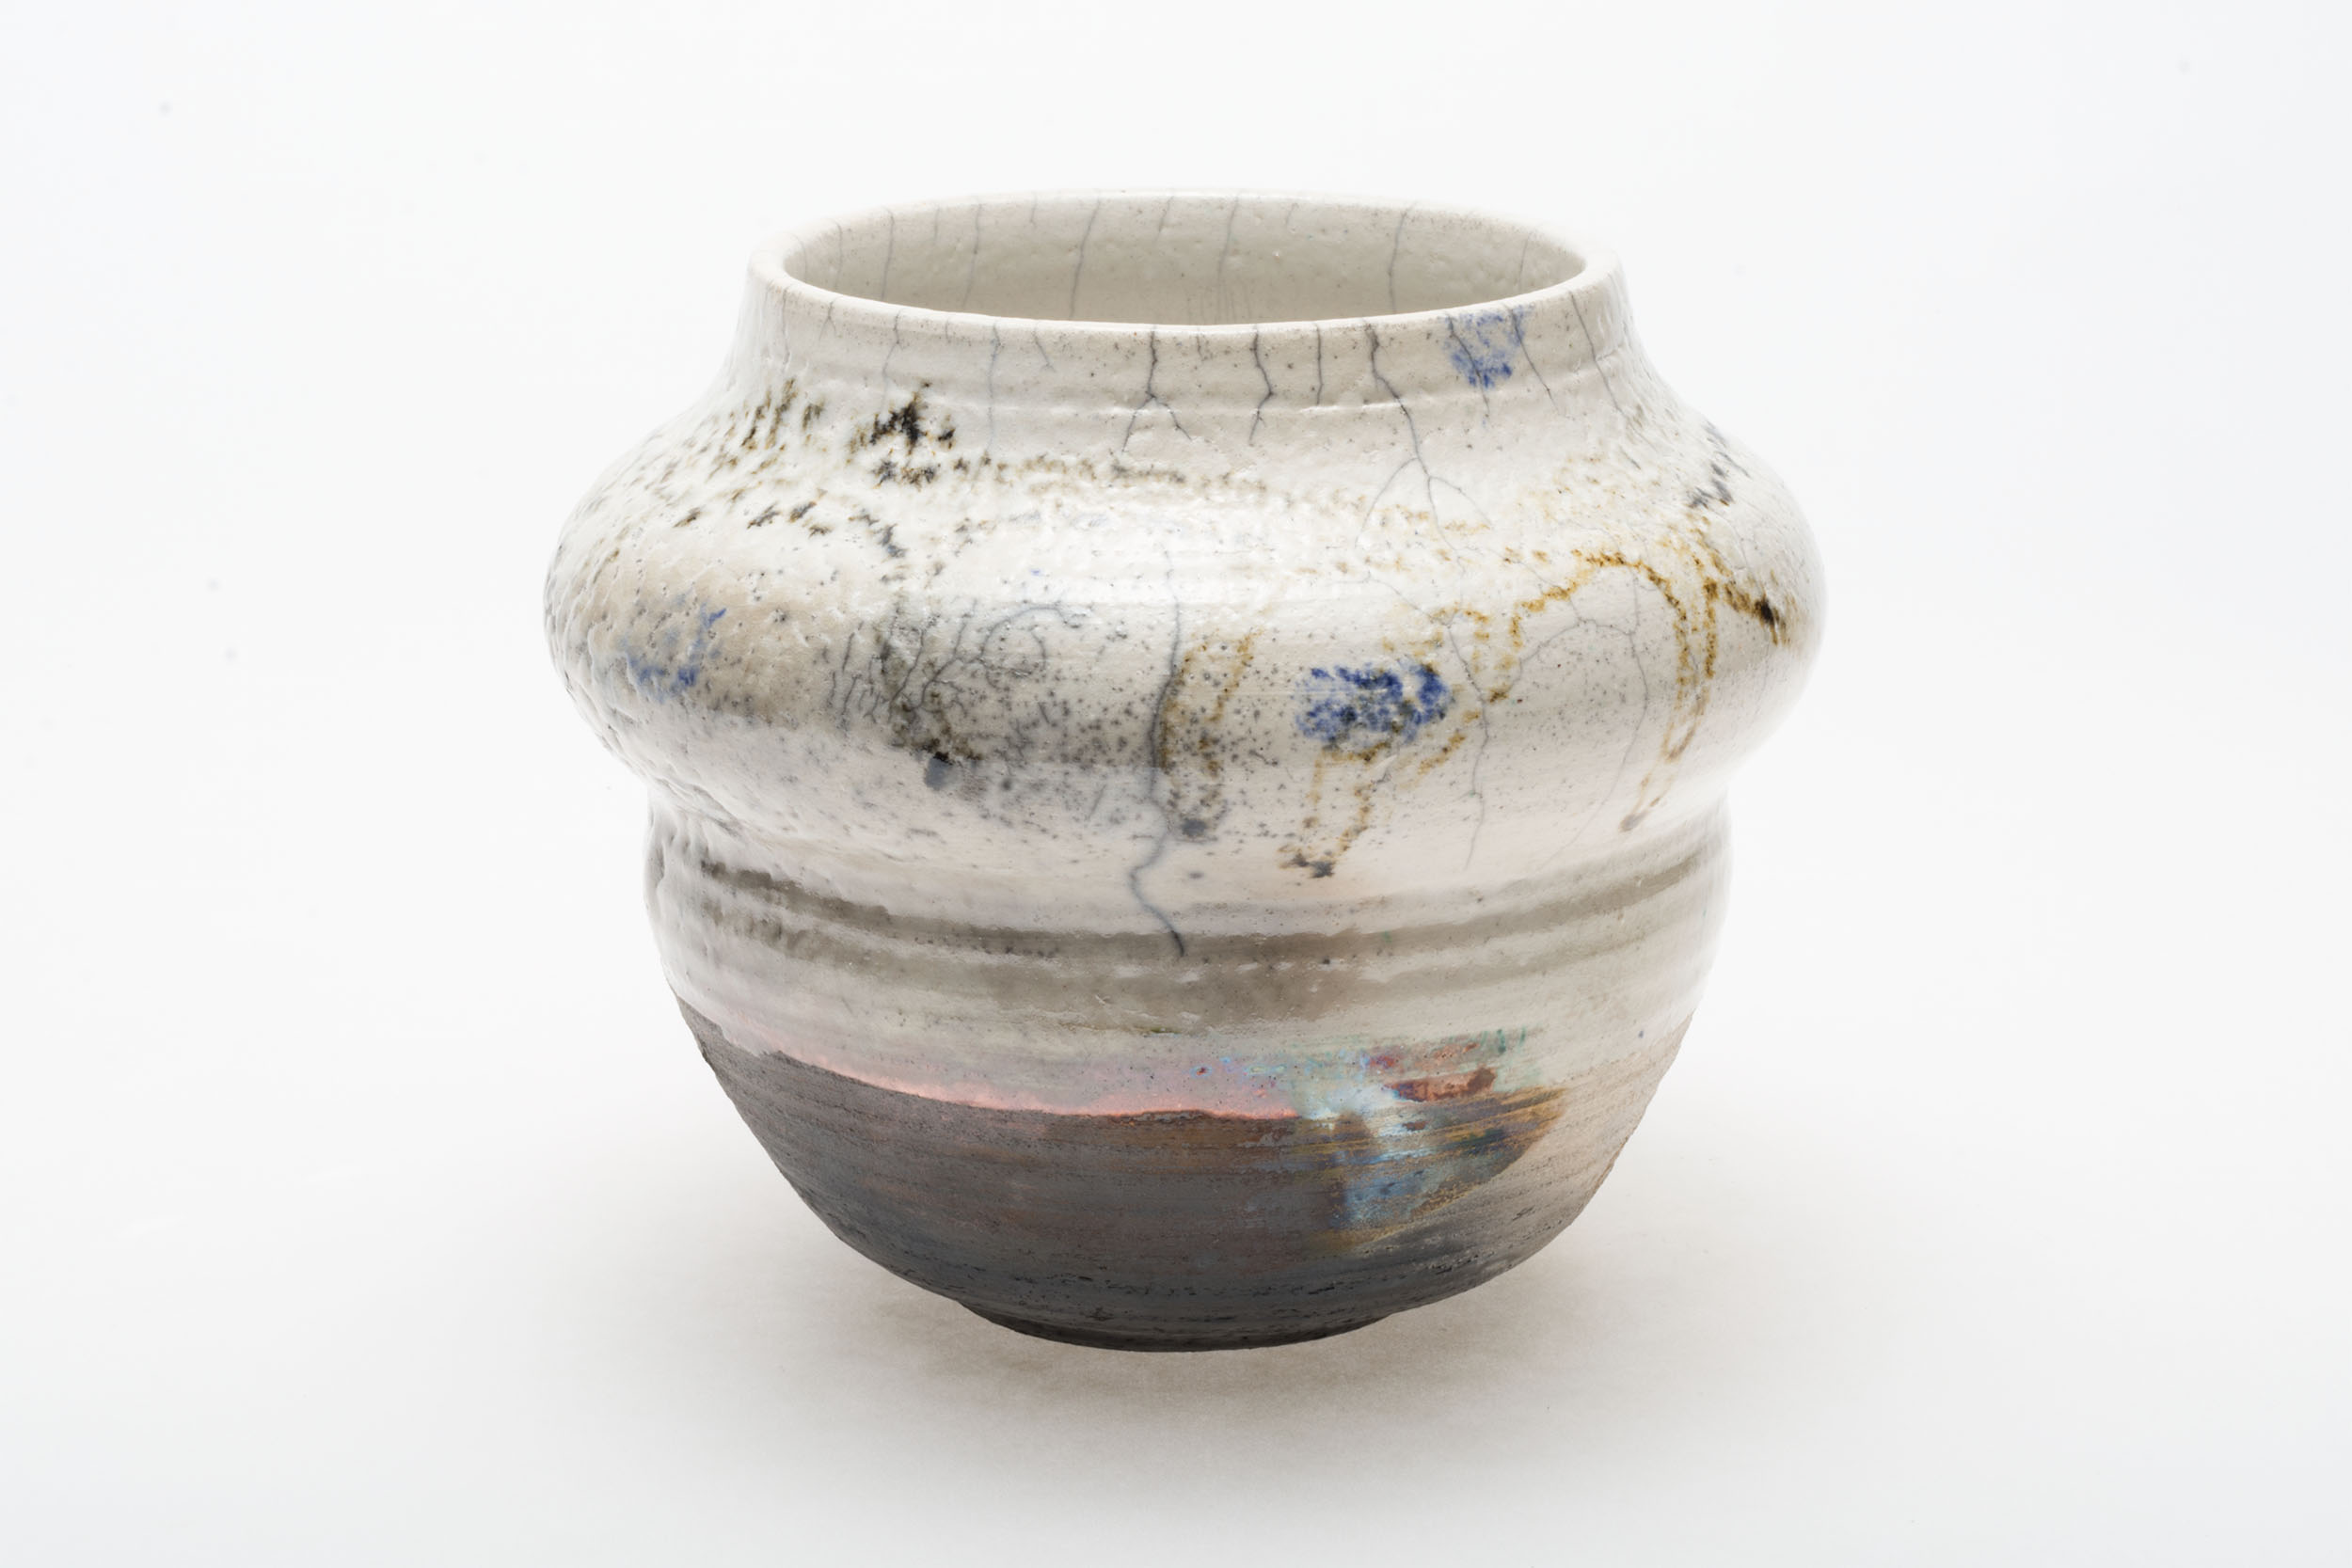
Low fire glazes for ∆06 will also work, but they are formulated for an oxidizing kiln atmosphere, so the colors may not look the way they are originally intended. Blue, black, white and yellow will generally translate, but other colors may flip their nature. Copper greens will become red and iron oxide will go from red to gray. In the example above, copper is red while a glaze with iron has slid to blue-gray. It all depends on what chemical elements create the color in a given glaze. Note the tong mark on the lower left of the bowl in the second image above.

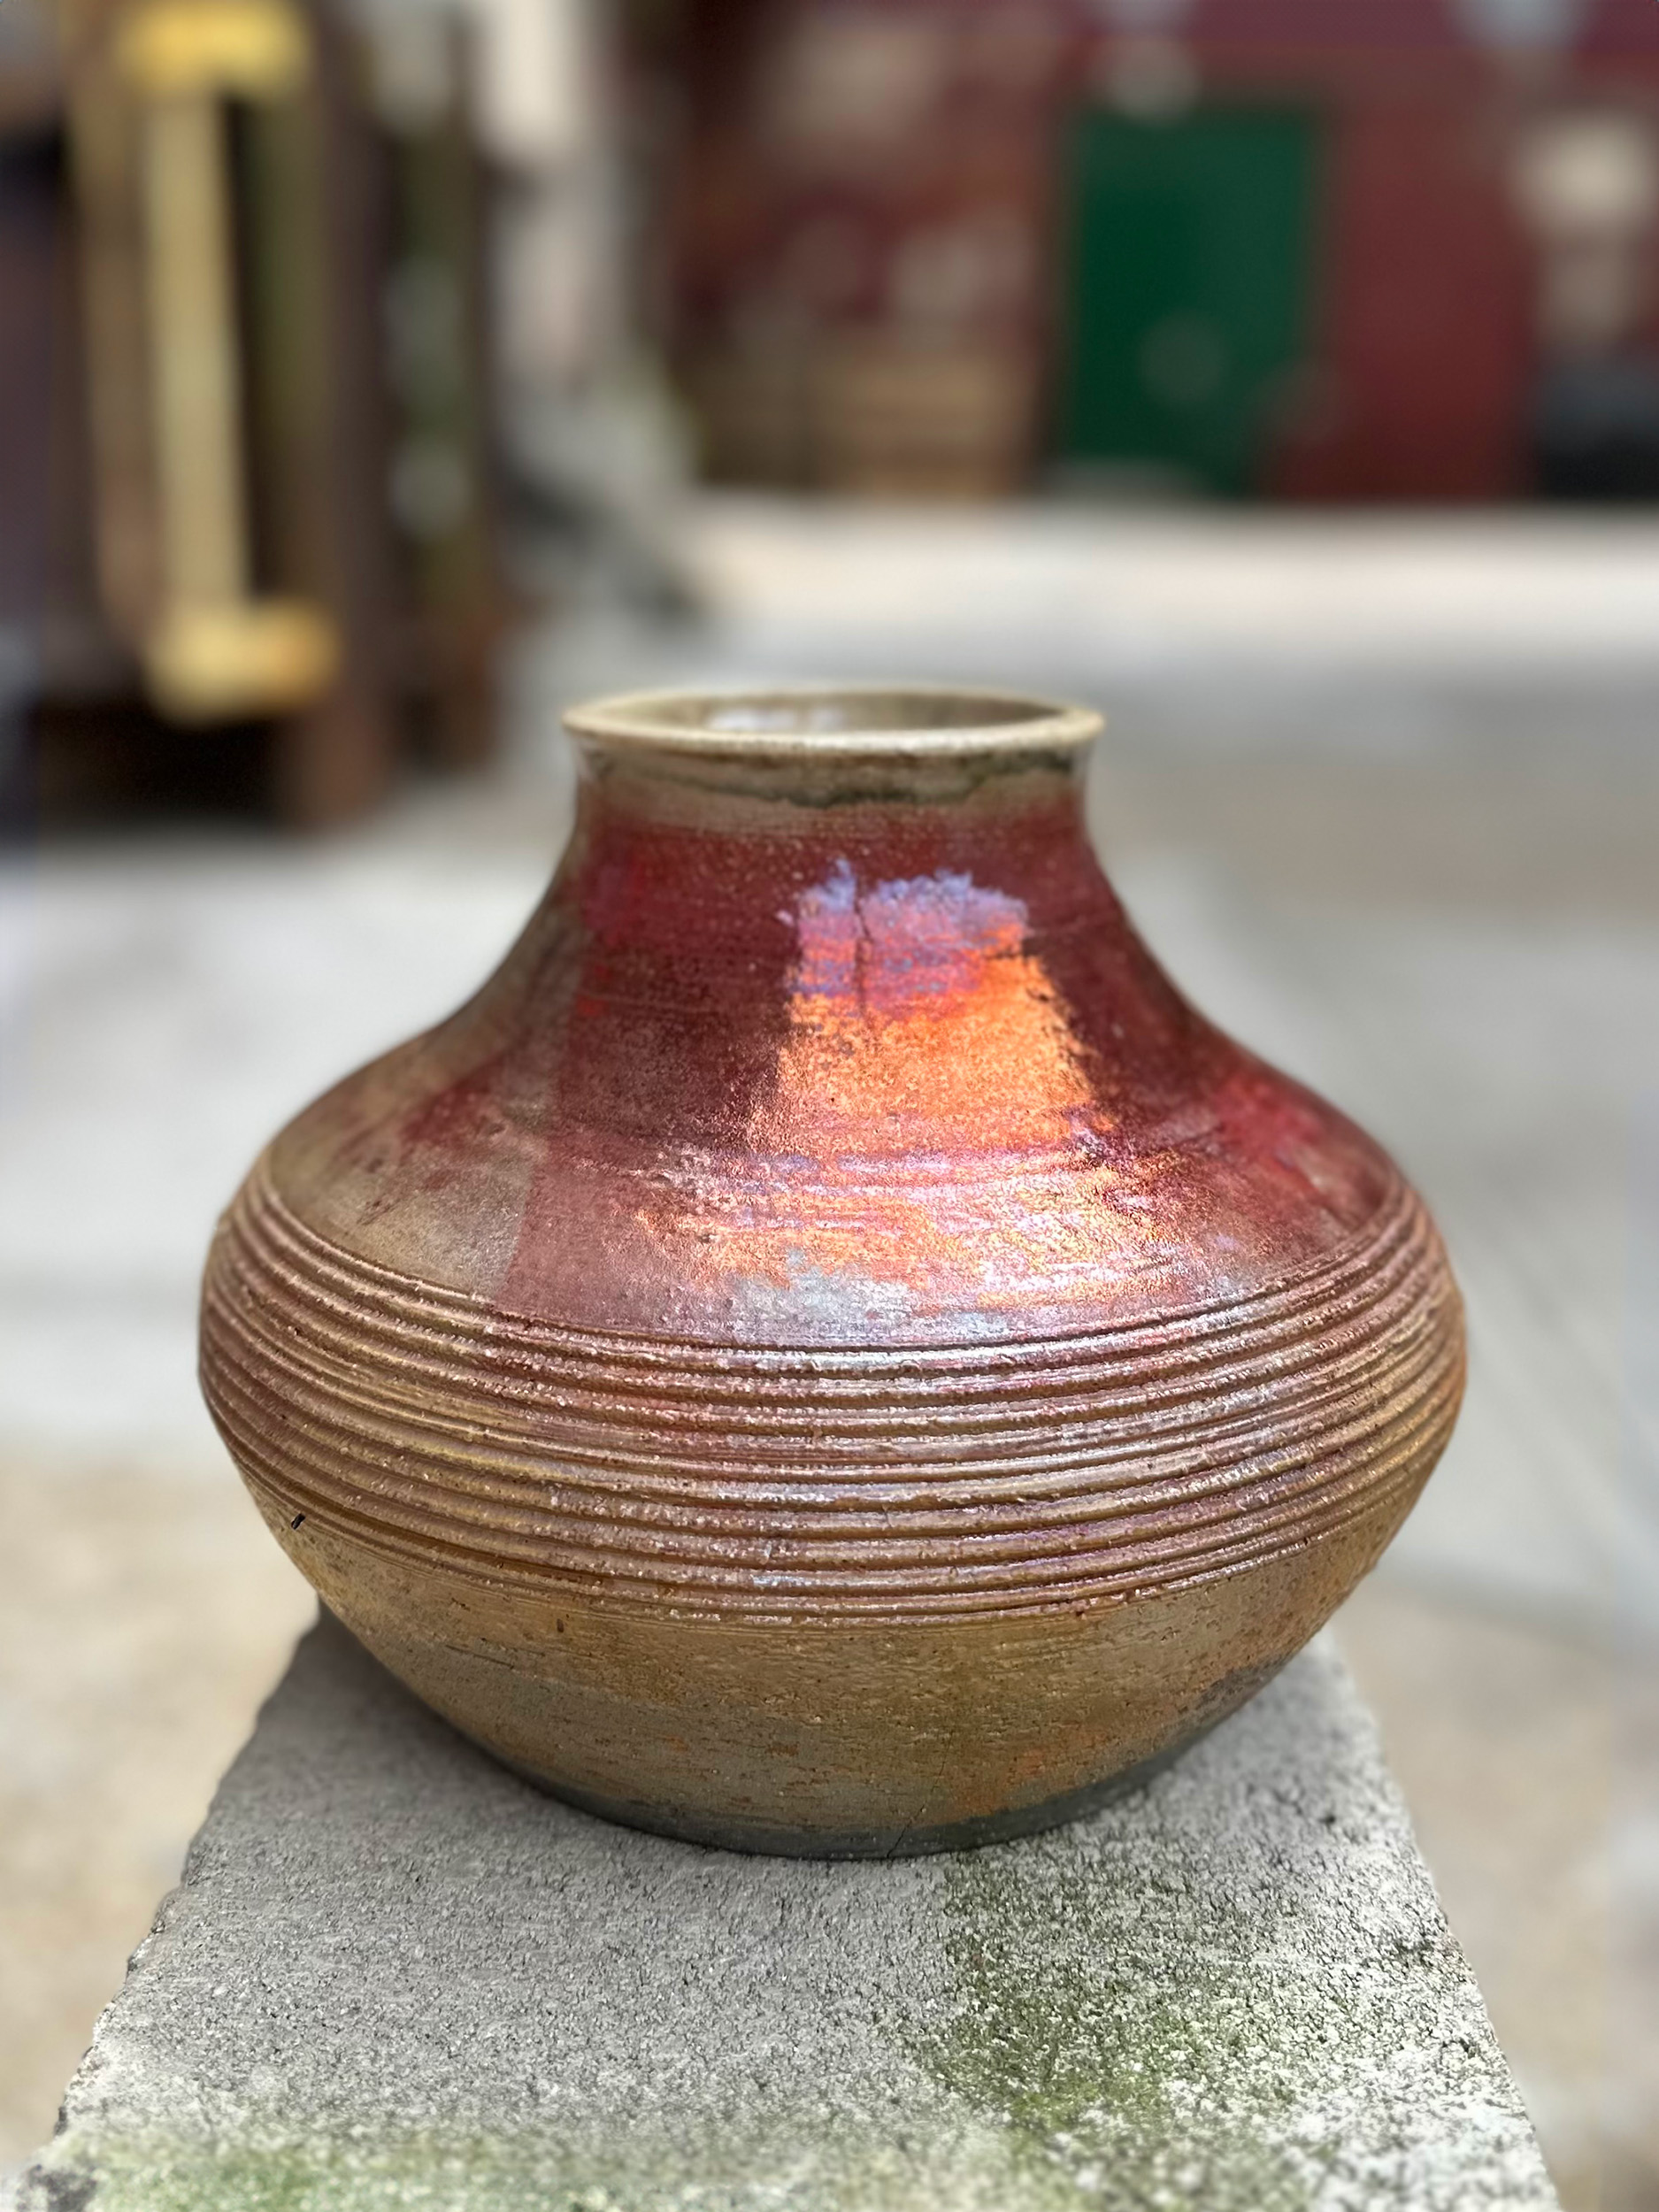
Glazes may be glassy and fluid, or matte. An artist can achieve several glaze textures in a single piece, such as in the example above. The bowl below uses a natural colemanite glaze over iron oxide and yellow ochre washes for both gloss and matte results.
Glaze in Secondary Reduction
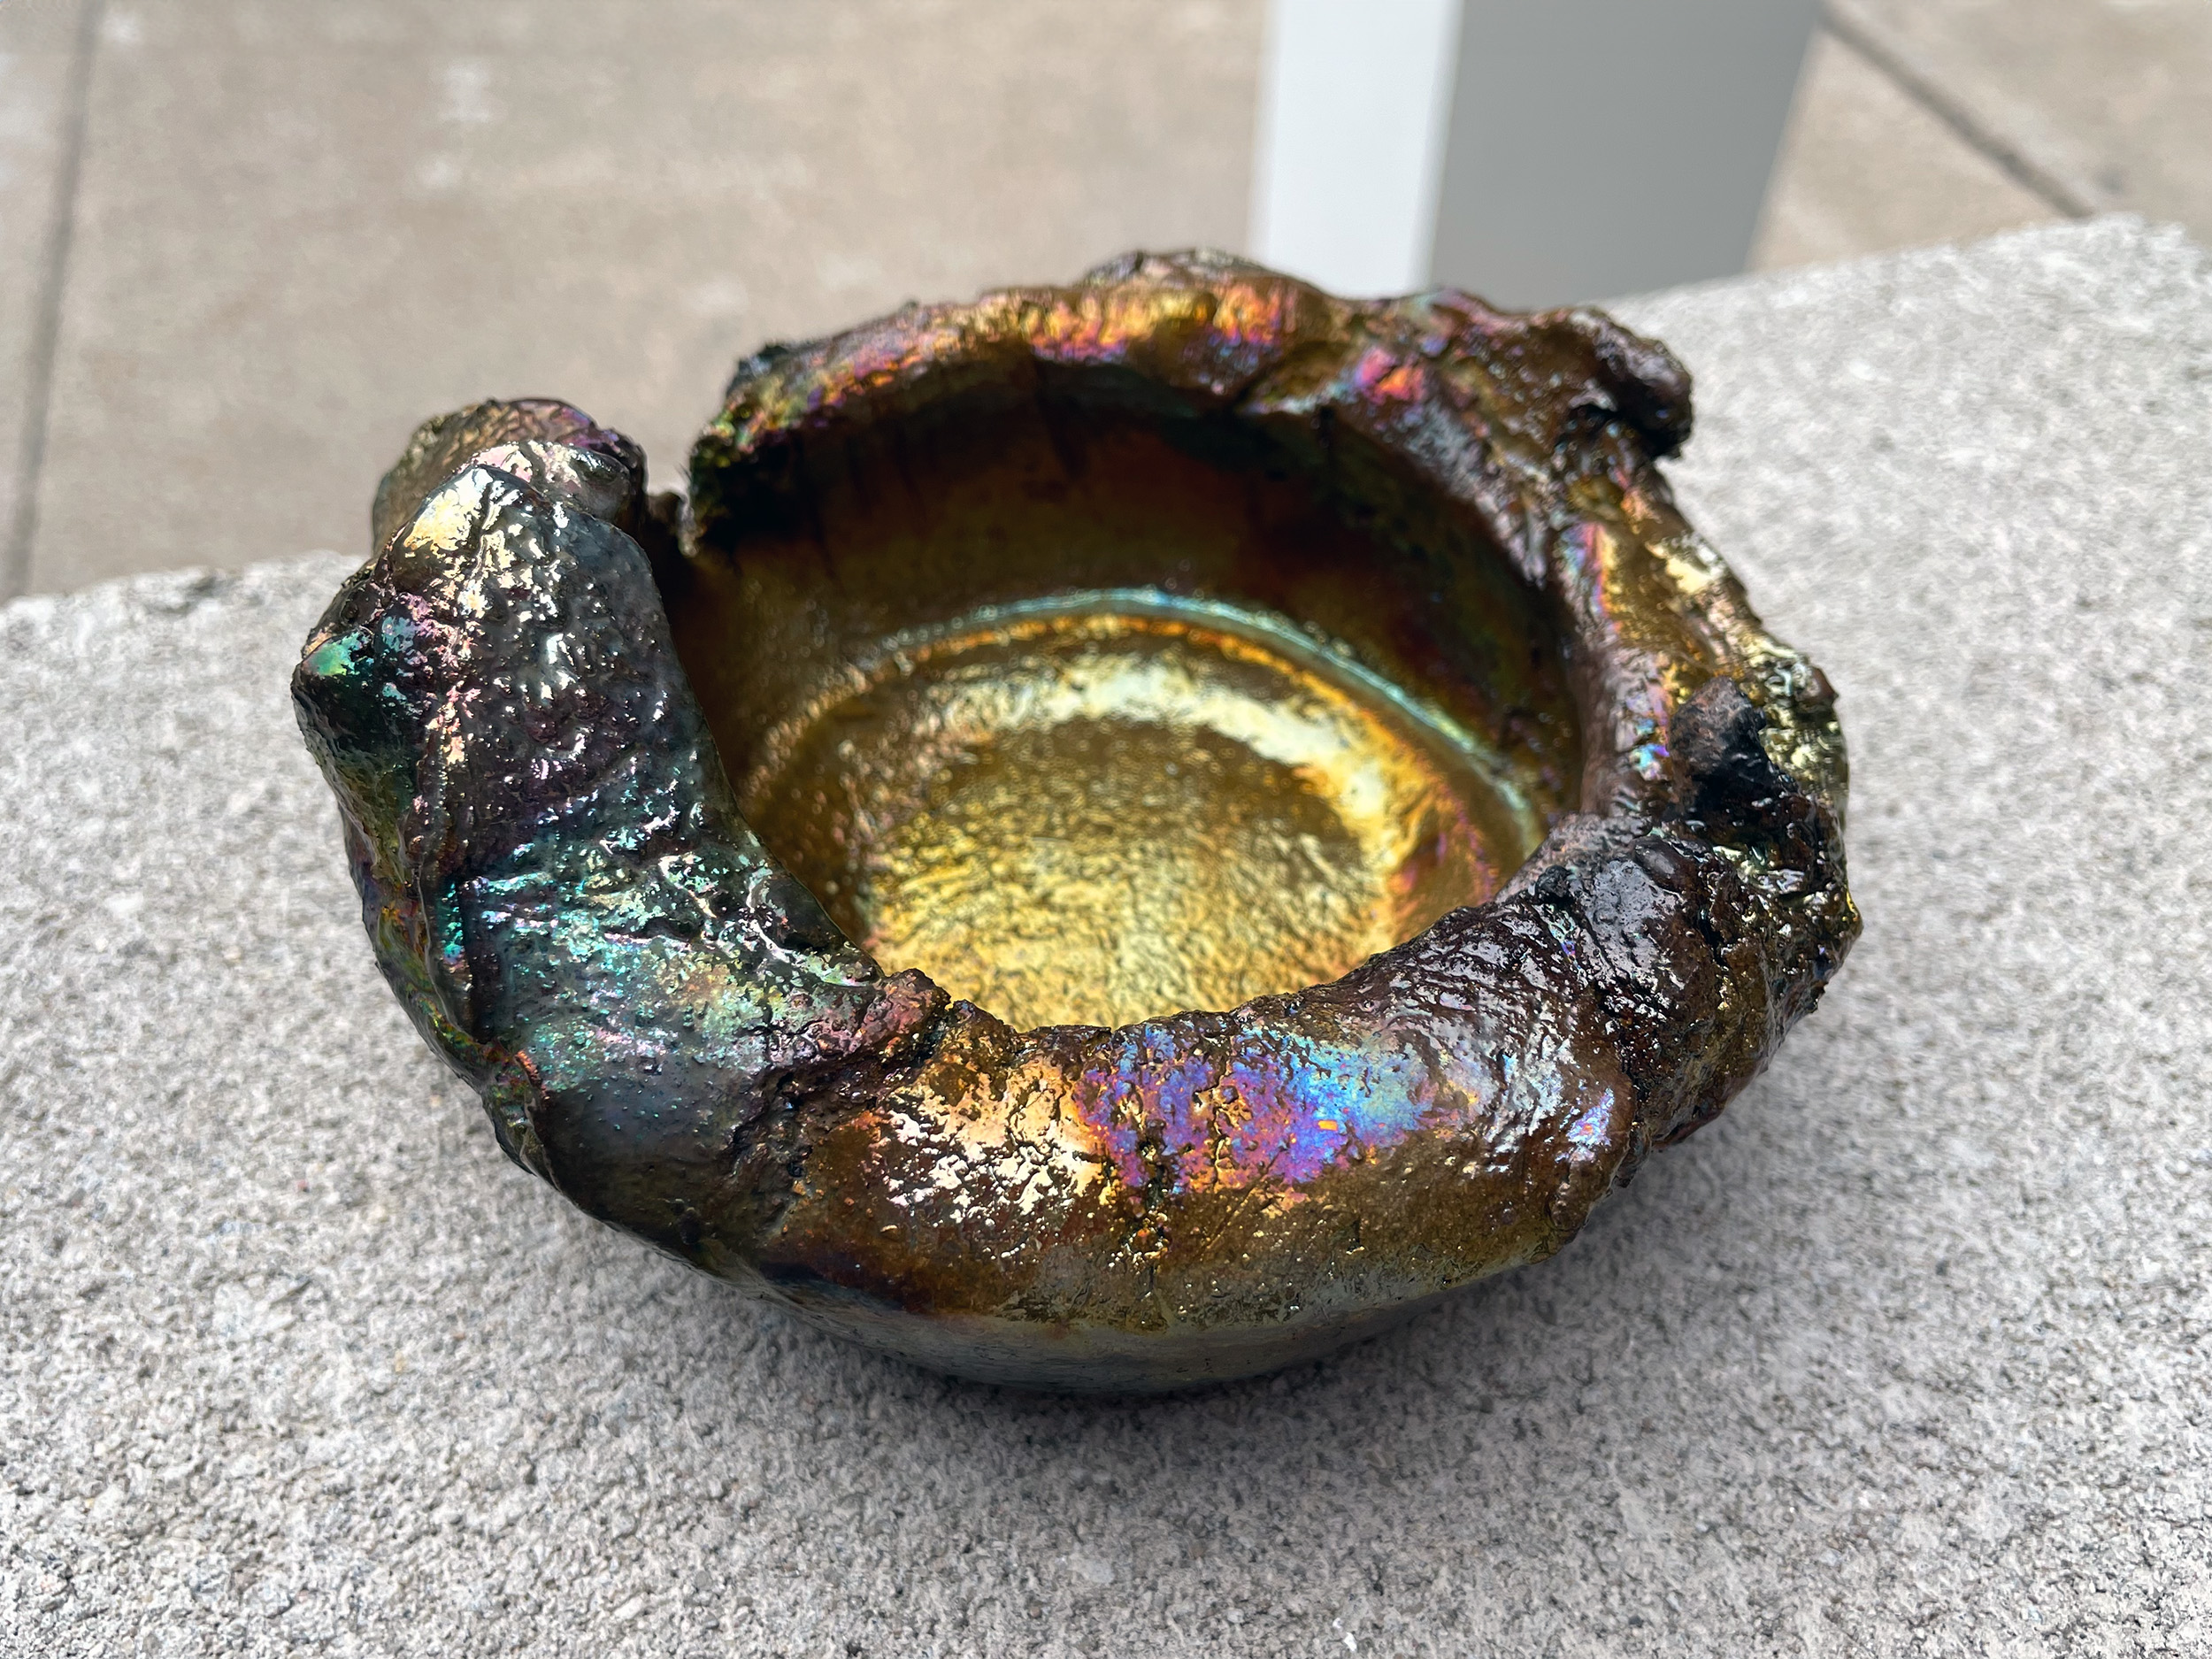
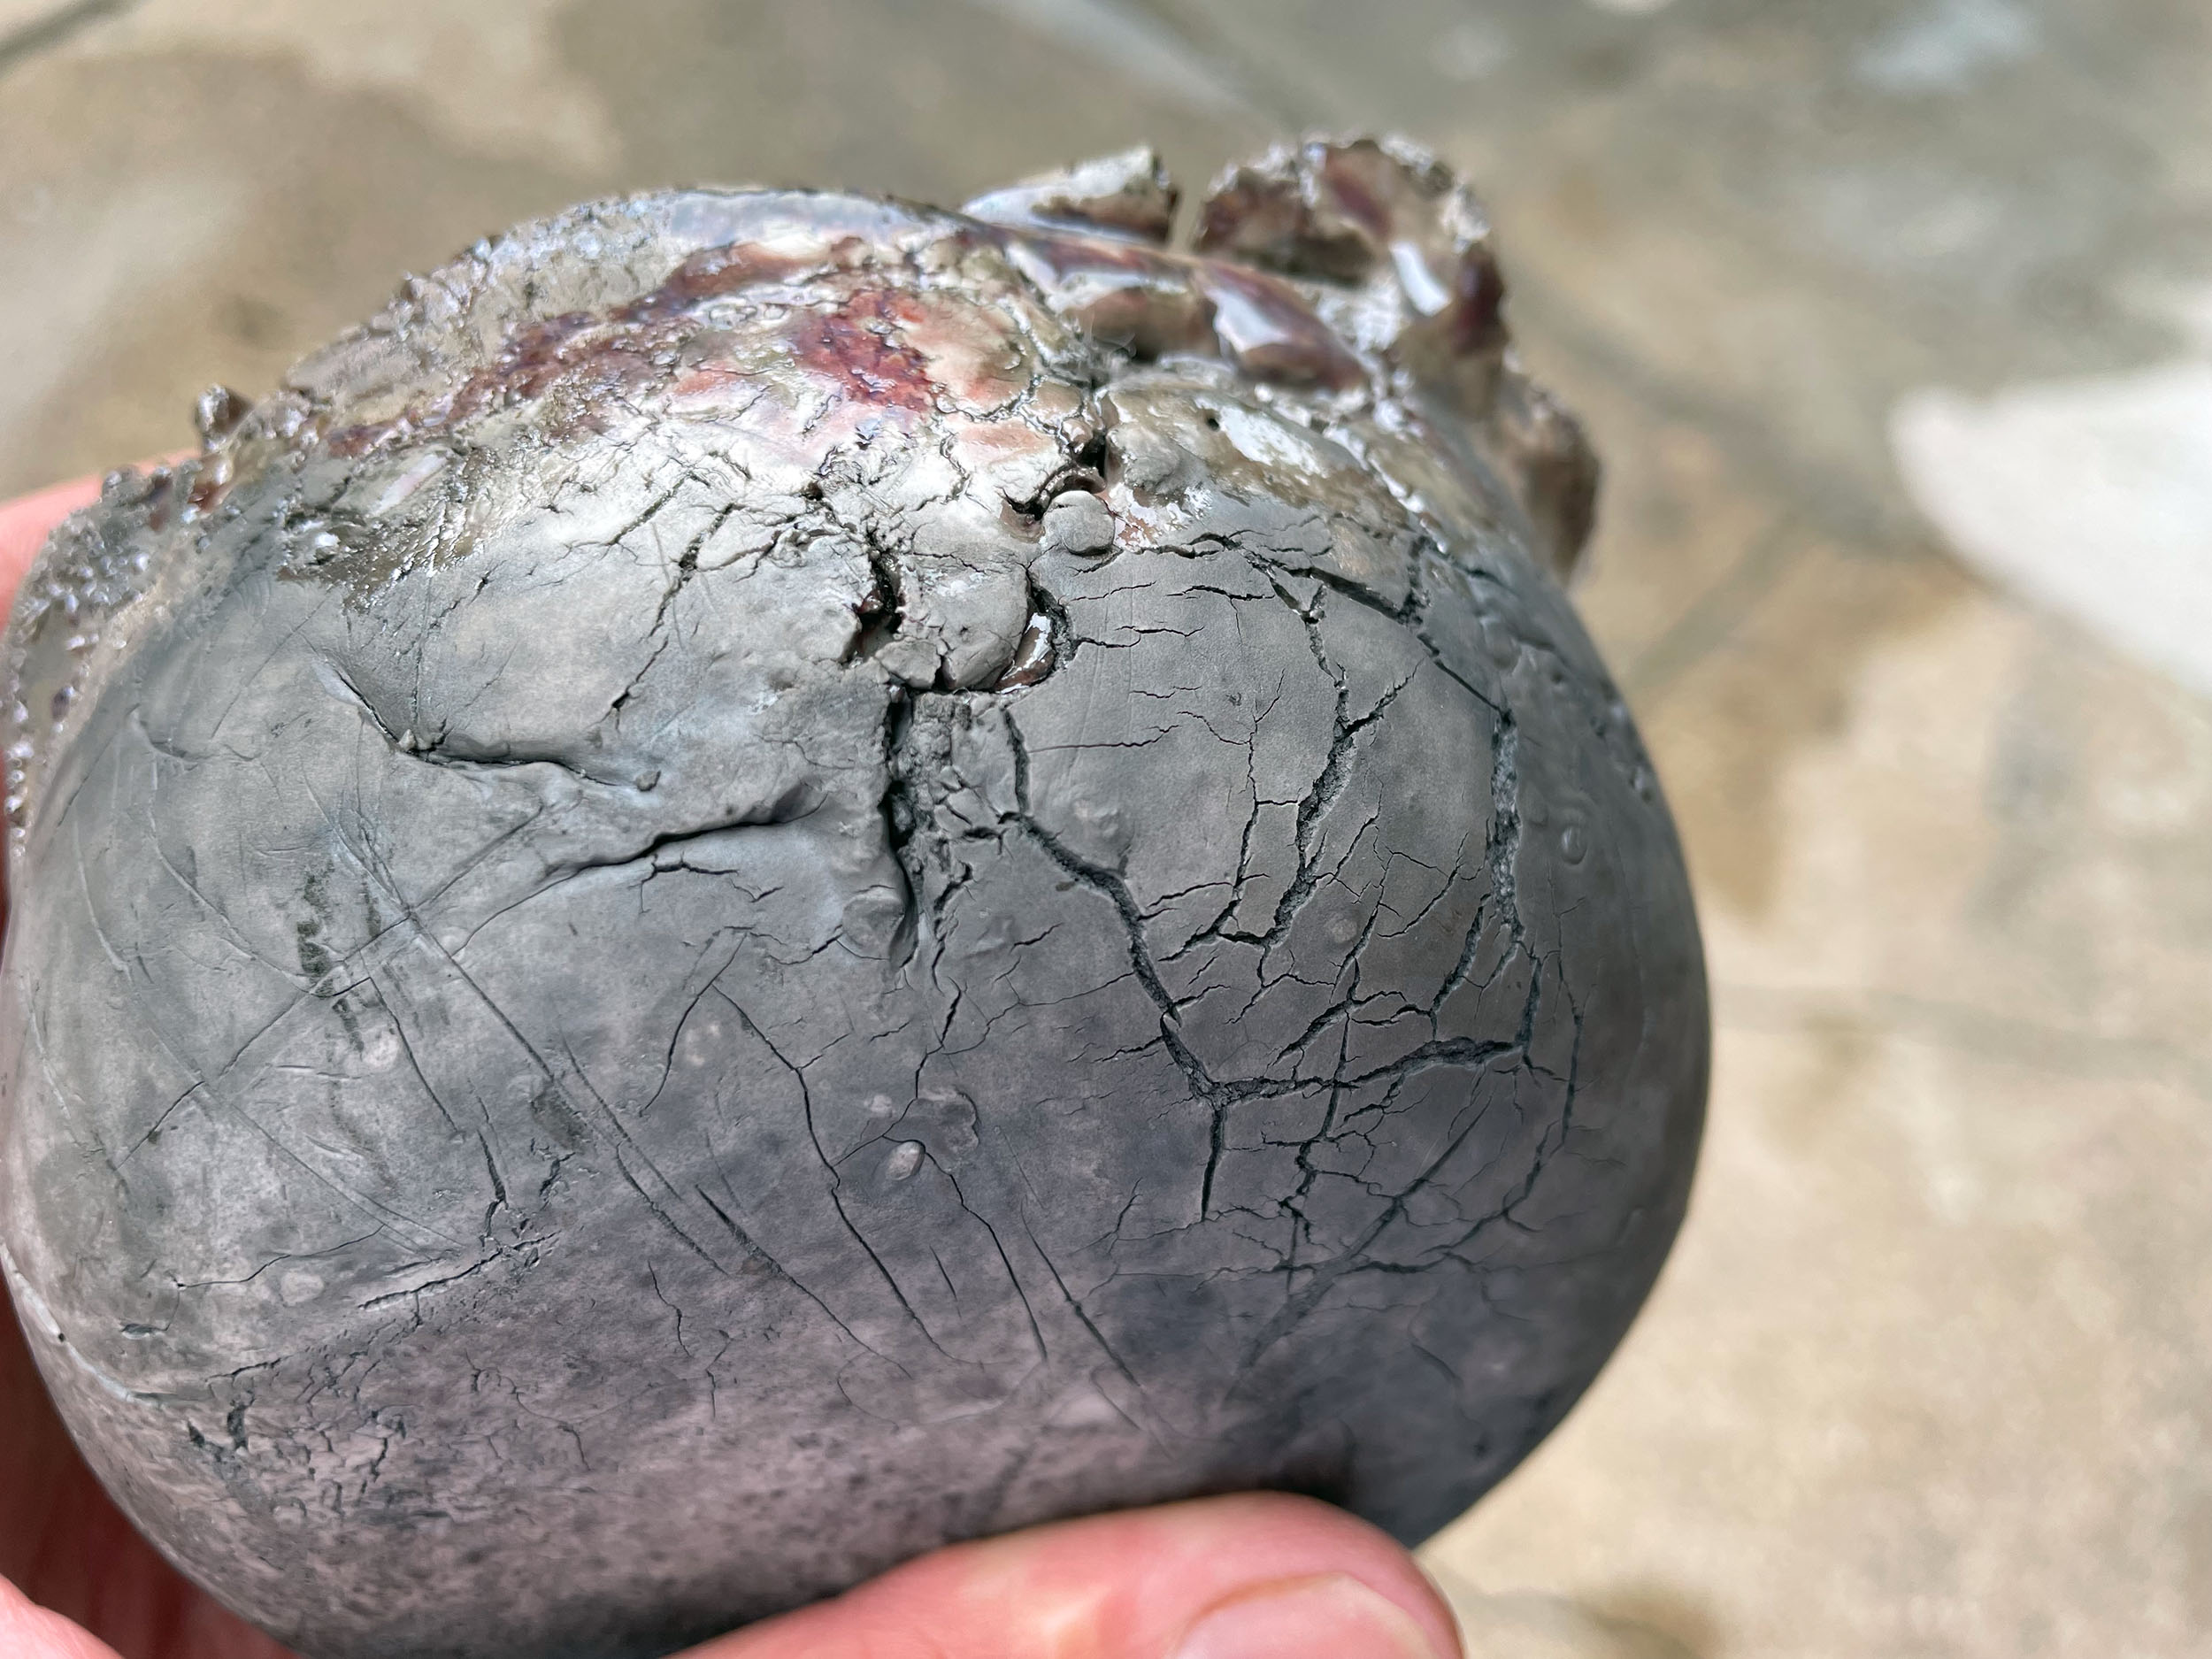
The presence of glaze will block carbon from entering the body in the glazed area during secondary reduction. Unglazed areas will turn black. A clear glaze will show the color of the fired clay body. Raku glazes use metallic elements to create not only color but different effects which occur with slight variations in the presence of oxygen. This is why we smother the ware in carbon-rich leaves, sawdust, or paper. Simply put, the smoke pushes away oxygen. For example, copper is green when oxidized but is red-brown in reduction. Copper and other metals present in glazes can introduce wildly dramatic shifts in color as seen in this pinch-formed bowl below.
Crackle Effects
Crackle glazes work best by allowing brief air-cooling or a quick dip in water to shatter the glass surface of the glaze. The artist then places the ware in an immersion of combustible material to allow carbon to enter the cracks. This makes the cracks really stand out visually.
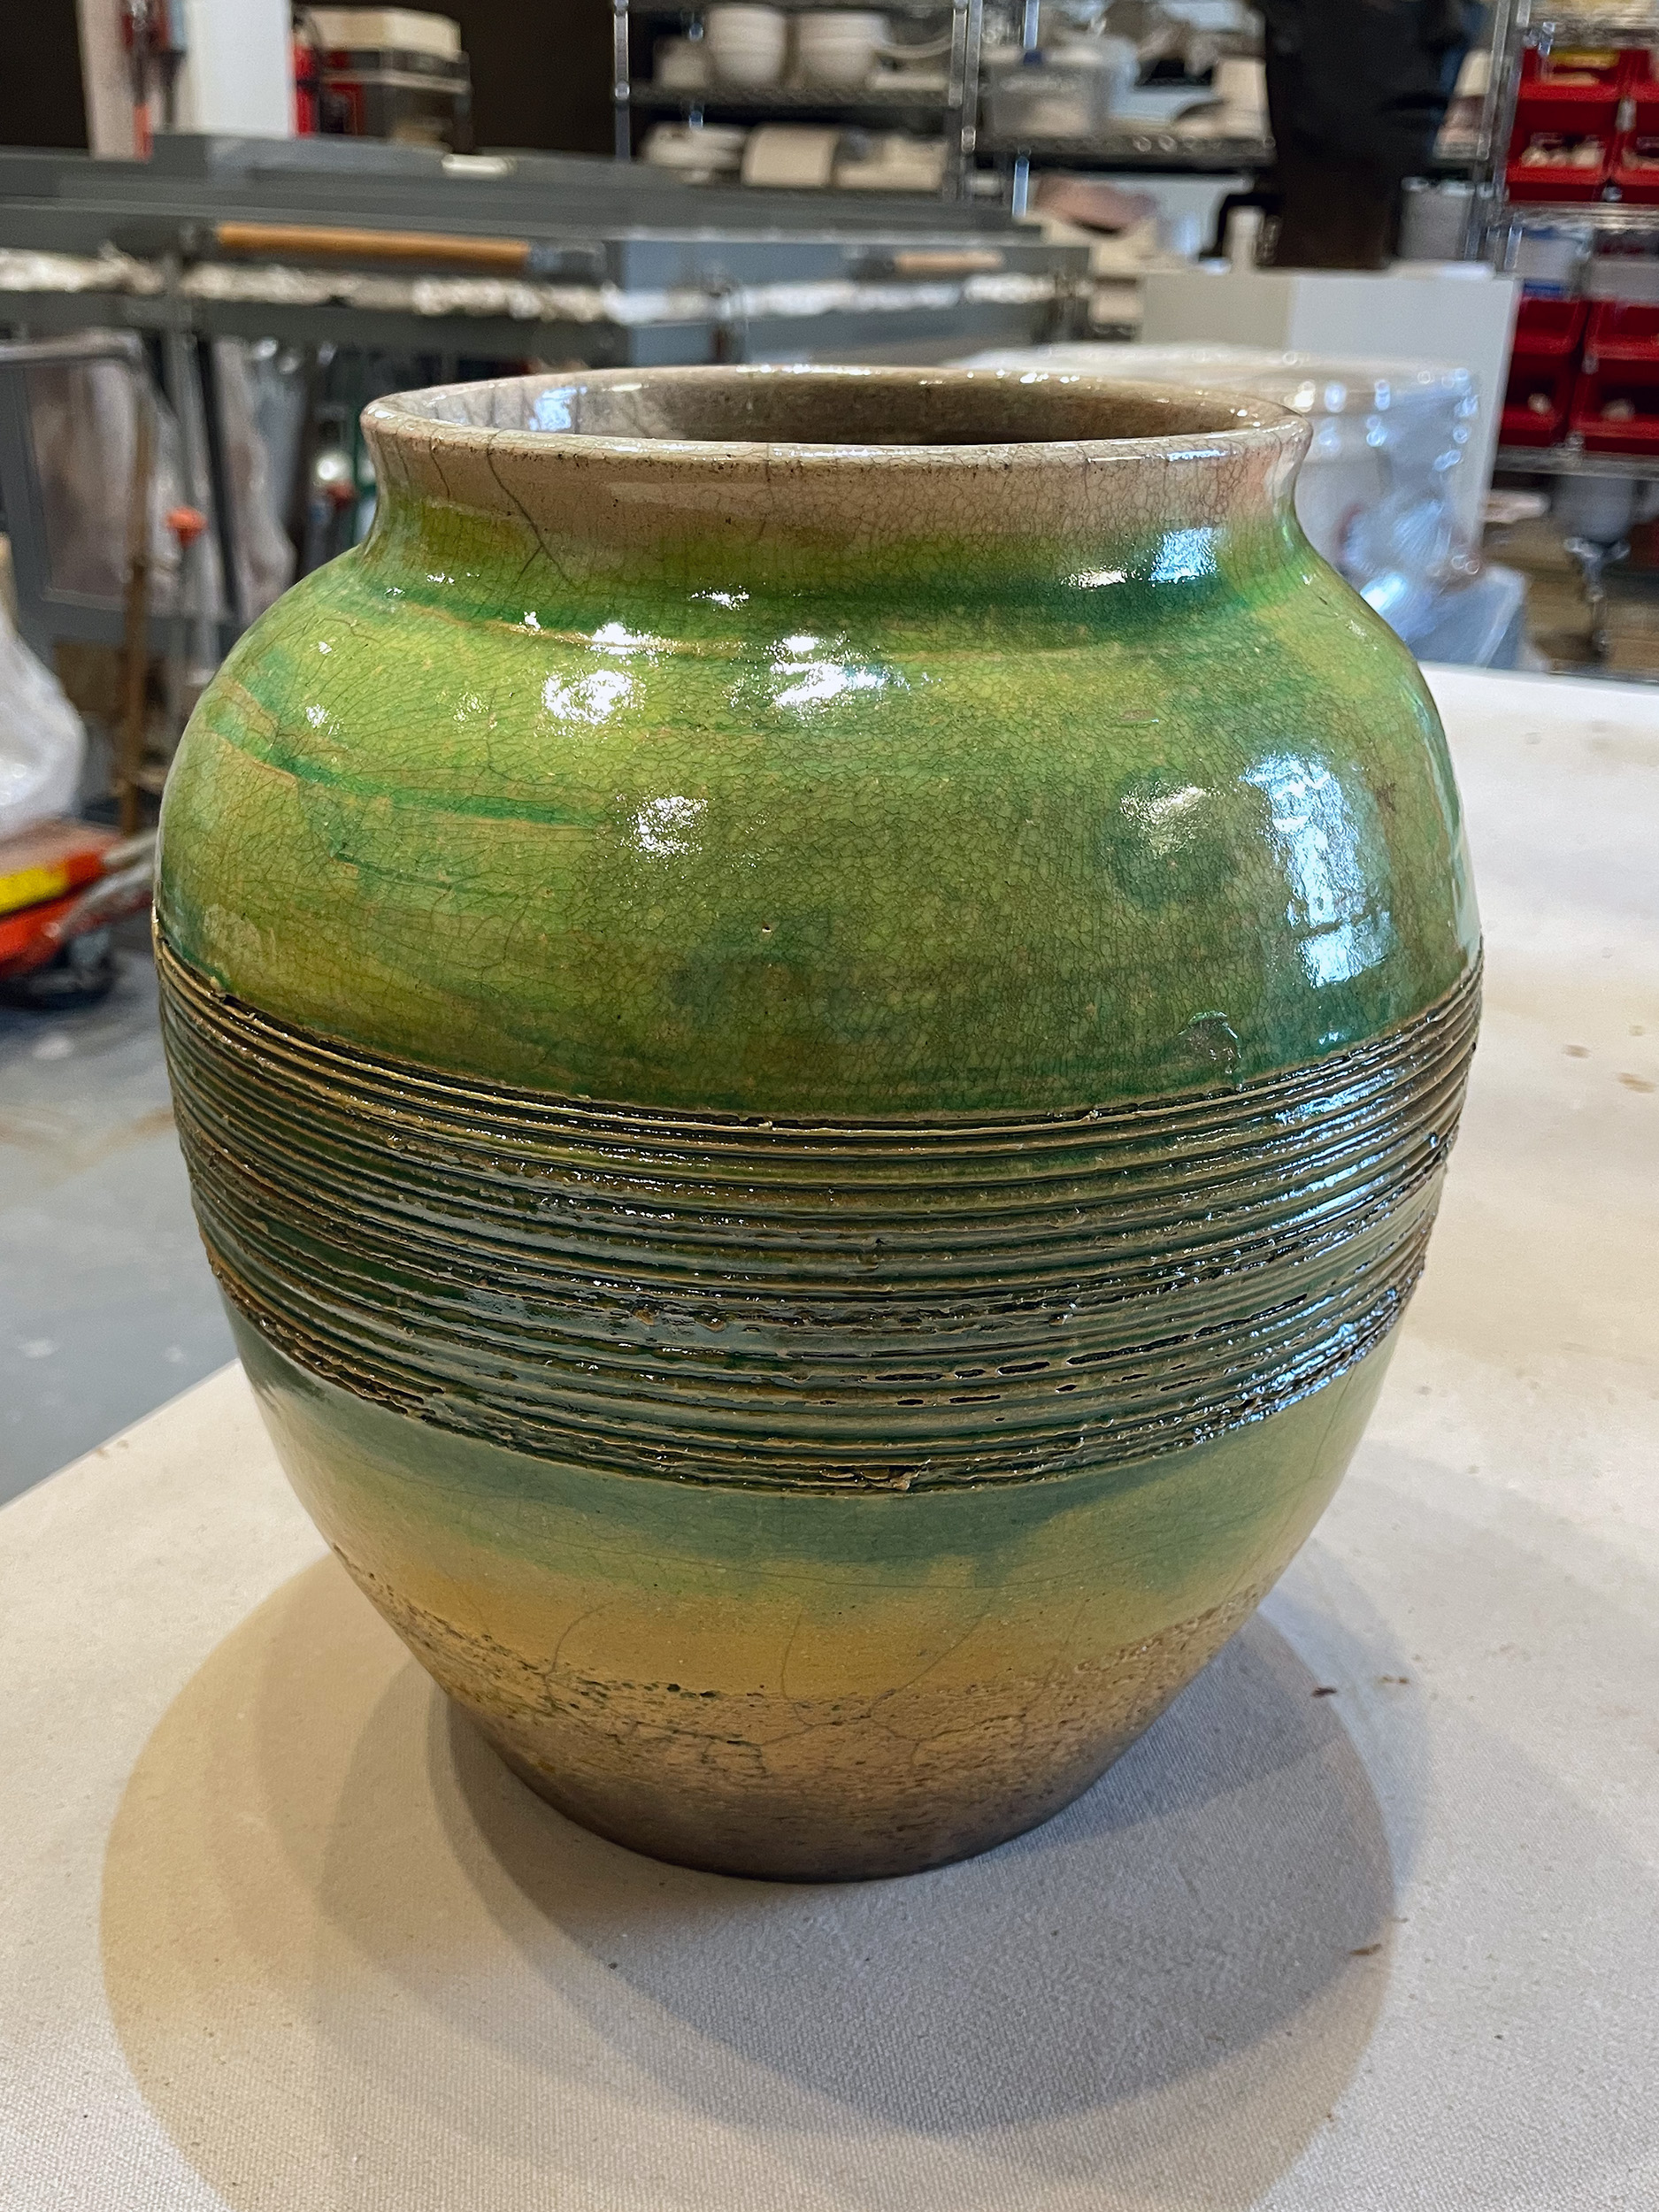
As a general rule, crackle-formulated glazes will almost always exhibit cracking, but the artist’s decisions can influence the quality of the cracks. For instance, finer cracks result from a spray or rapid plunge into water, compared to a vessel quickly moved from the kiln to a closed container. Once again, note the tong mark on the green vase, just above the raked decoration.
To maximize the effects of a reactive crackle glaze, a reduction atmosphere may also be necessary. Even some white Raku glazes have ingredients that will produce metallic silver or other subtle color variations.
Other Considerations
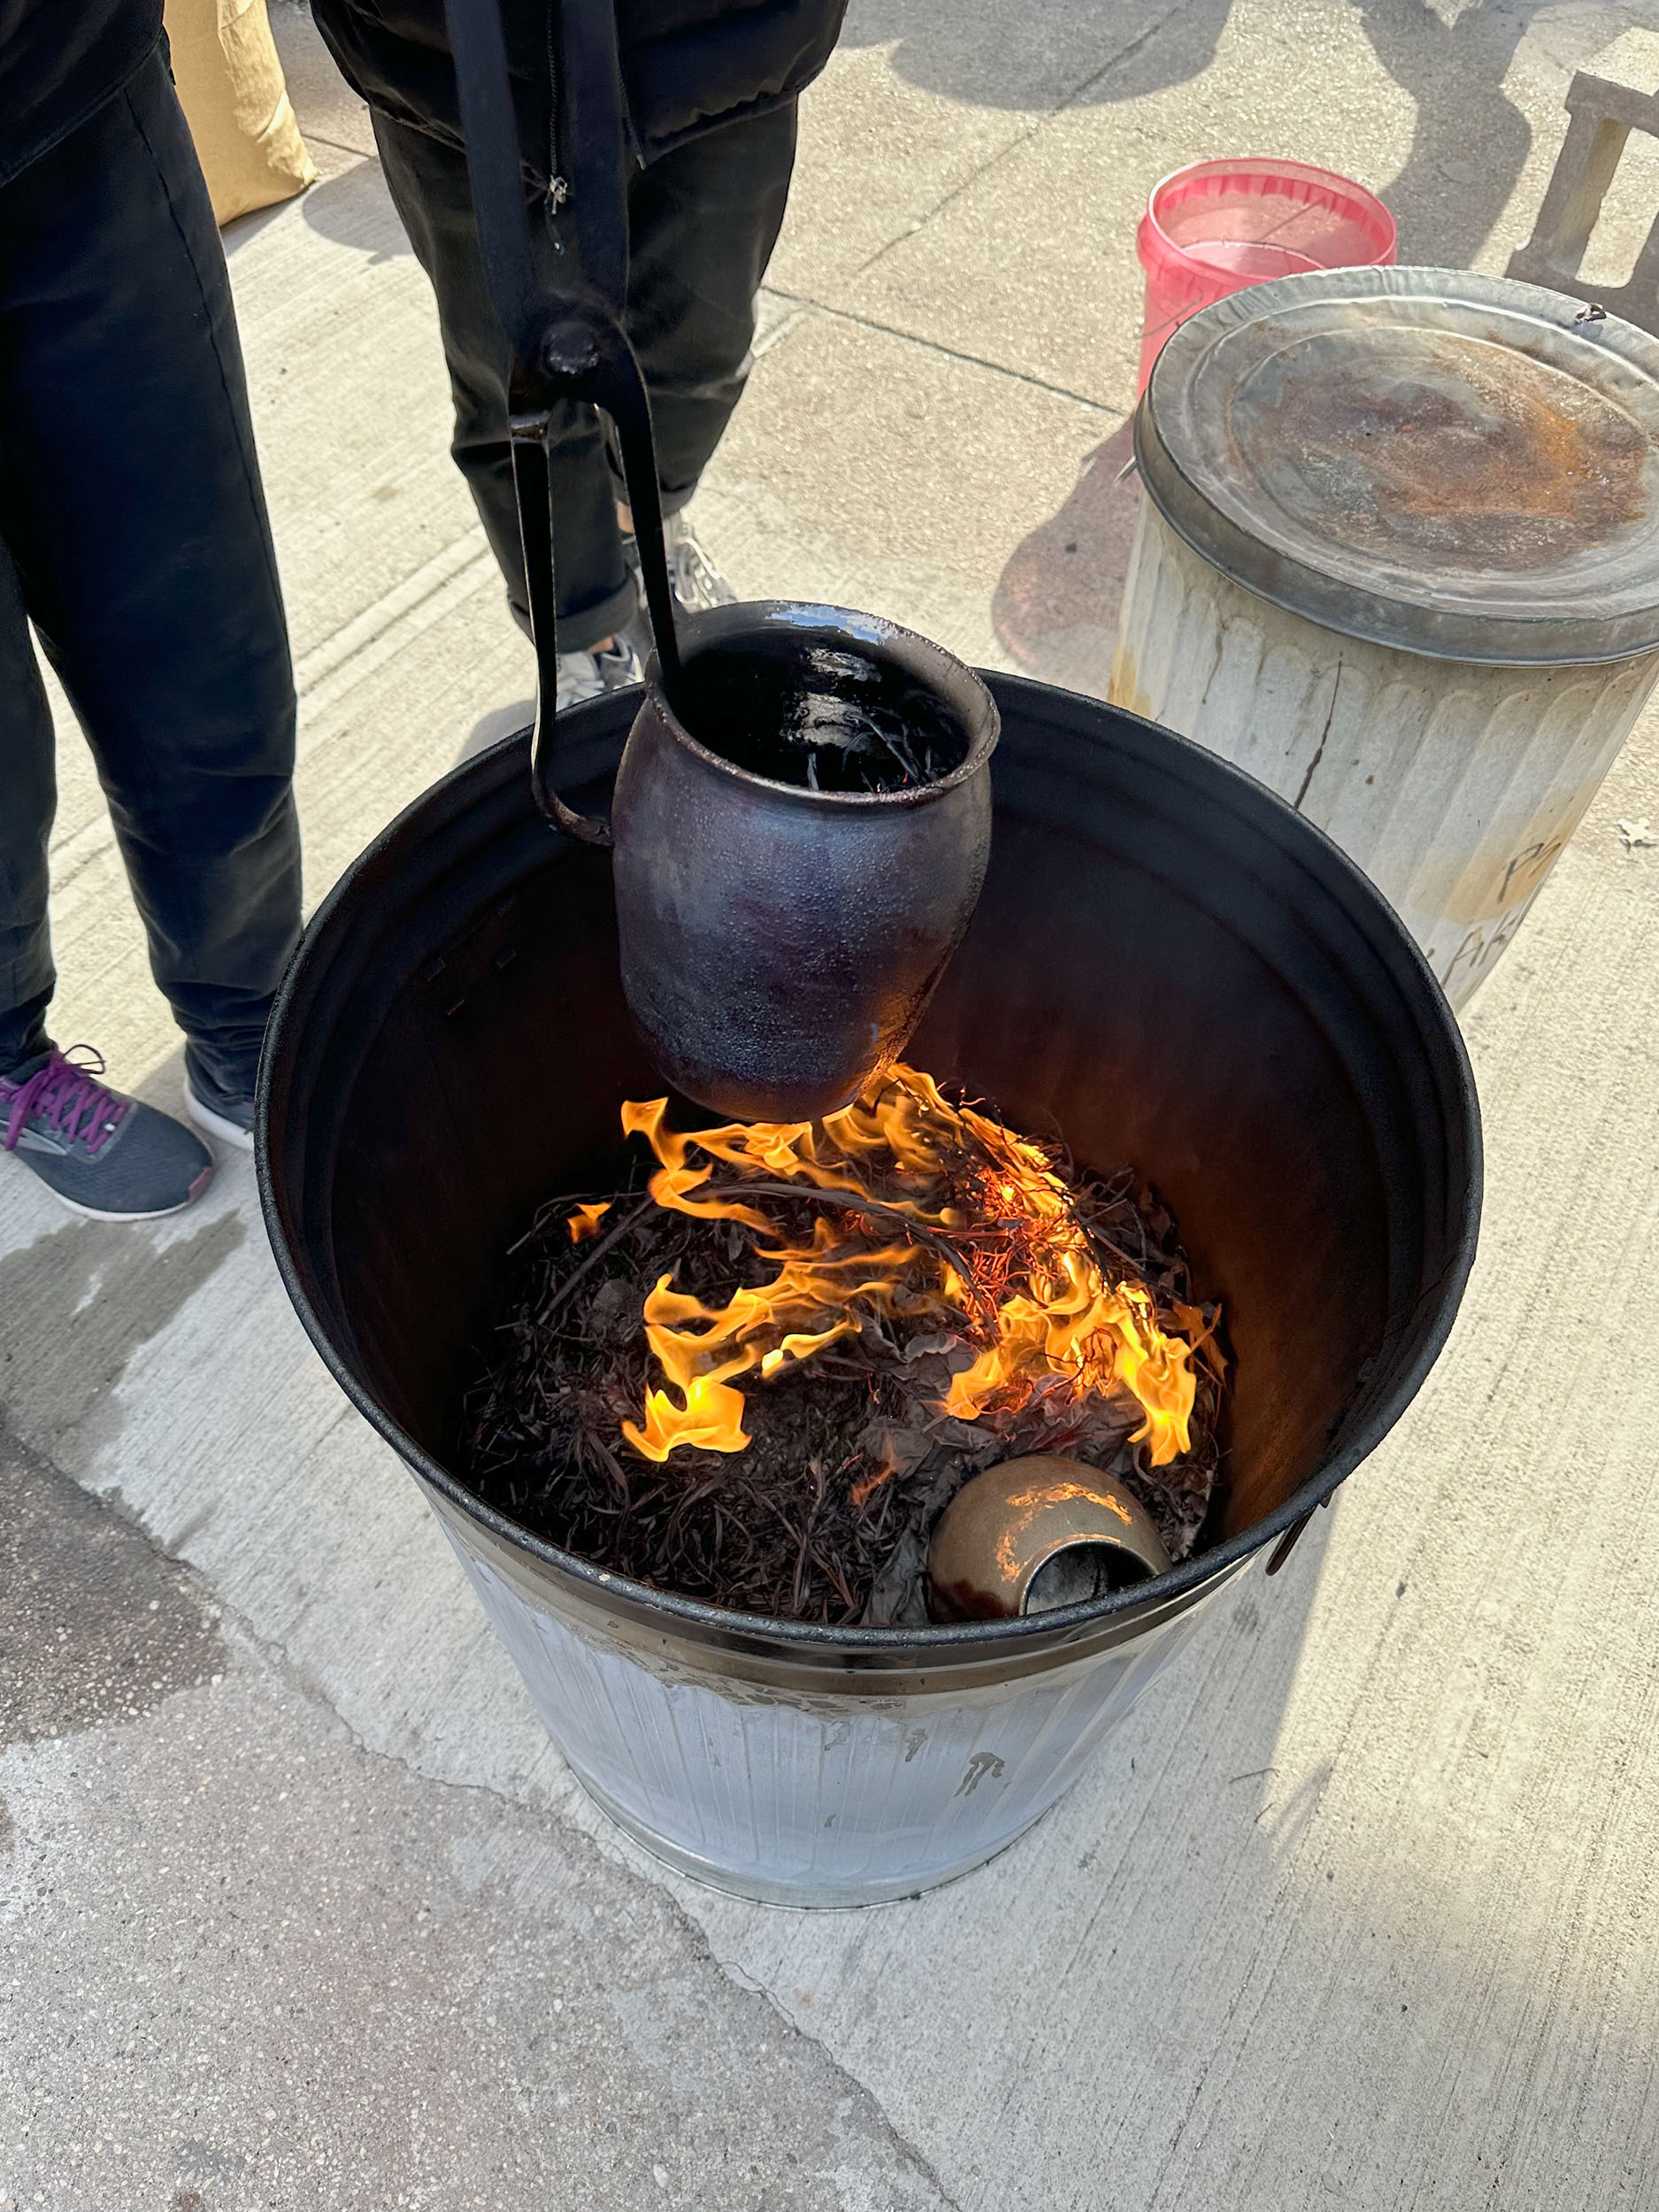
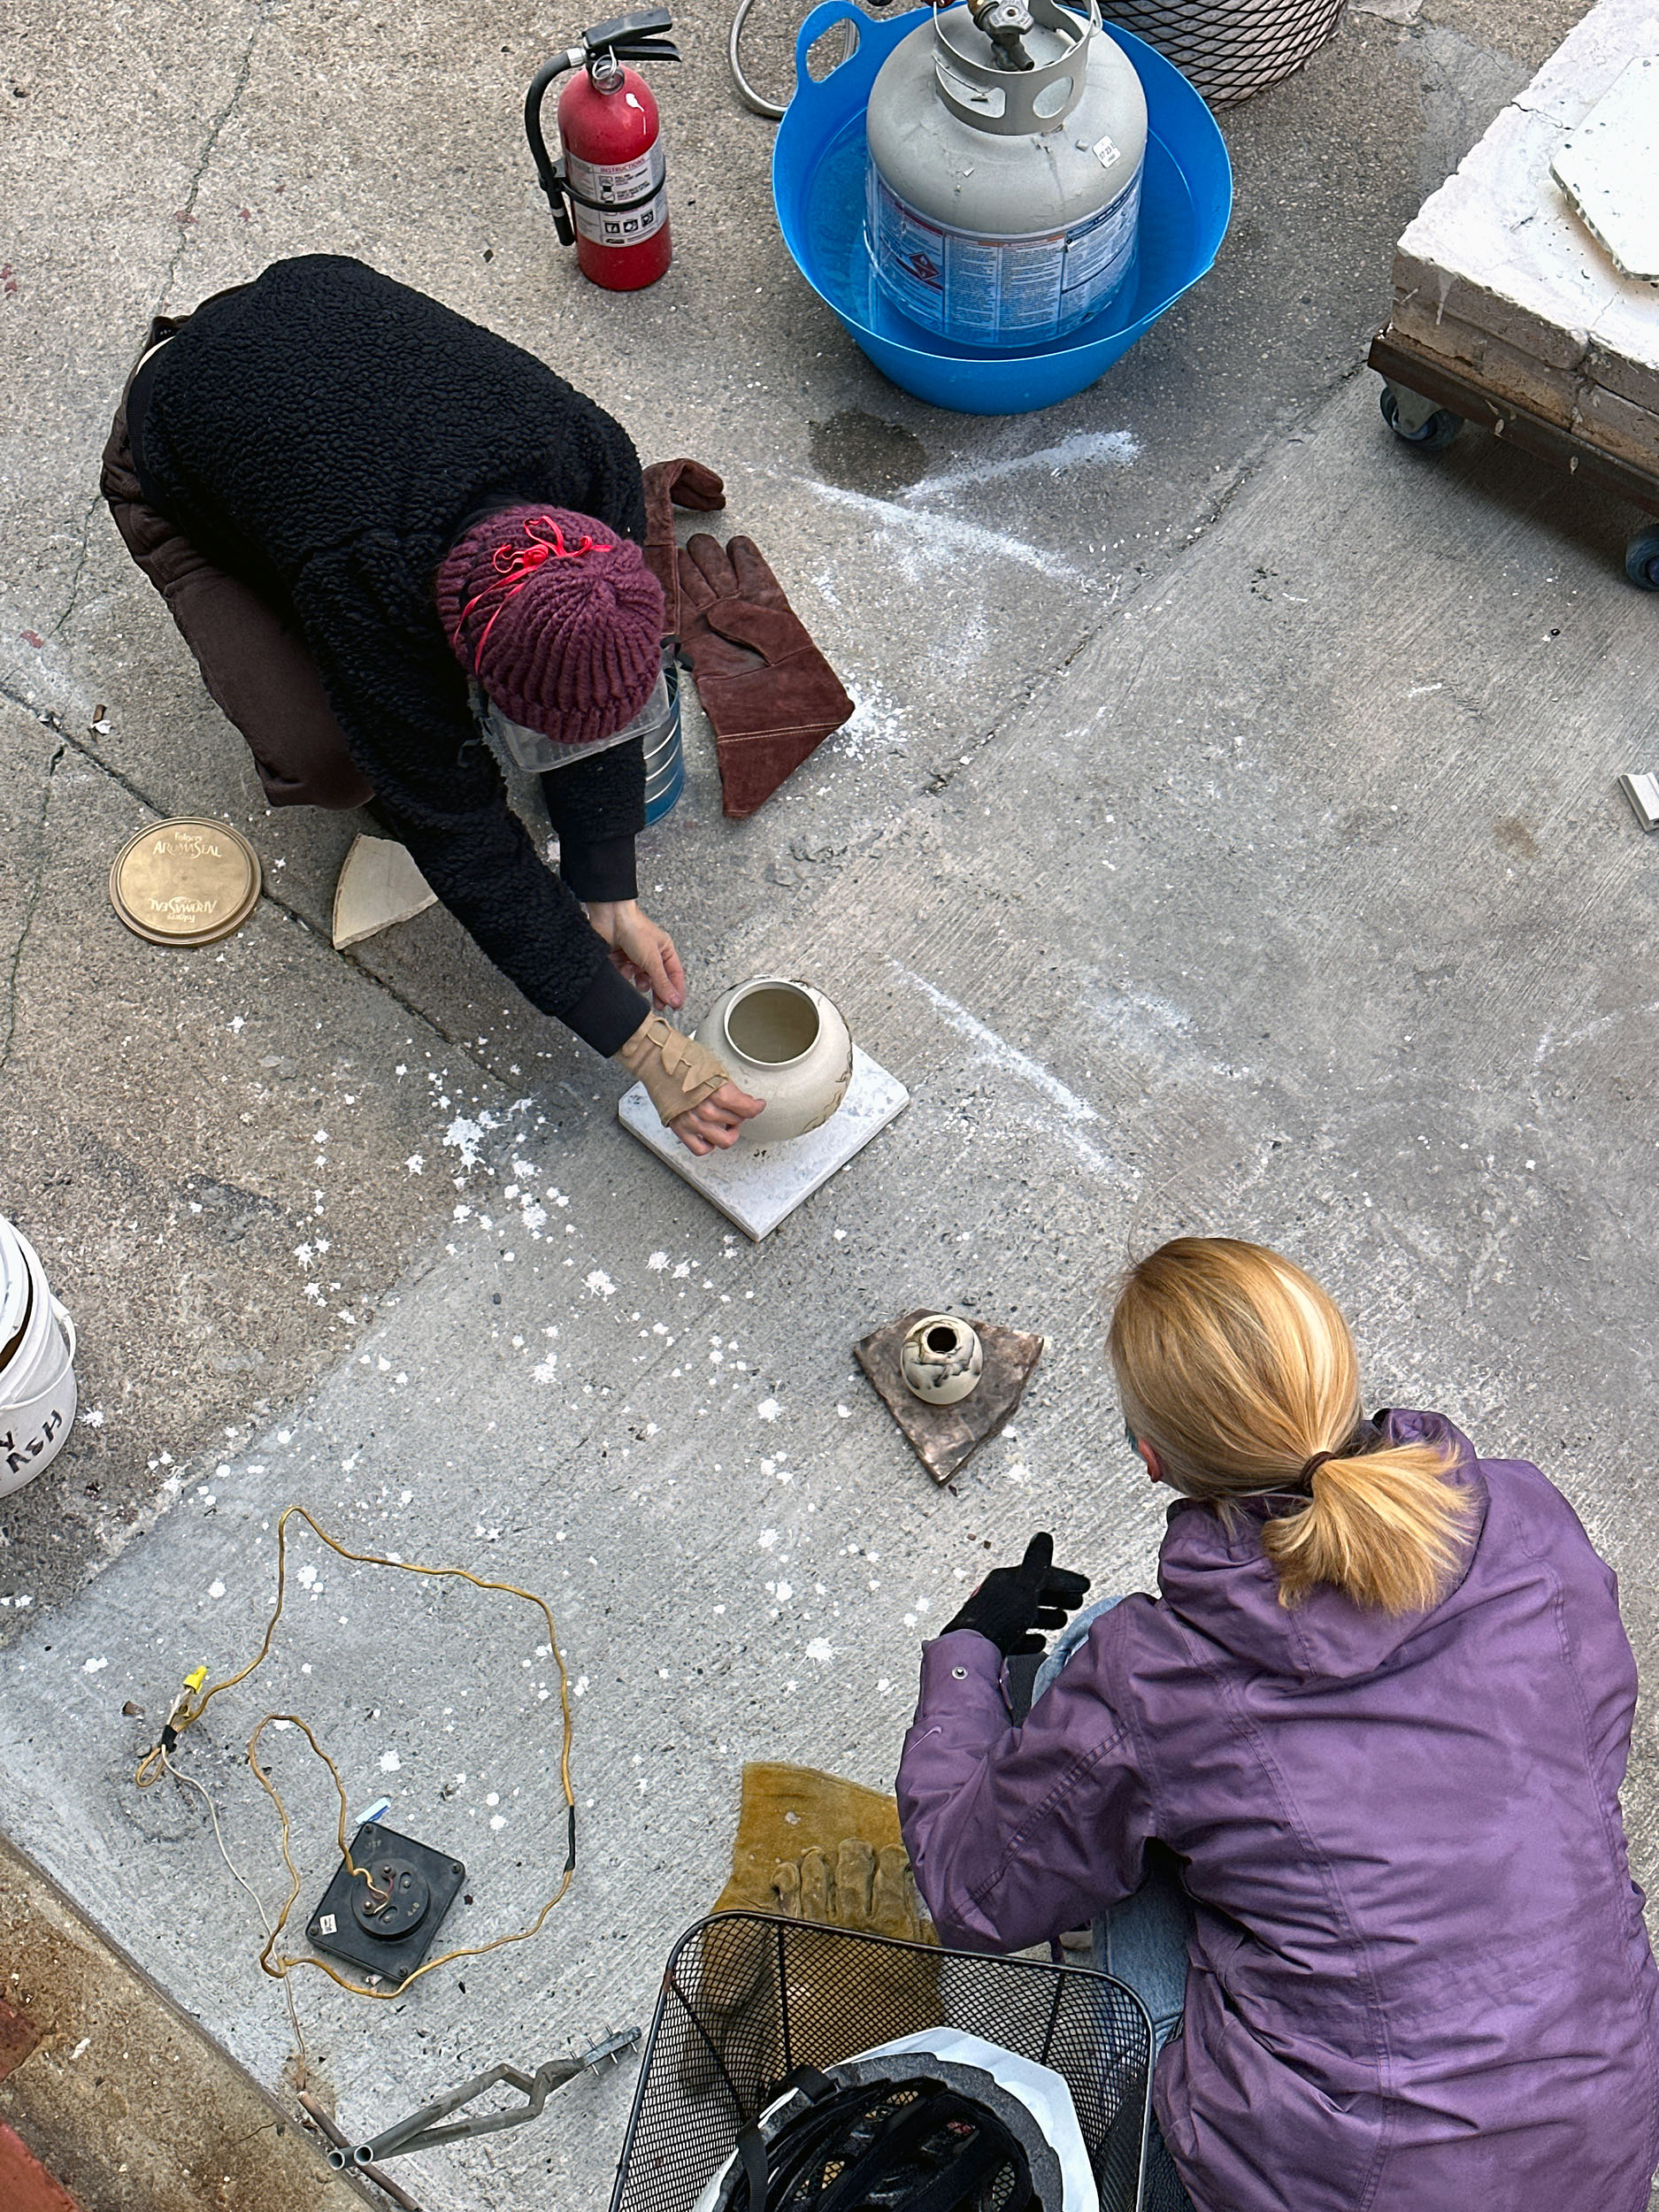
After removing the ware from the kiln, each artist takes responsibility for planning their next steps. During our group firing events, we simply place most of the hot ware in metal trash cans with tight-fitting lids.
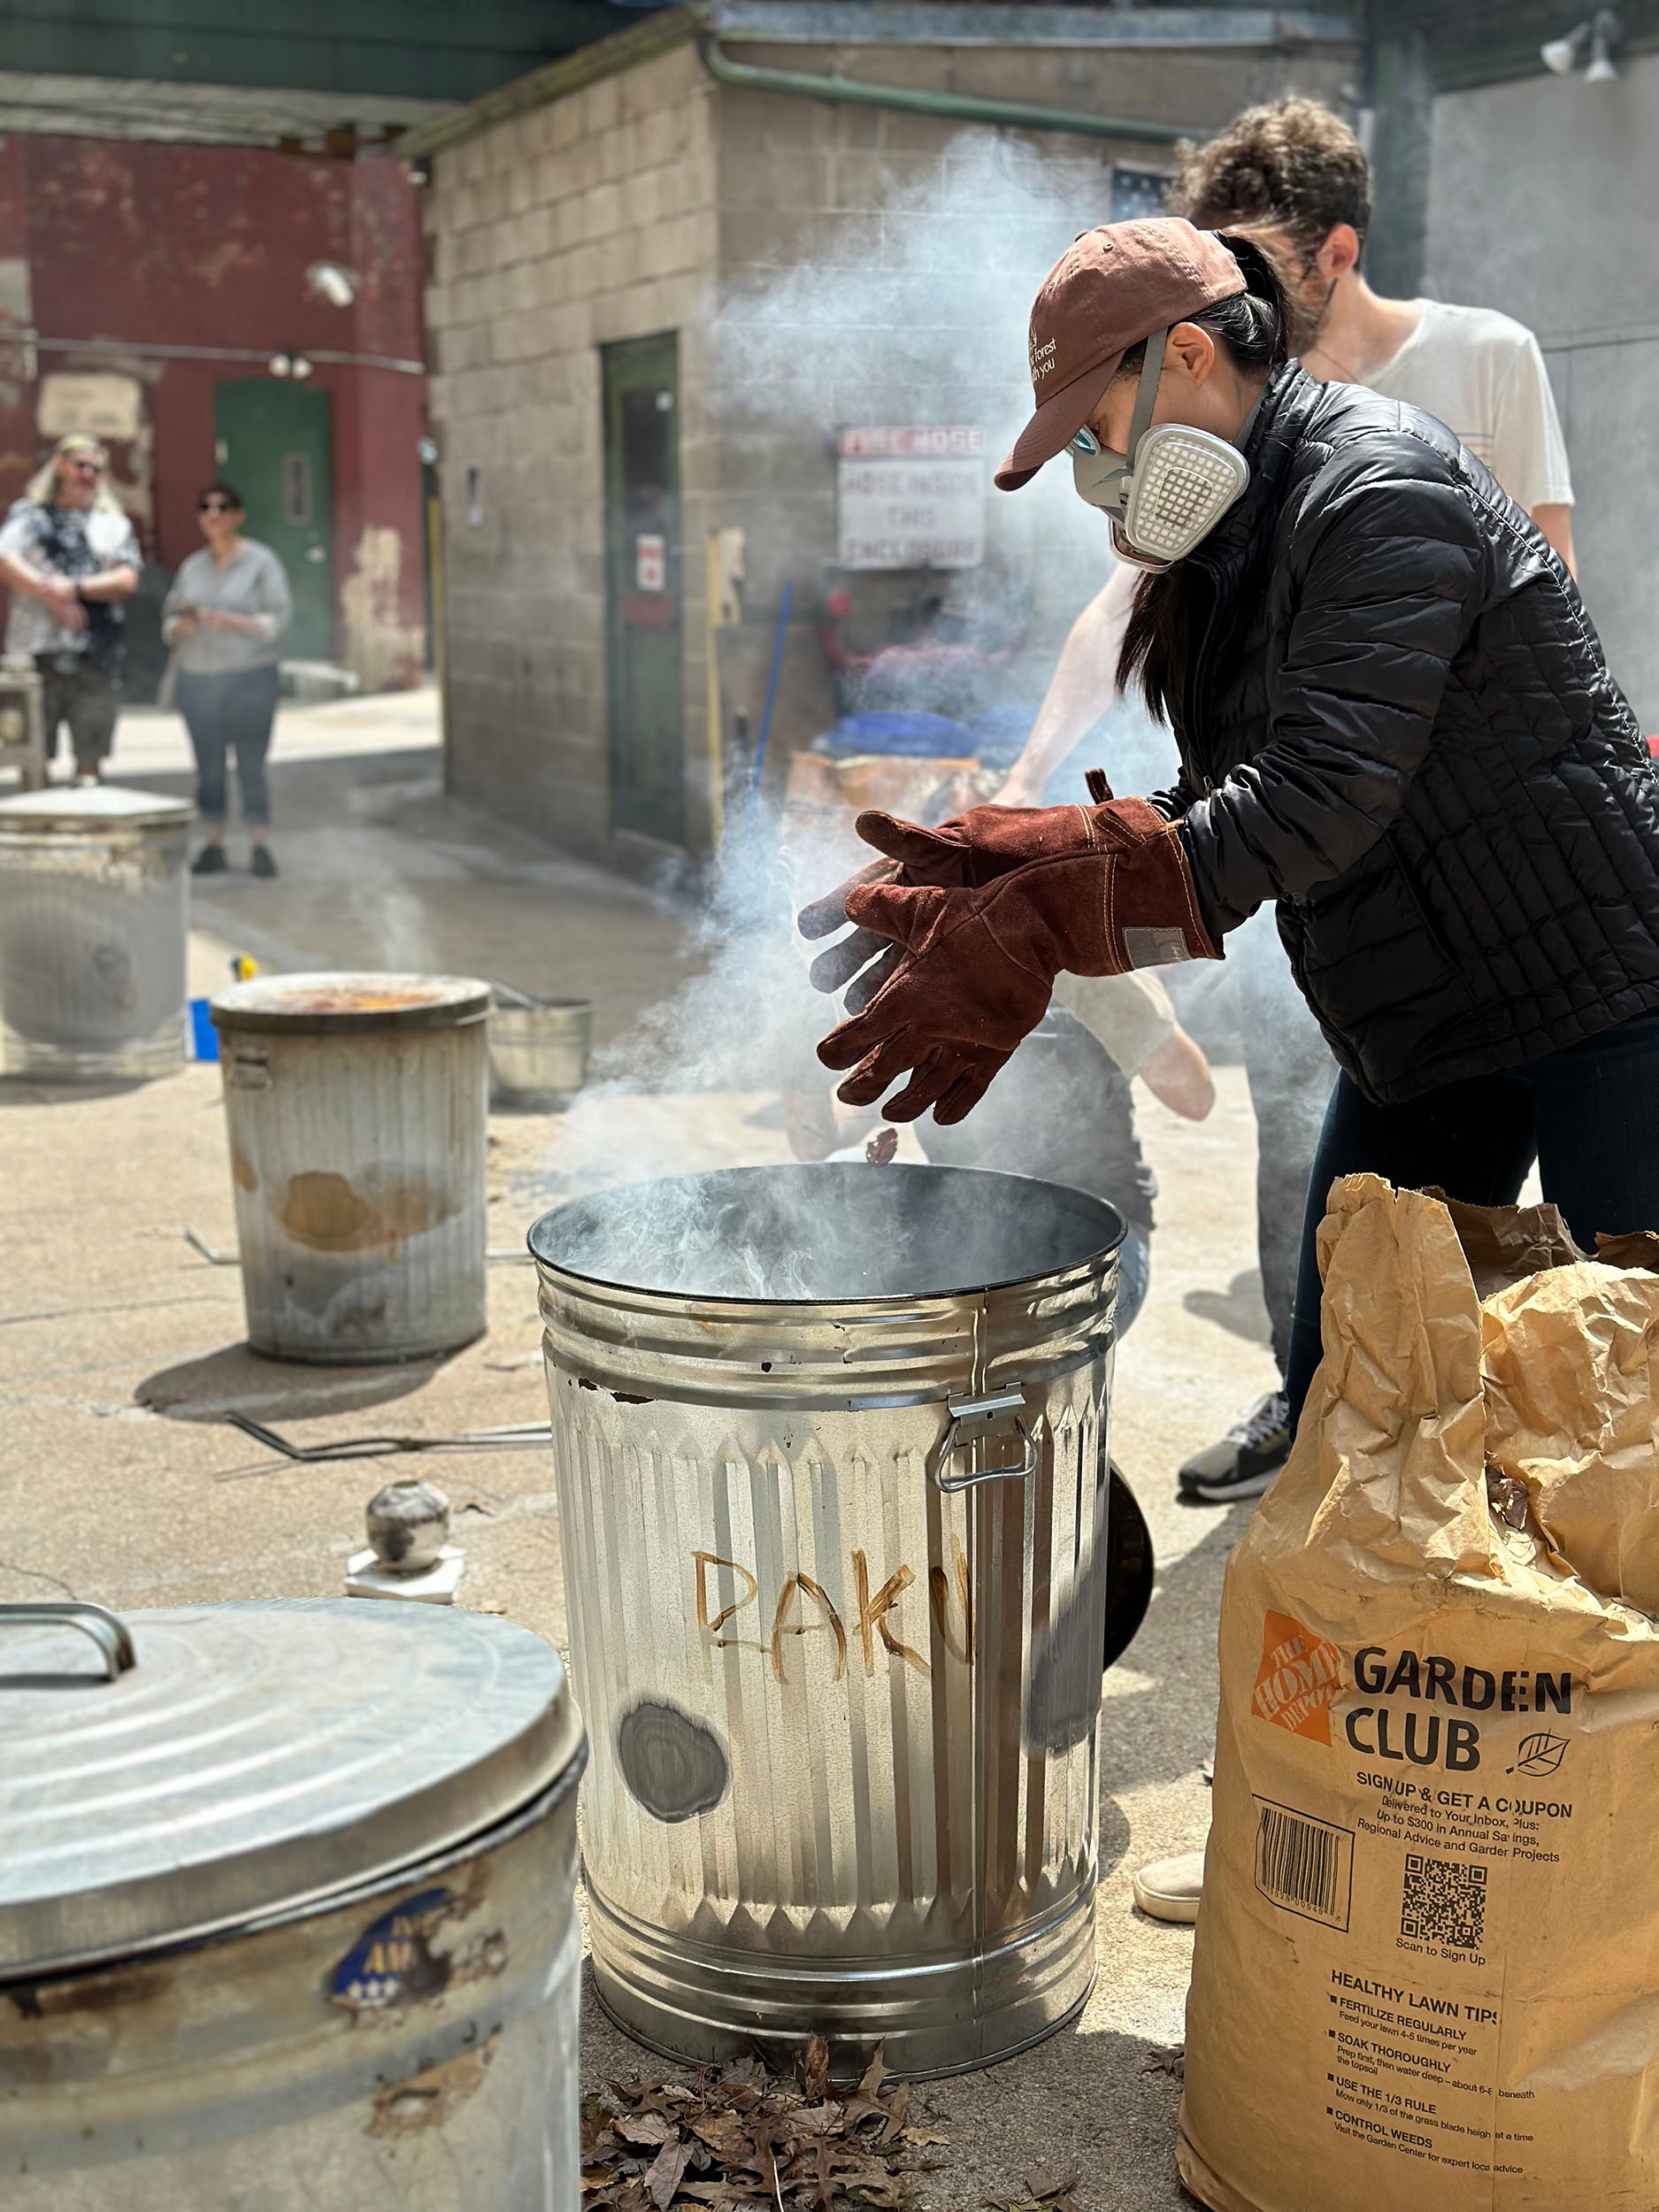
In the Western Raku process, achieving black carbon saturation on unglazed areas is a desired outcome. This happens naturally when the potter puts hot ware in a container with combustibles. Alternatively, a more deliberate and isolated approach involves placing a hot pot onto a piece of cardboard or newspaper.
At Project Studios, we are generally not firing lead glazes, but some of our vintage low-fire glazes contain lead frit. There are also additional chemicals that might be in use which are also not food safe as-fired. There can also plenty of cross contamination happening inside the kiln.
Raku is simply not considered to be food safe, and there isn’t much that can be done about it. Not only are the glazes problematic, but the ware itself is porous and is often cracked. There is no getting around the fact that Raku is a low-fire process. Embrace it!
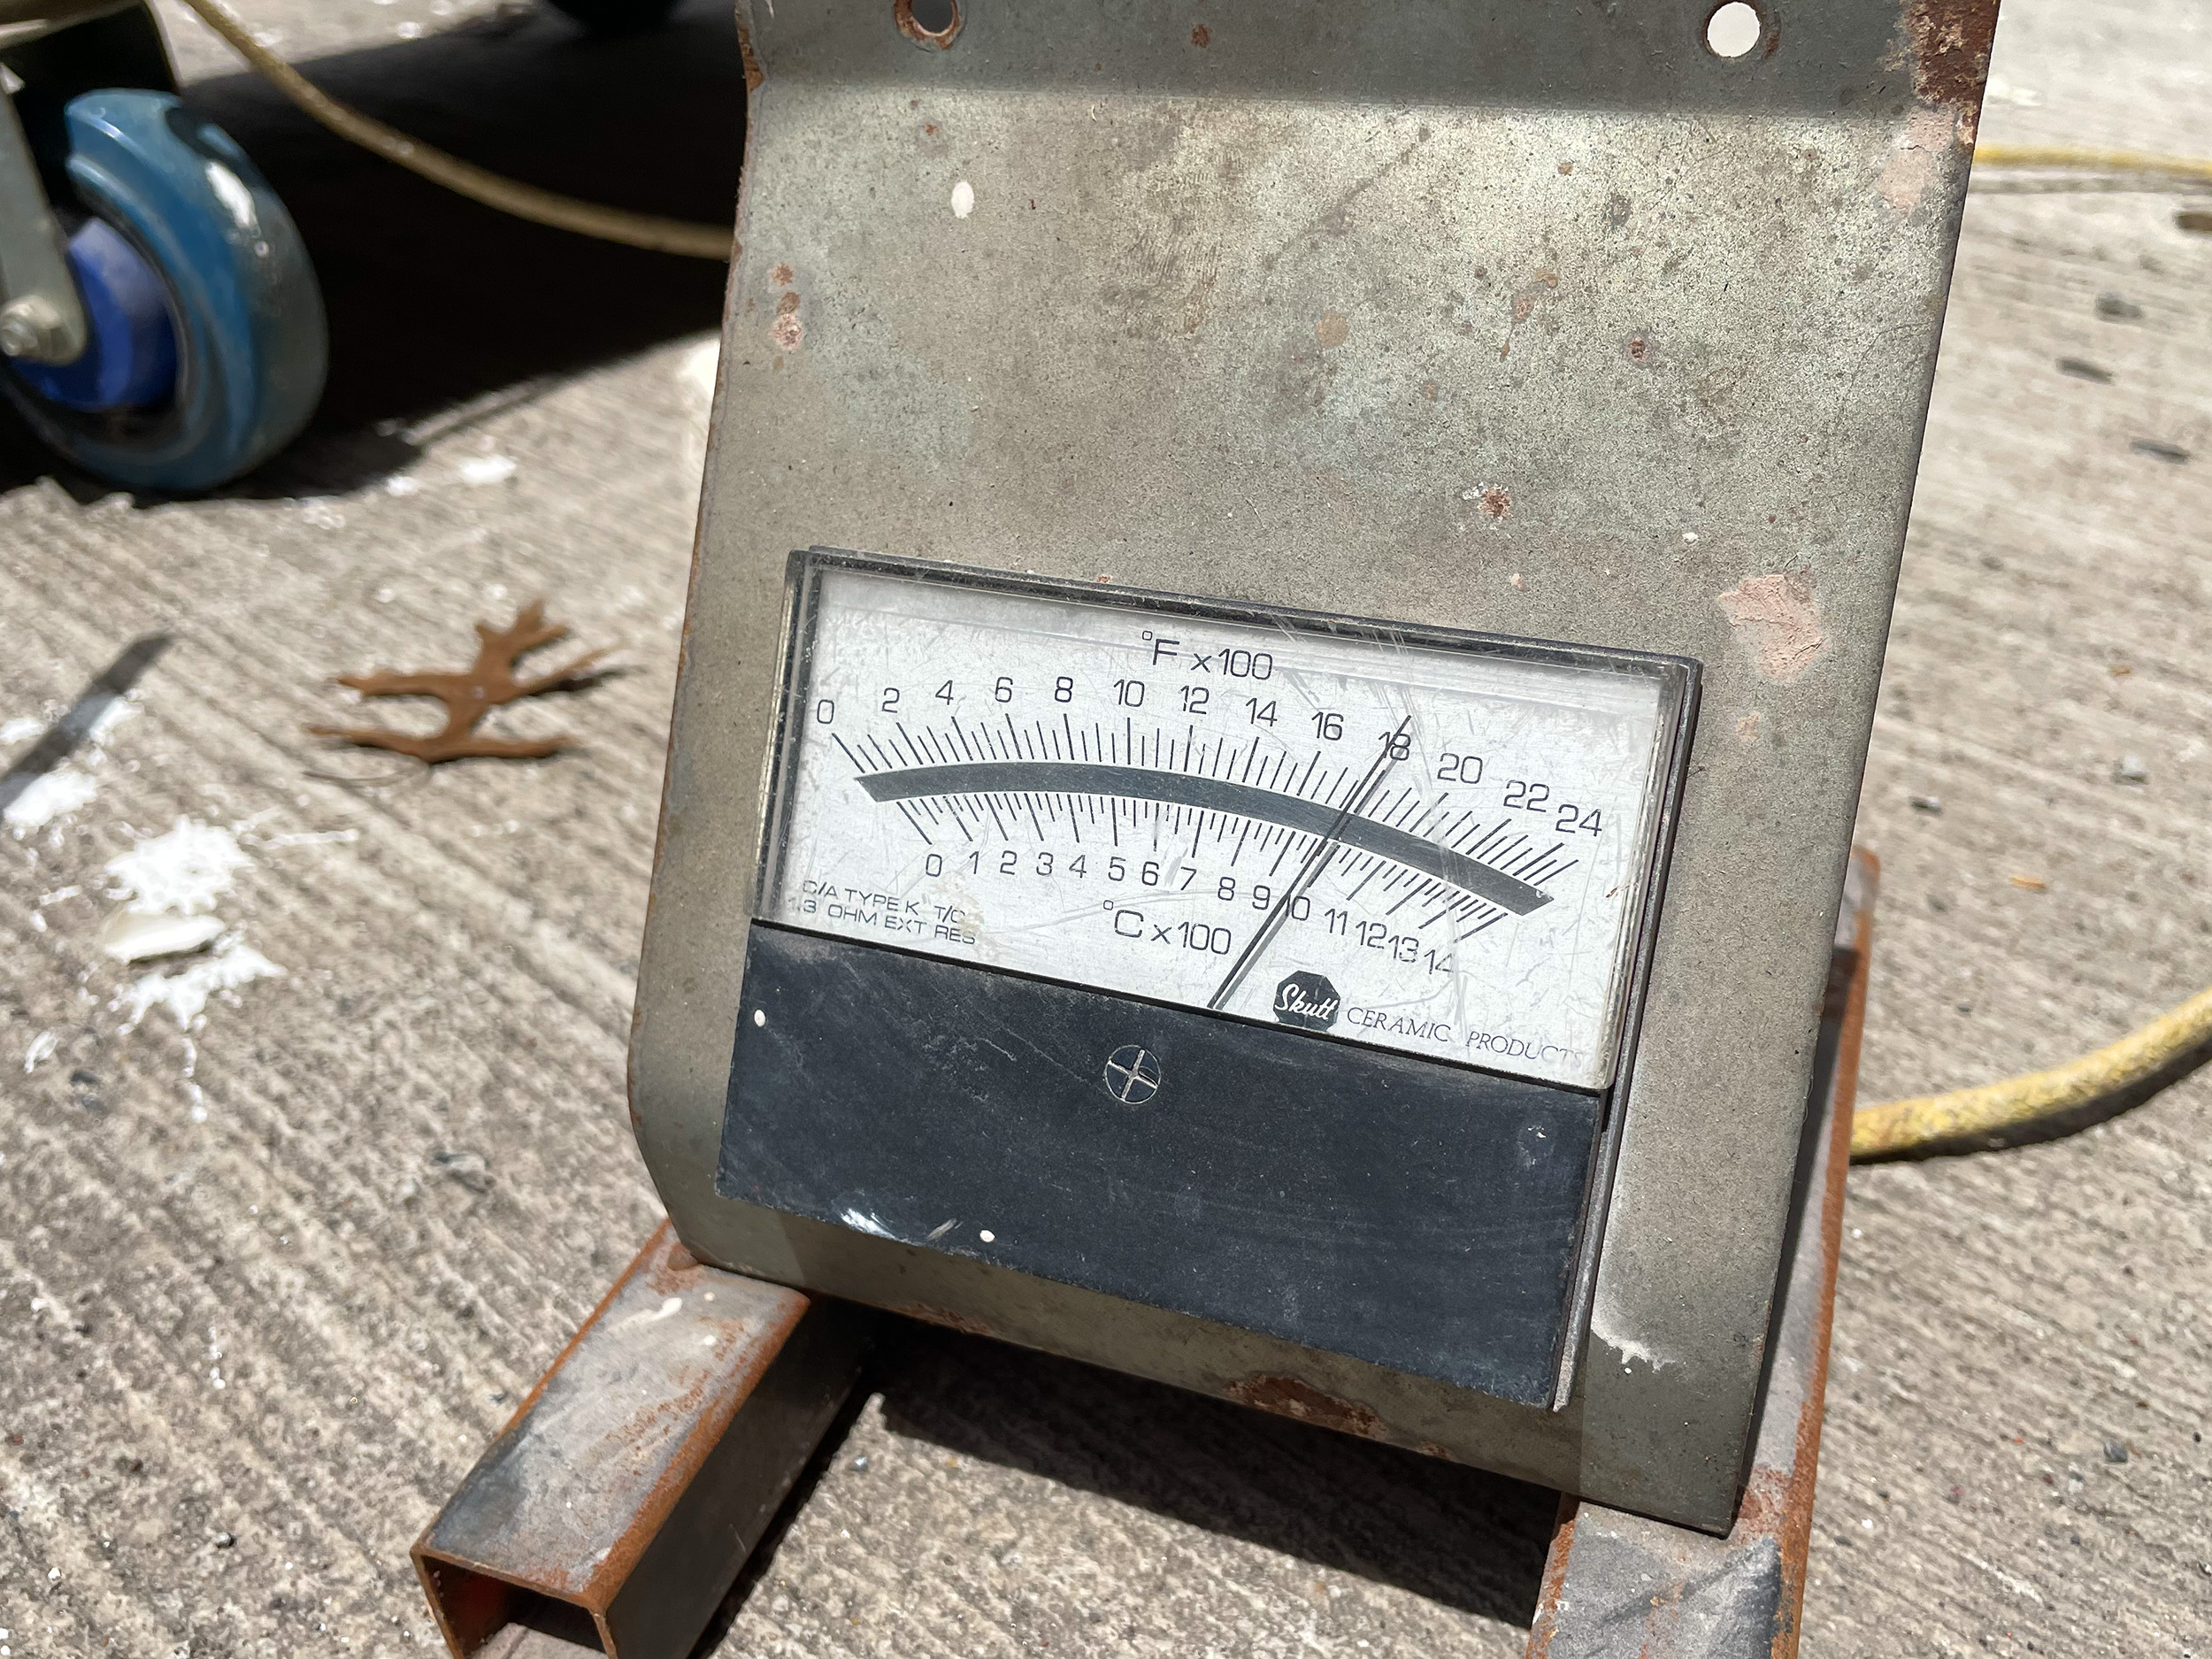
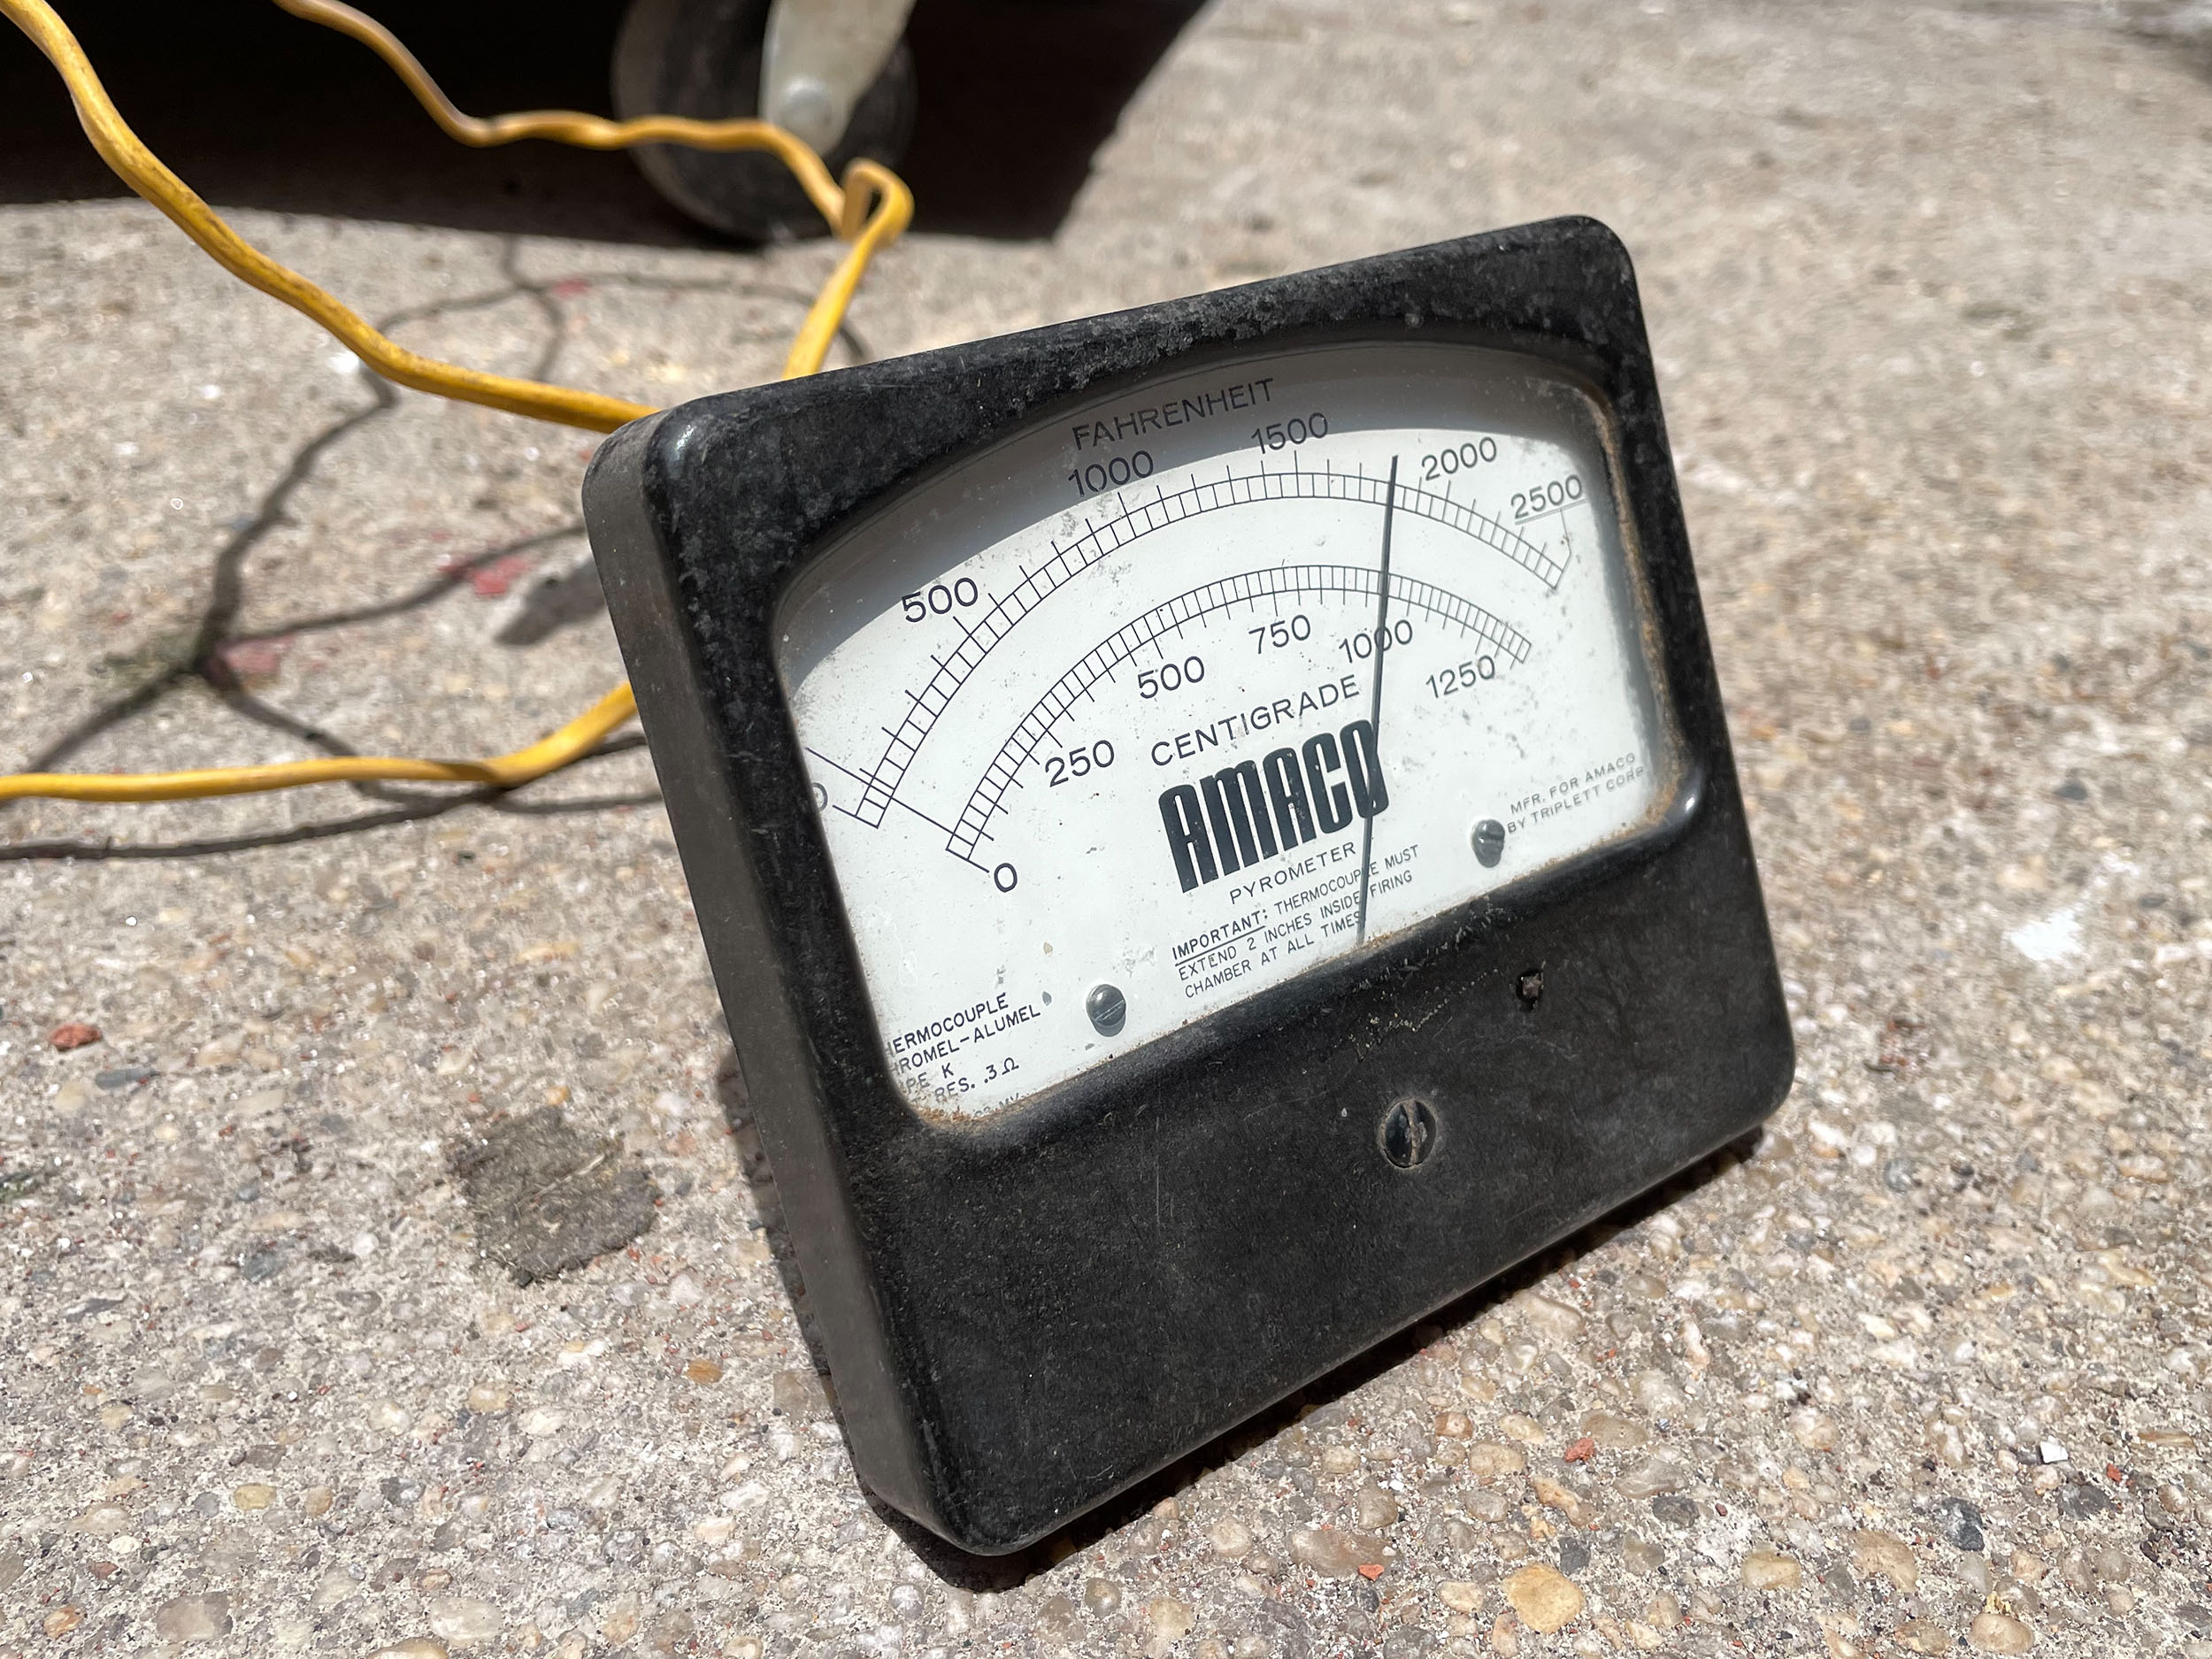
We fire to about 1800˚F and use pyrometers to get an accurate temperature reading. With some experience, it isn’t too difficult to eyeball the kiln color to determine the temperature. Our issue is that the bottom sections of our kilns heat faster and we have to monitor the burner throttle to not over-fire.
Even a small bowl like the red copper penny example above, with no visible cracking and excellent glaze fusion, is decorative or sculptural and not functional.
Other Carbon Effects
Many artists like to use hair, feathers, flowers, etc. to create a carbon image on a an artwork in the Western Raku Process. To successfully achieve this, it is best to have a polished, unglazed surface. A smooth stone or tool can be used to burnish the leather-hard clay. White Standard Clay Company Raku body with a smoothed surface and no glaze is a good basic canvas for this technique. Sanding after bisque will not give you the same surface as a burnished greenware. Adding a terra-sig or other fine slip also creates a smooth surface. An unimproved clay surface will still work, however the subtle smoke marks won’t show well.

The concept with this technique is that an organic item touched to the surface of the hot ware creates carbon as it burns. The porous ware then absorbs the carbon to create an image. The temperature must be high enough to burn the material, and yet not so hot that all of the carbon is burned away. This does not work on glazed ware. For example, if the potter applies hair to glazed ware, it will just stick to the glassy substrate.
After applying these carbon-rich materials, we do not place the artwork in a can with combustible material. Instead, we immerse the work in clean water to freeze the image, or we may allow it to air cool depending on the amount of heat still present in the ware.
This article won’t delve into the details of the Naked Raku process, which sometimes gets confused with these carbon treatments of unglazed ware. Naked Raku involves using a sacrificial slip coating to control carbon absorption when fully immersing the slip-coated ware in combustibles.
Cleanup of Ware
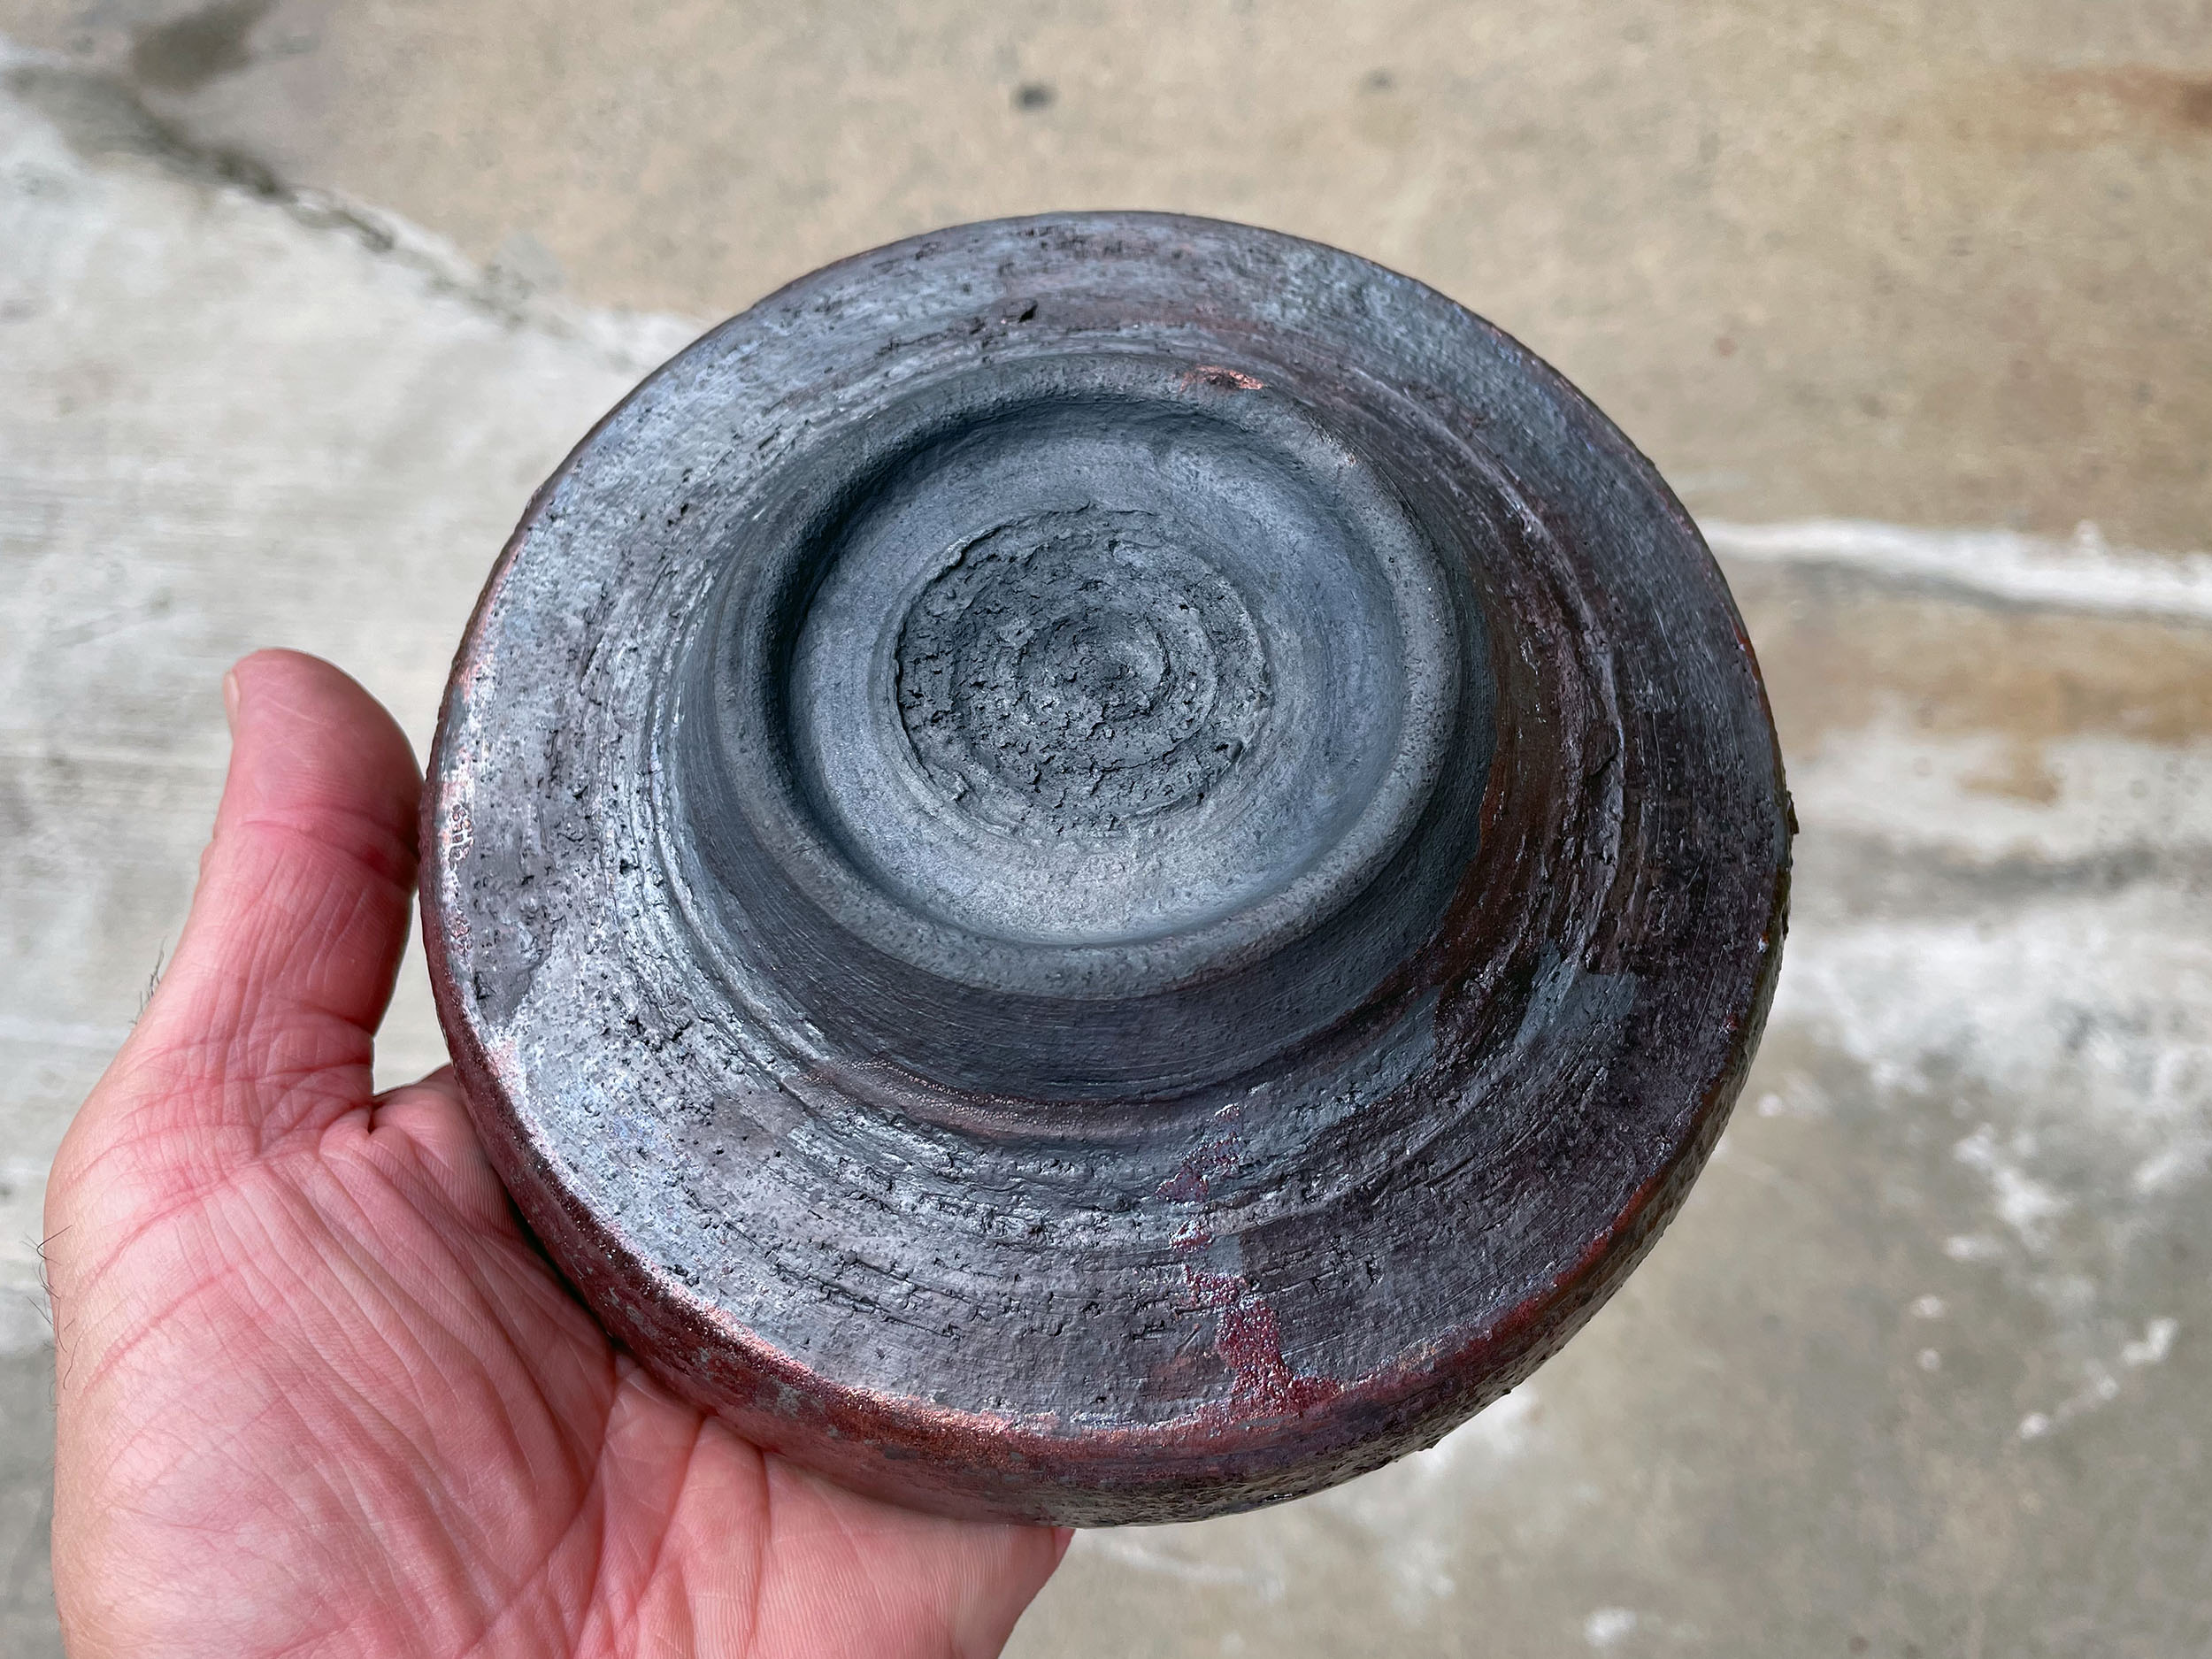
Once the artwork has cooled, cleaning becomes necessary. While it may be tempting to perceive soot and smoke residue as part of the glaze finish, the sooty film is not truly fixed to the work and remains impermanent.
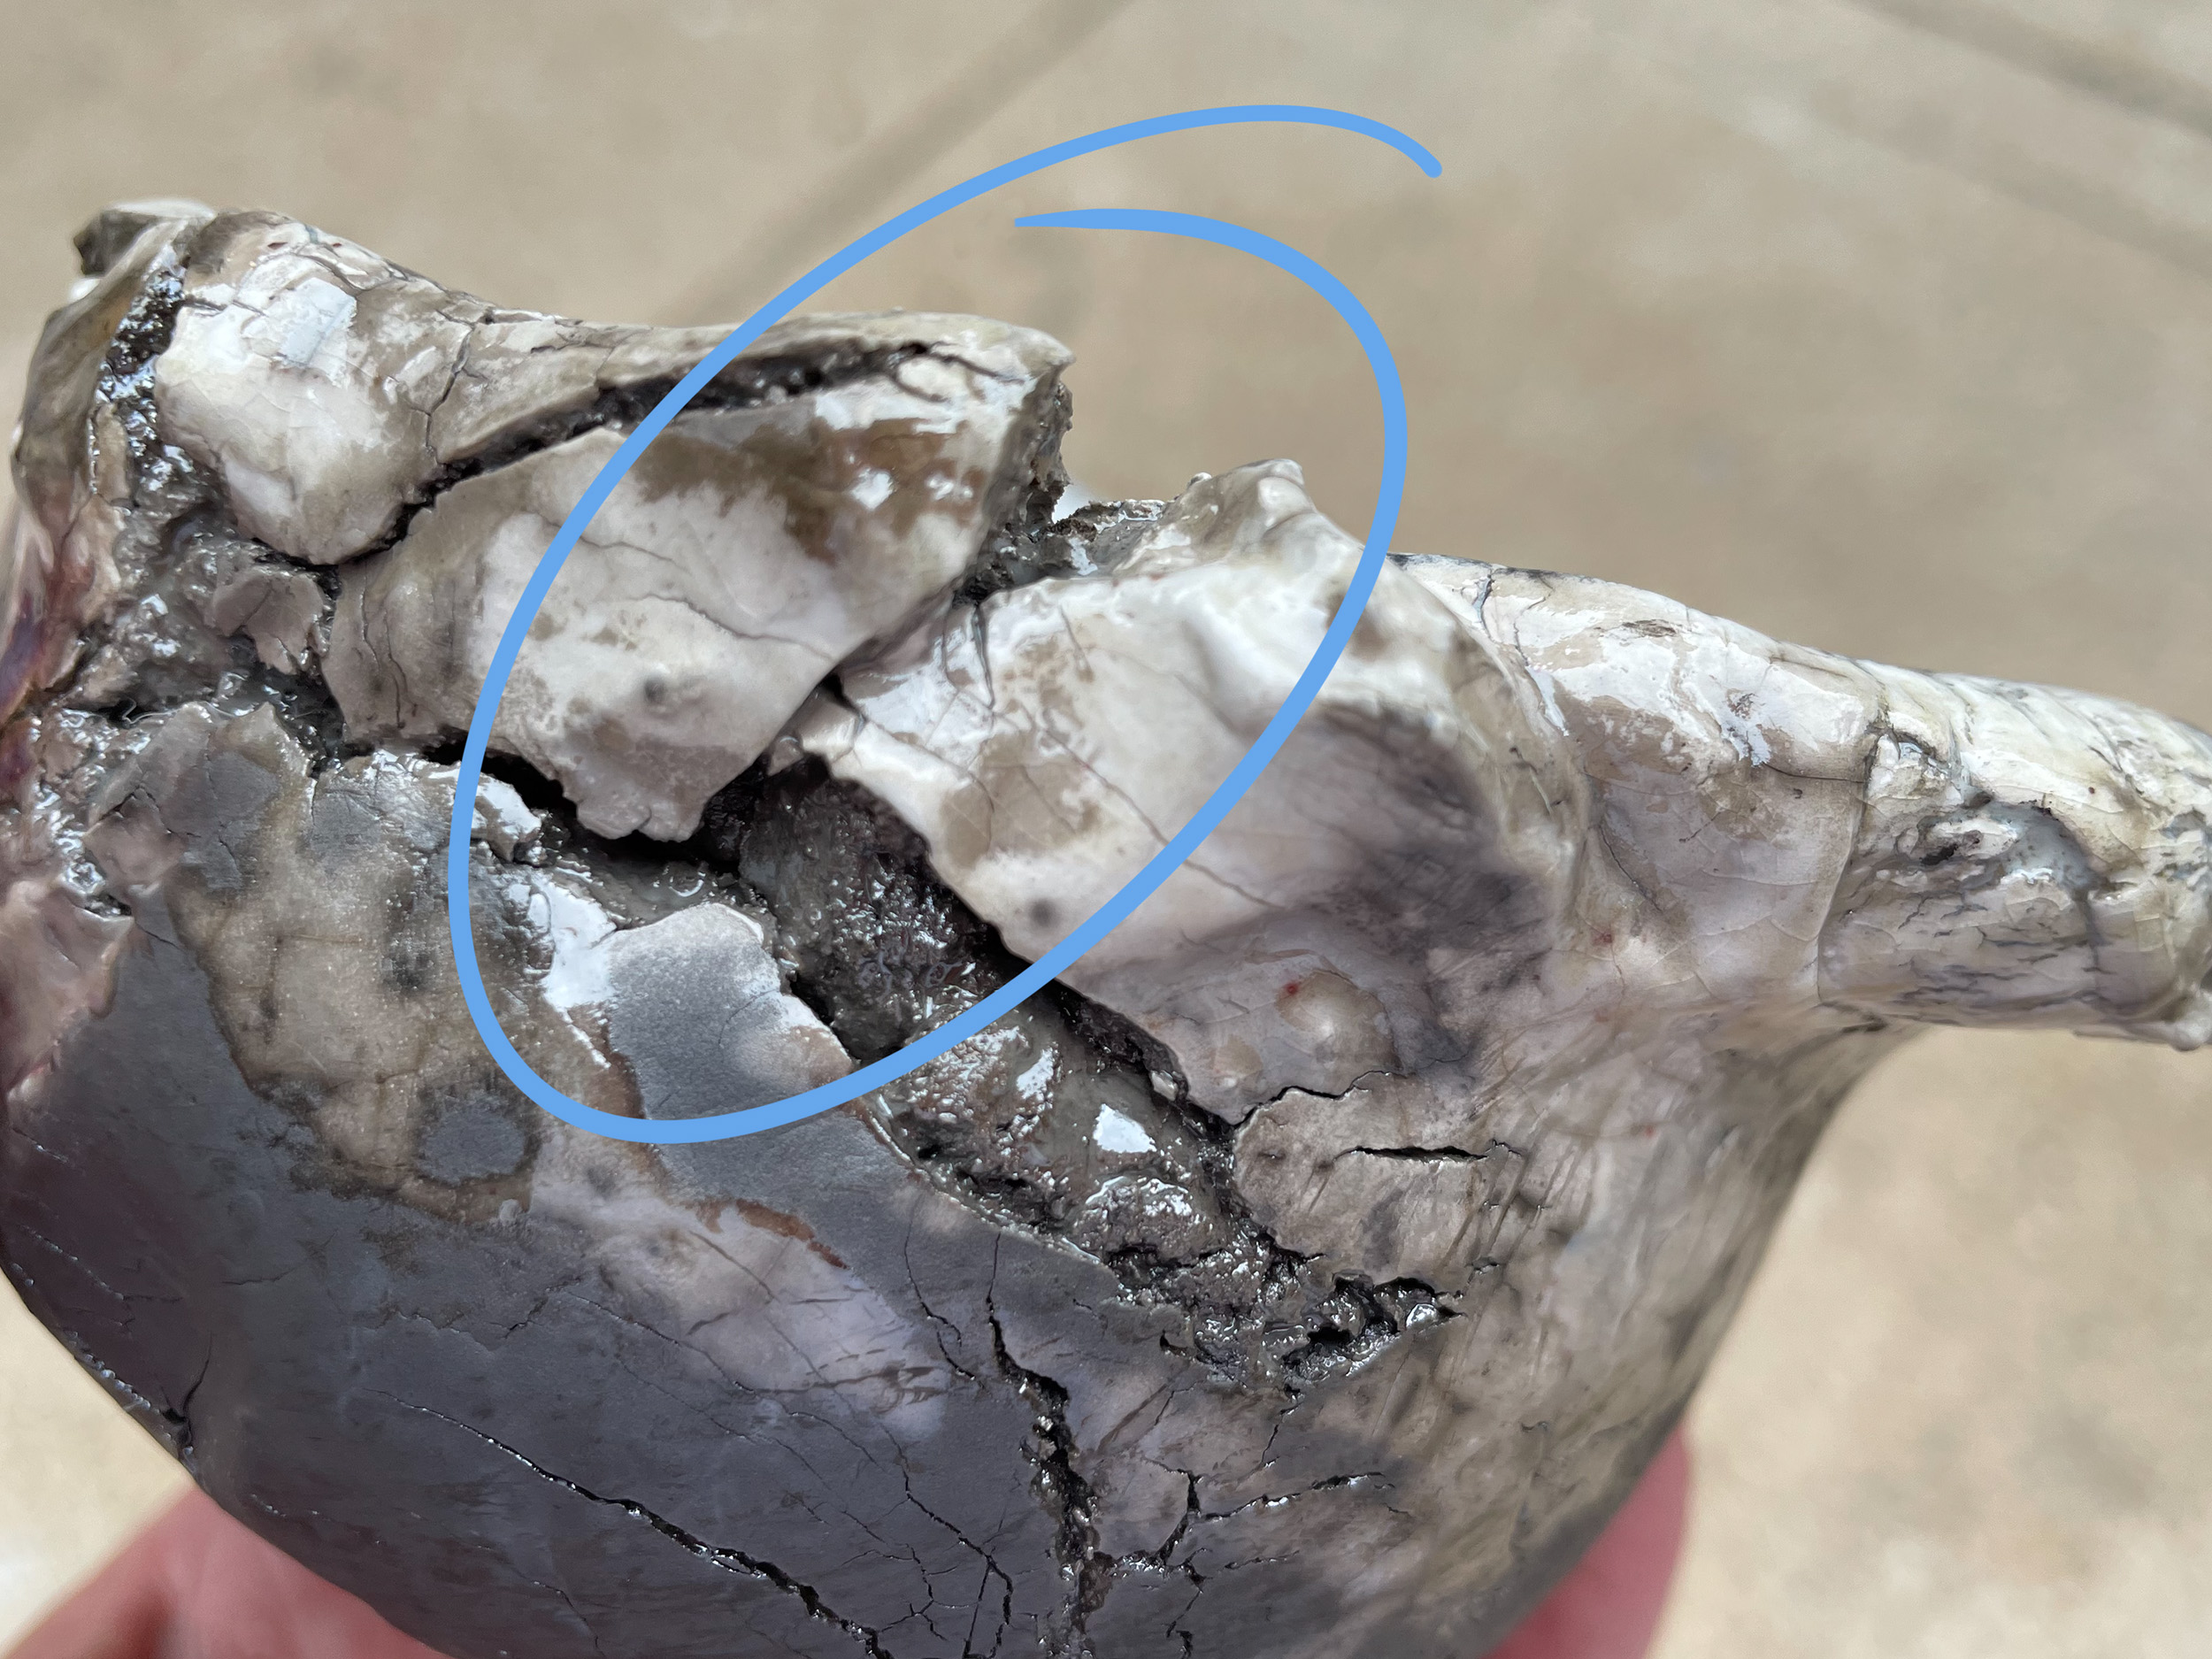
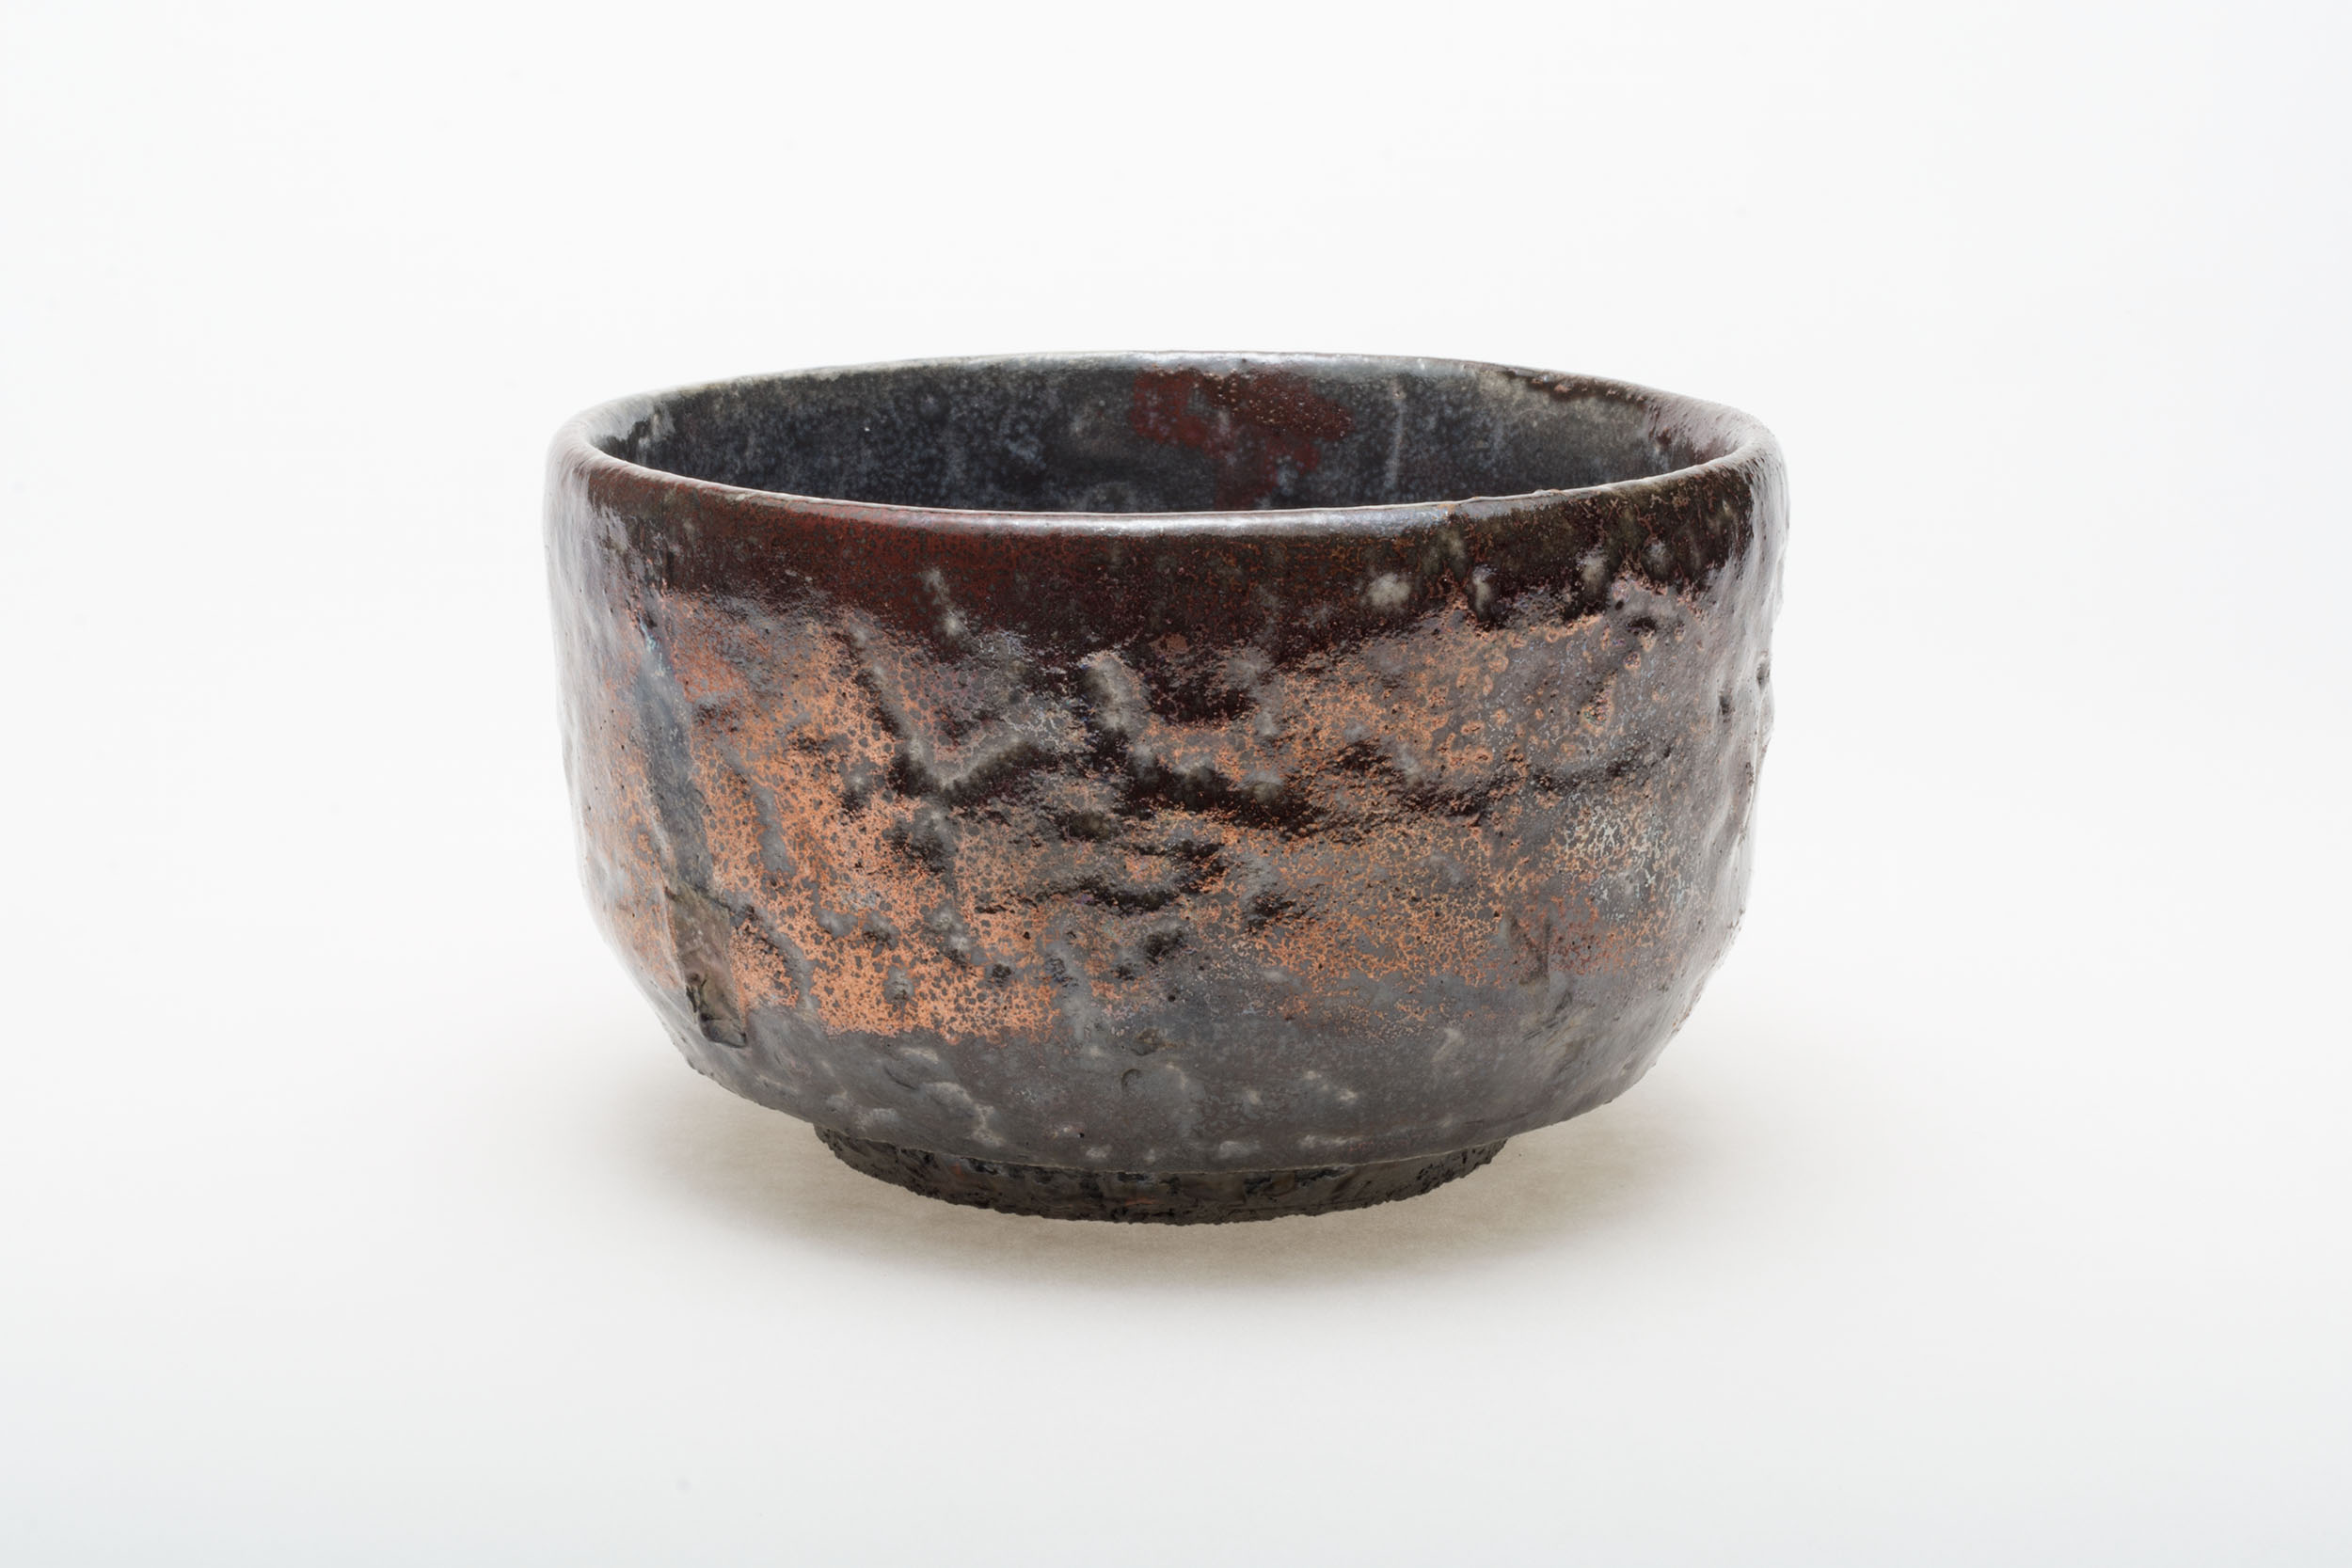
The black carbon that has become embedded into the pores of the clay body is more or less permanent, and won’t wash off. The circled area in the image above shows soot on a white porcelain slip. Note the difference in color and quality of the carbon-black area of the piece in the lower left. To remove this film, simply scrub the surface with a non-woven abrasive in a sink or bucket of water.
Once dry, it isn’t a crime to apply a sealant. Clear acrylic spray or sculpture wax will keep the metallic glazes from oxidizing over time. Use caution with some products such as polyurethane that is formulated for use on wood. Often, these products can yellow over time.

There are many details and aspects to the Western Raku process we haven’t covered in this little article. There is one further, and very important characteristic to mention, and that is the social nature of the activity itself. Nothing builds studio camaraderie like the trial by fire that is Raku.